Introduction
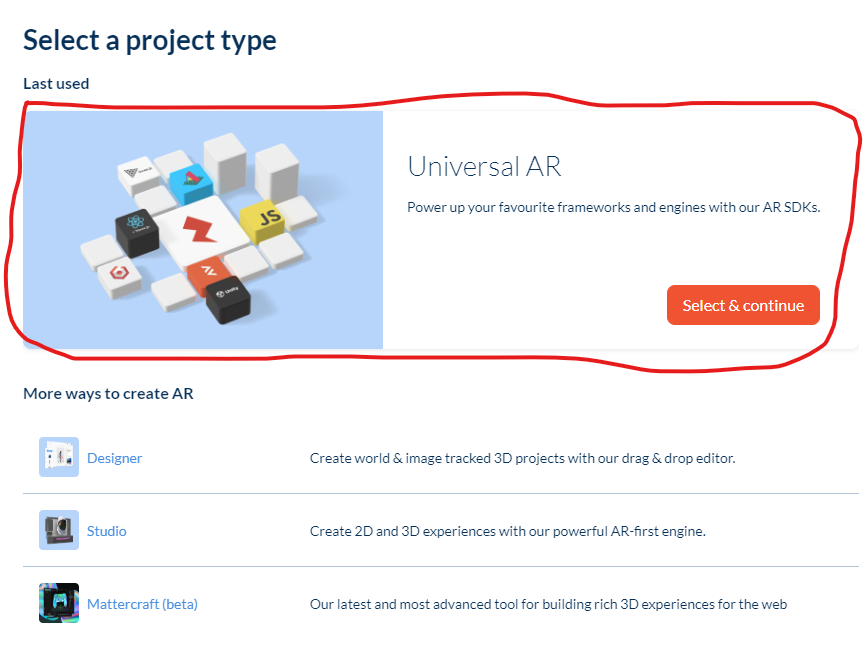
As told in my project plan blog for my project along with its plan and story, my project will be AR based in which AR (Augmented Reality) is the real-time integration of virtual game elements, in which AR games detect reality and overlay game visuals and audio in the use of sensors such as cameras, microphones and GPS (global positioning system). The reason I went with AR is because AR based games help people get out and about and explore places as they can find things in those AR based games. I will put my AR projects on Zapworks where there will be 4 projects, in which each will have 2 AR models.
Inspirations
As told in my project plan blog, my inspiration for my project is from Nintendo 3DS AR Games for Star Pics where characters like Mario and Kirby pop out when their AR cards are placed for 3DS and 2DS systems to scan them, and Mii Pics where Miis can be used to make poses, facial expressions and actions, and also have photos taken to save onto Nintendo 3DS Camera.
Plan and Story
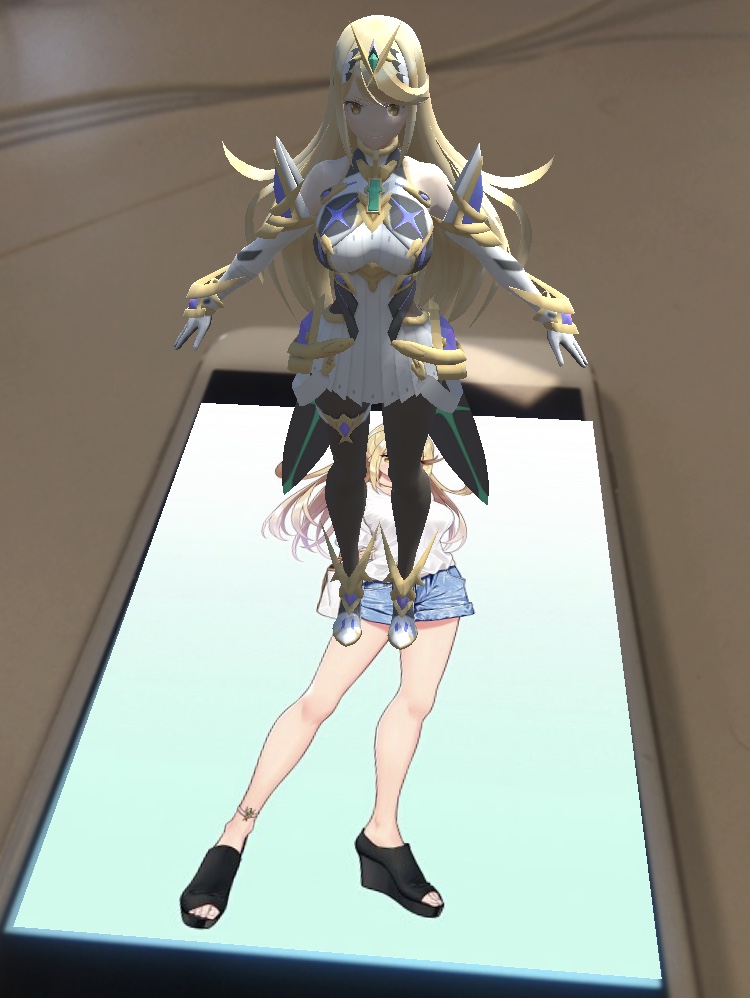
My plan for my project is where I can get images to print out as tracking images and then find characters that match their tracking images alongside overlays attaching texts making a few sentences about who they are. I will download character models in Sketchfab and/or any other model downloading websites. Character models I will download for my AR projects are models of Autobots and Decepticons from the Transformers series along with a Xenoblade character, Mythra as my target audience will have a mixture of people who have interests in playing Xenoblade games and watching Transformers programmes. The story for my project is tracking images of characters being put in random places for players to explore and find them in order to catch characters and their information.
Softwares to use
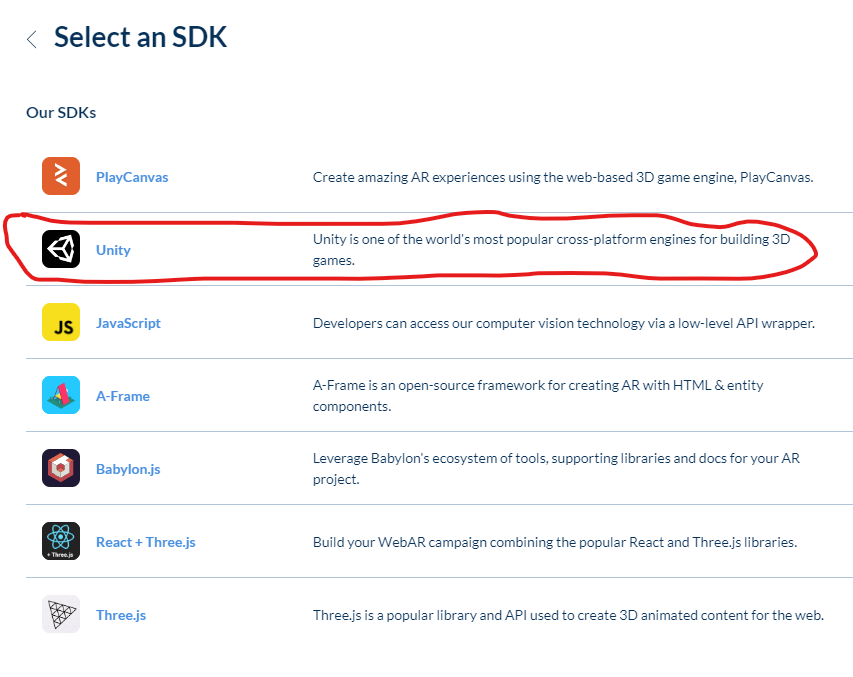
As told in project plan, I will use Unity to make AR projects for my image trackers using Zappar Camera from Zapworks by bringing in character models along with overlays with text about their informations so they are triggered by their trackers. Also in my project plan blog, I stated that I would have also use Adobe Aero where I would have gave the Mythra model a few simple animations such as walking, running, jumping and much more, but unfortunately it would take me a very long time to tweak animations and rig the Mythra model, so the plan for animating the Mythra model is cancelled.
Software originally planned but no longer included
Also in my project plan blog, I stated that I would have use Adobe Aero where I would have gave the Mythra model a few simple animations such as walking, running, jumping and much more, but unfortunately it would take a very long period of time to tweak those animations and rig the Mythra model, so as a result, I have decided to cancel and reject the plan to use Adobe Aero for animations.
Moodboard
This is how my Moodboard for my chosen project looks:
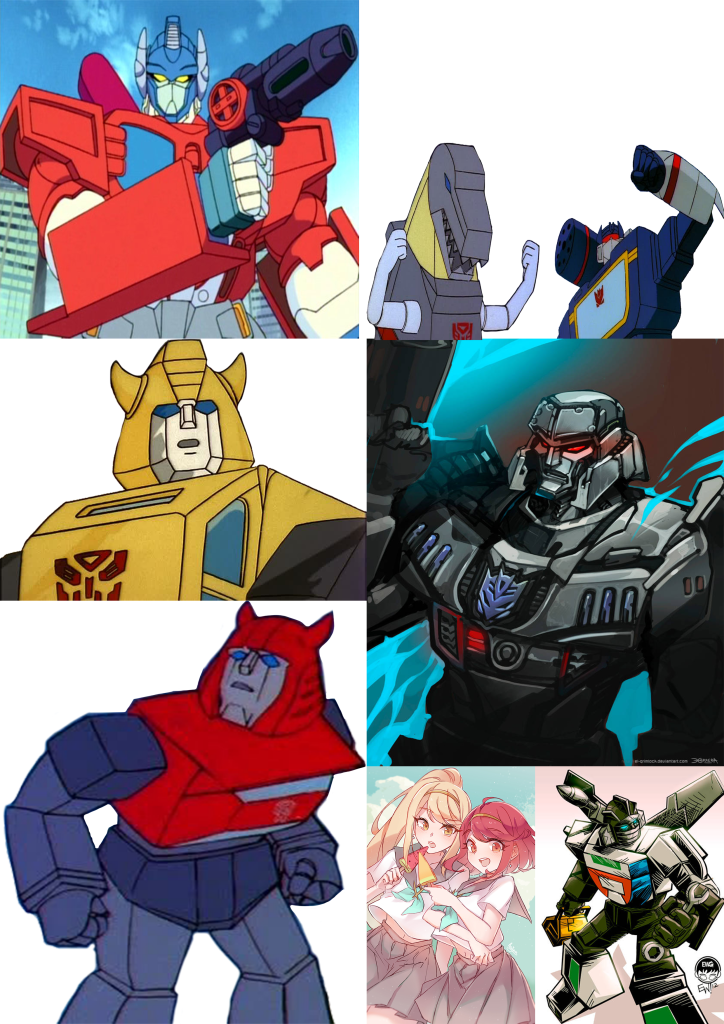
This Moodboard was made on Photoshop to inspire which characters I have chosen for my projects as image trackers and models.
Production
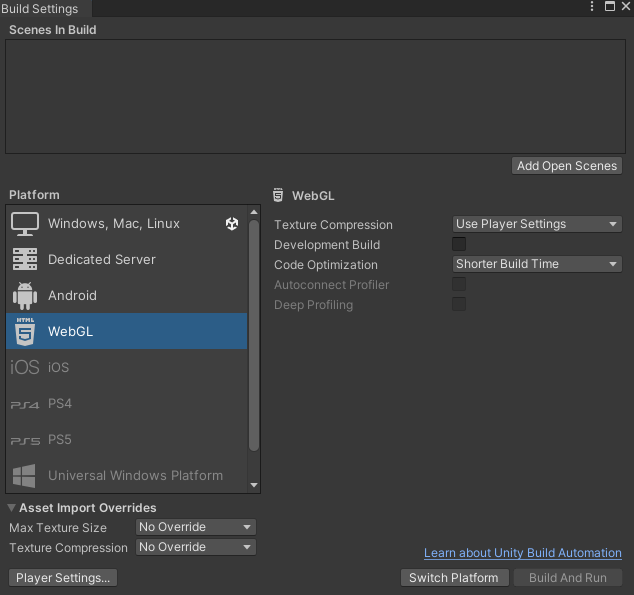
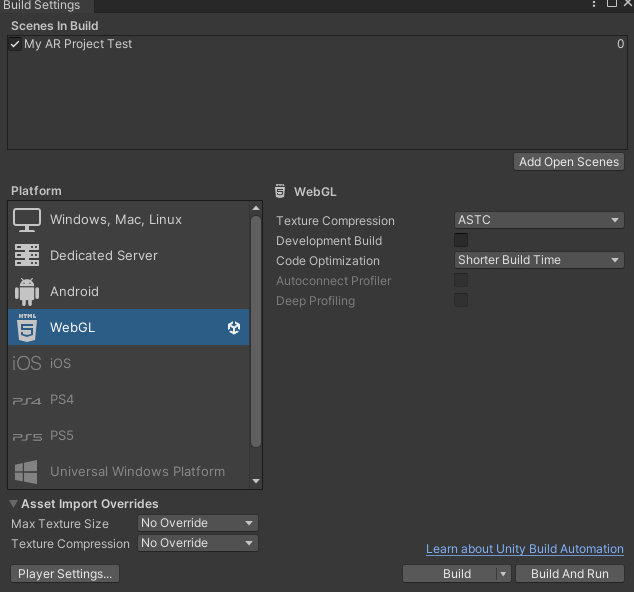
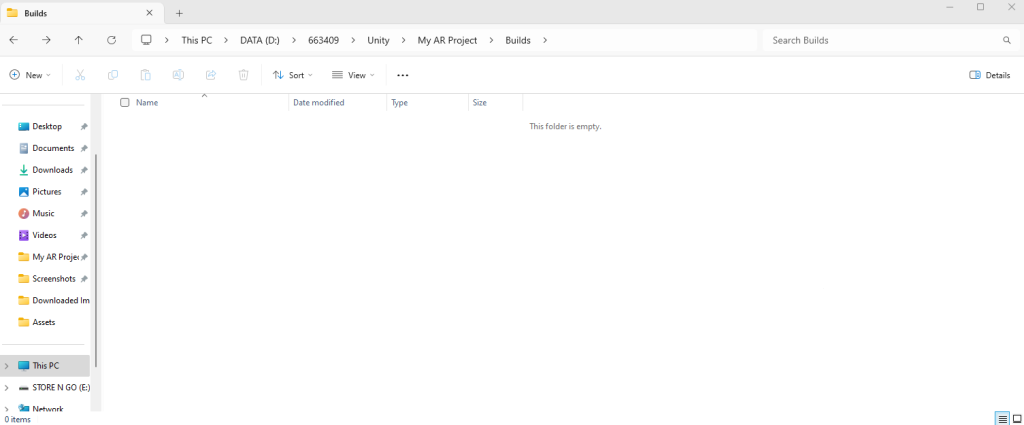
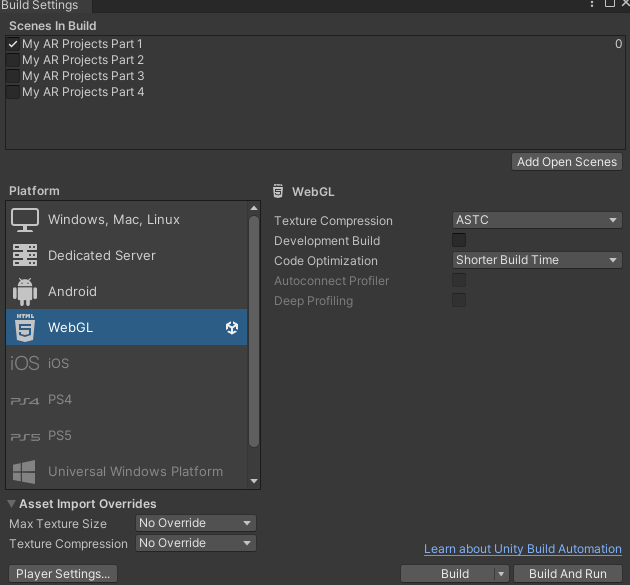
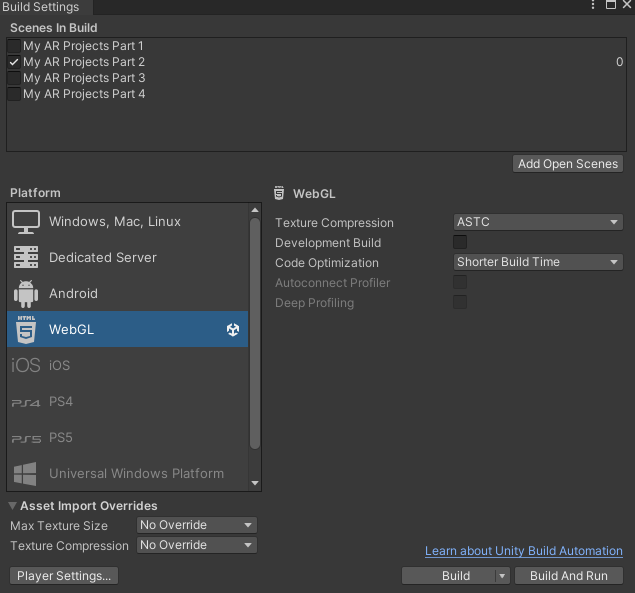
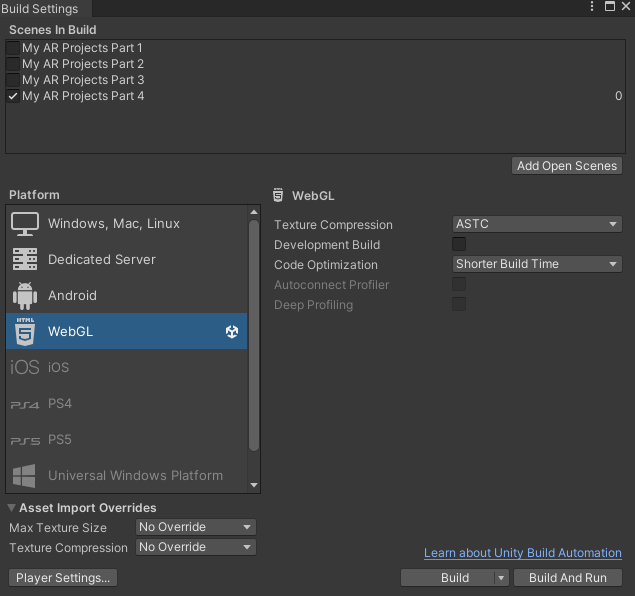
Firstly, I made a new Unity scene and saved my project on a University PC where there is plenty enough data for it to be saved before I went on build settings and switched platforms from PCs to WebGL by clicking on WebGL and then the Switch Platform button.
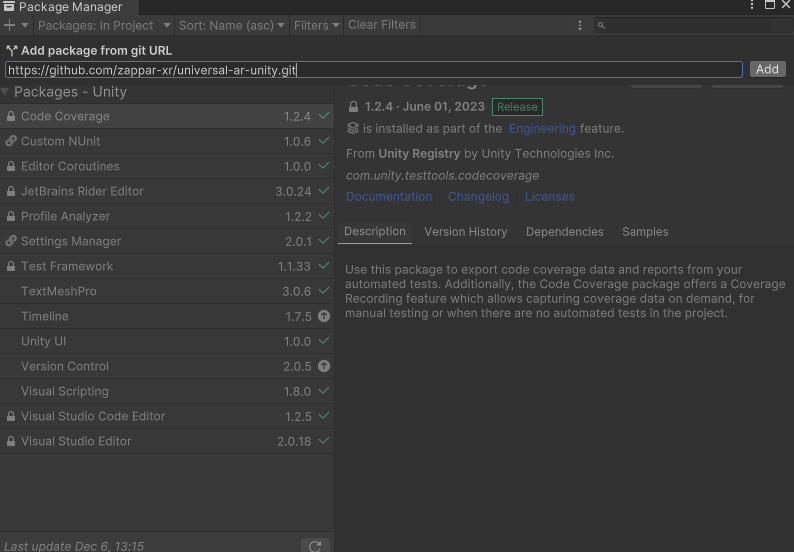
Next, I copied a link with github for Zappar Camera before I went on Package Manager, right clicking on the black text box to paste it, adding the Zapworks Package in order for Zappar Camera to be used for the AR project Unity scene. From what I have experienced using Unity with my laptop, Zapworks Package in Unity only works for PCs in University buildings such as Media Hub and DAIM Science, not on iMacs and MacBooks.

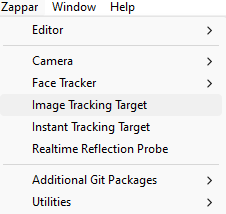
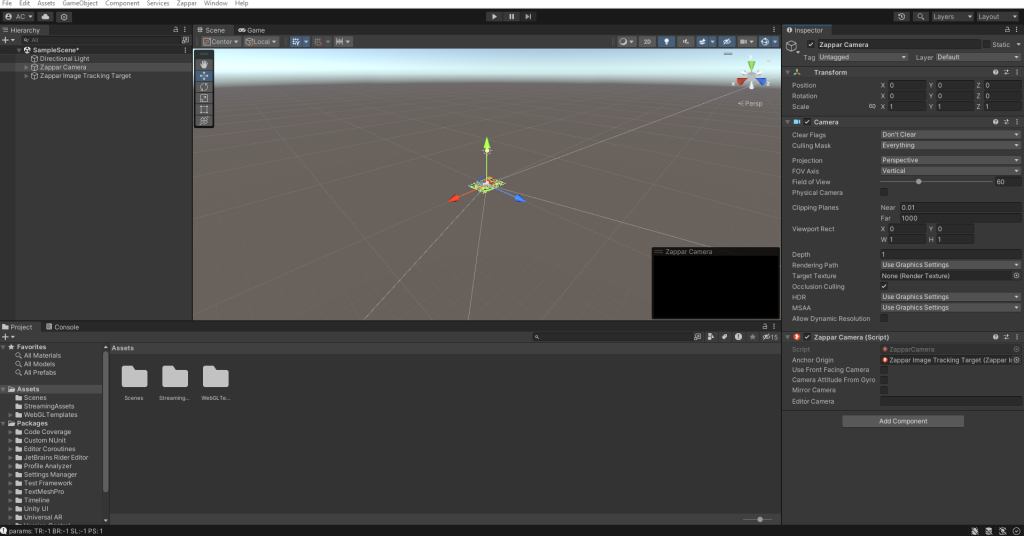
I added a rear facing Zappar camera via Zappar, Camera and Rear Facing Camera and the Image Tracking Target via Zappar in preparation for adding my Optimus Prime image tracker. Then, I went through the same process for both my Zappar Camera and Optimus Prime image tracker as I did for my Sea Shack AR Projects and also made a Preview Object the child of the Image Tracker of Optimus Prime.
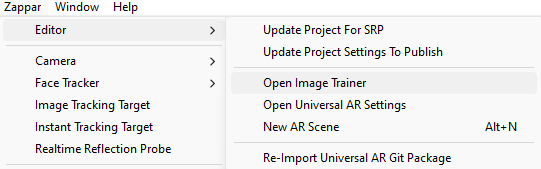
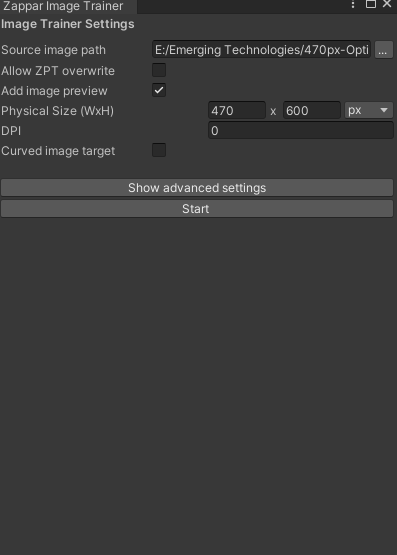
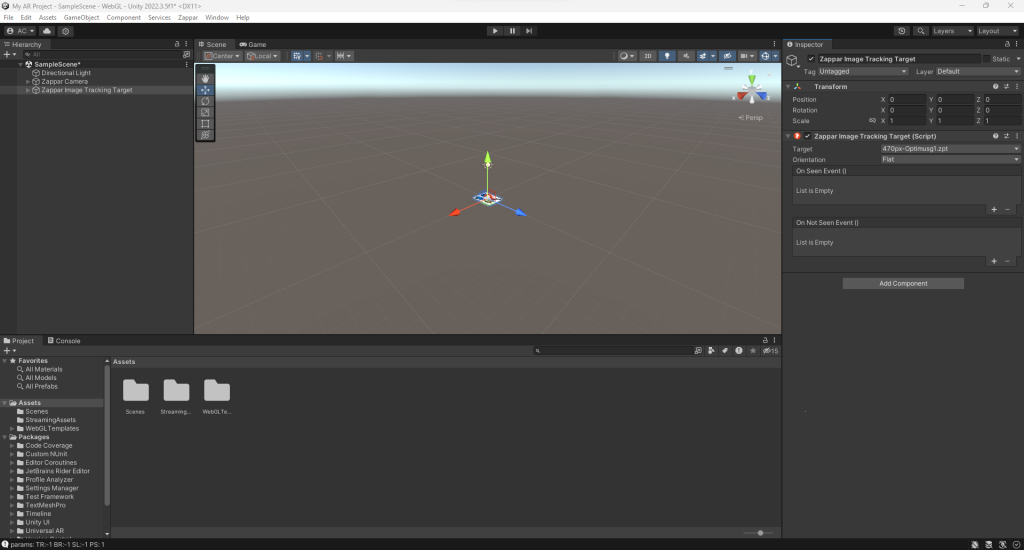
Went through Zappar, Editor and Open Image Trainer to open up the tab for it. I then clicked the 3 dot icon next to Source image path to get an Optimus Prime image I have downloaded which is on a USB memory stick and referenced in this post. I then went back into edit mode and went through the same process I went through for the Optimus image to be added as the image target for my Optimus Prime model.
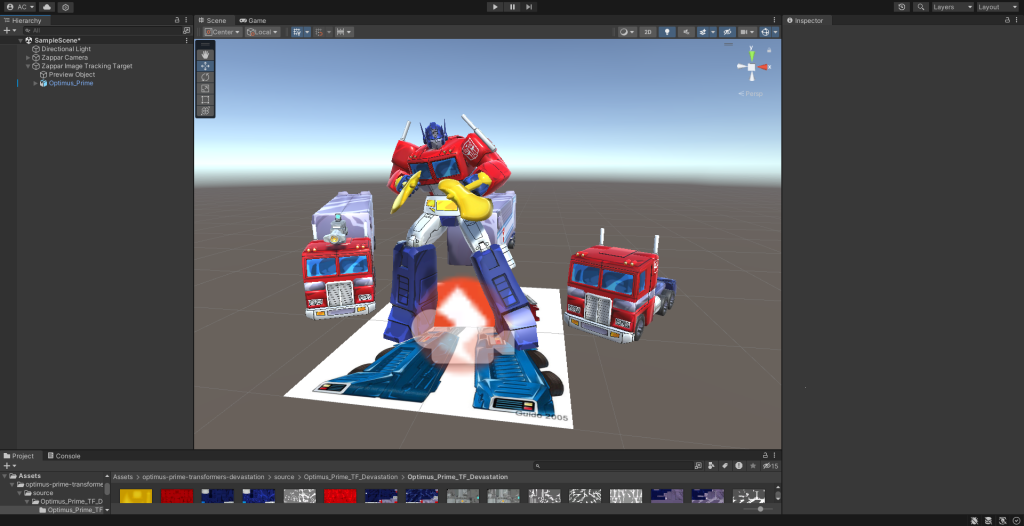
I have found an Optimus Prime model on Sketchfab and downloaded it on the same USB memory stick that has my Optimus Image to ensure I have it for my AR project for the Optimus image tracker. The Optimus model is referenced in this post.
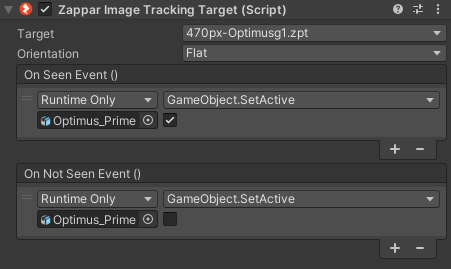

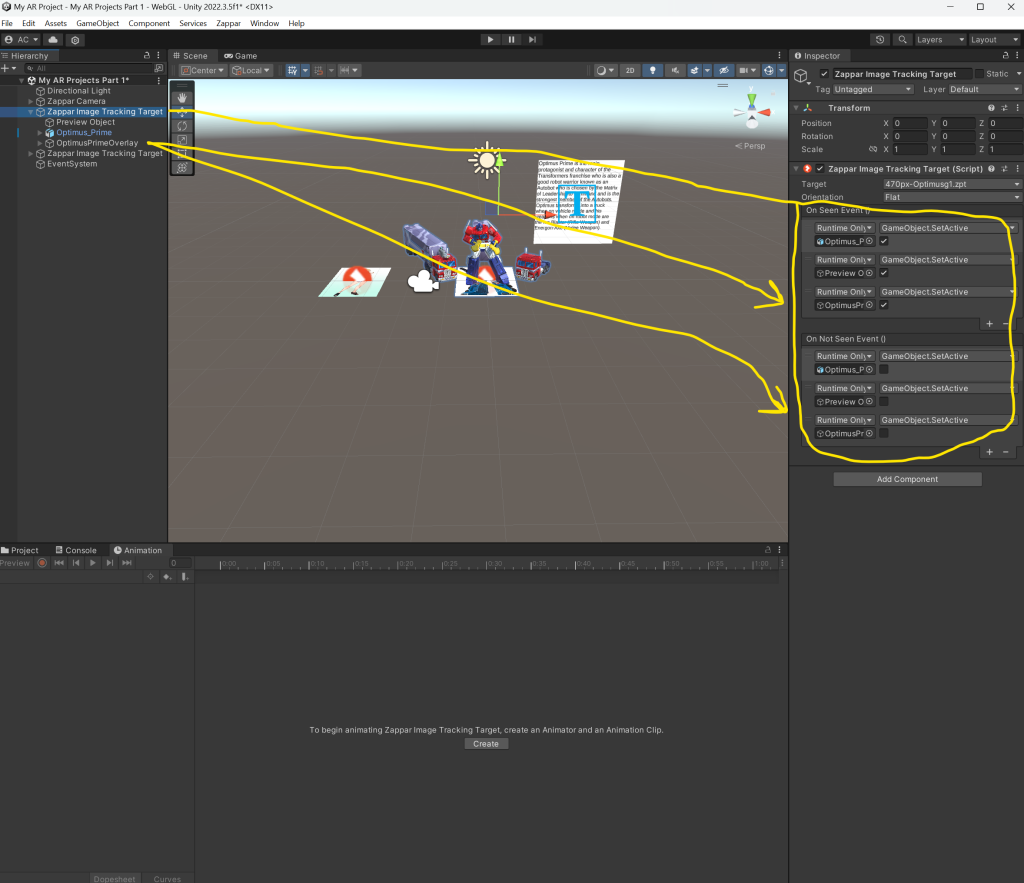
Then, I went through the same process as I did for my Sea Shack AR projects for my Optimus Prime AR Model, adding On Seen and On Not Seen events, and giving them Set Active Booleans where I ticked the model on the On Seen and unticked the model on the On Not Seen event.
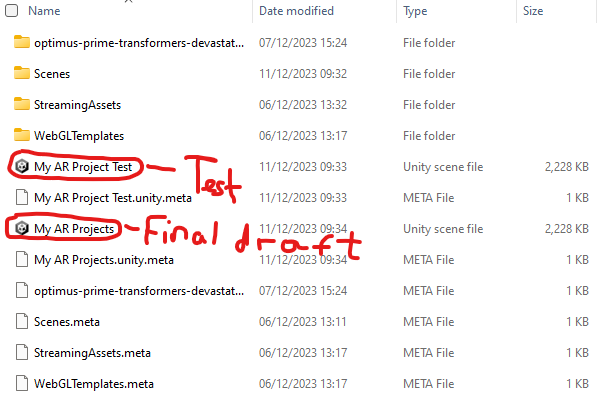
I had 2 scenes where one was a test as I wanted to test out what would’ve happened if I added 7 more AR models on one of the two test scenes.
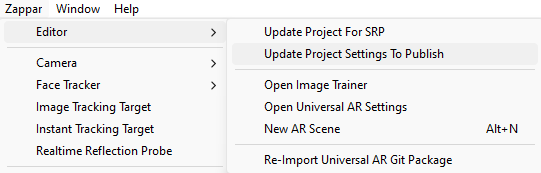
Then, I went to Zappar, Editor and clicked on Update Project Settings To Publish in order to ensure all backend settings are correct and finalised, ready to build my projects.
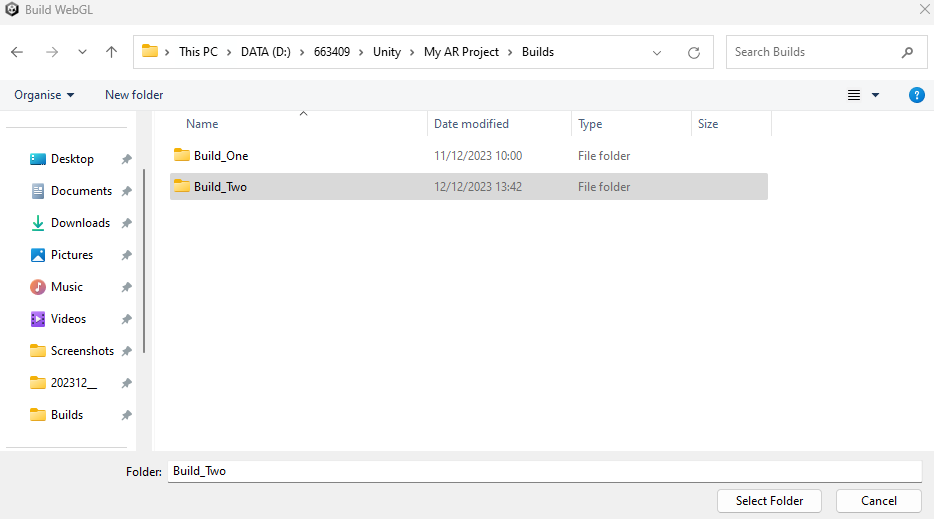
Next, I have built my AR Project Test by going through the same process as I did for my Sea Shack AR projects.
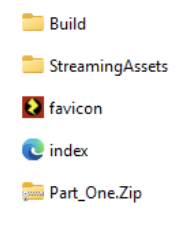
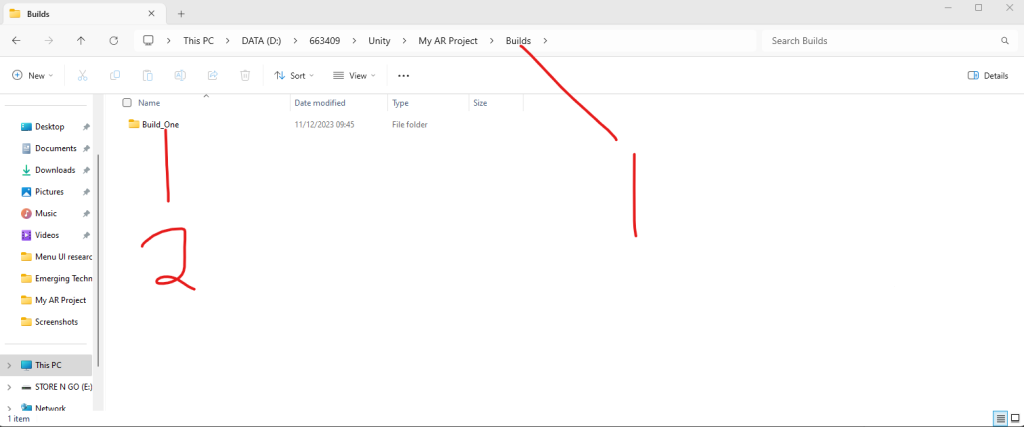
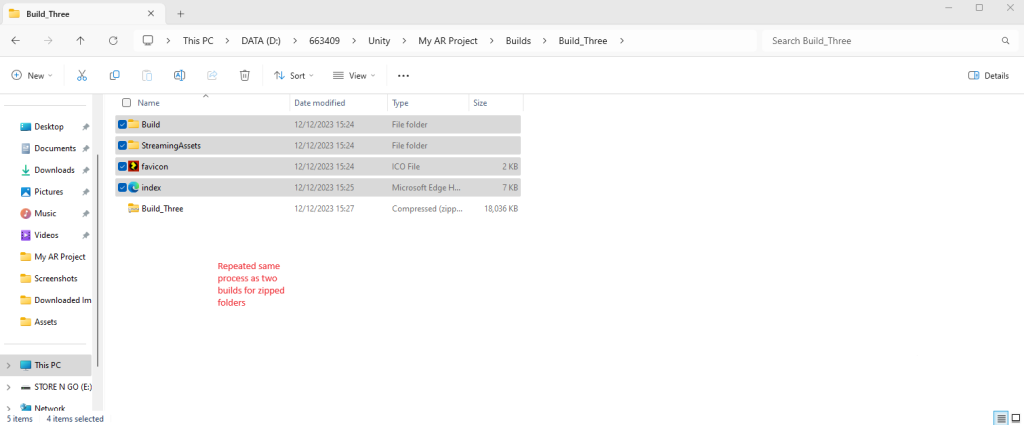
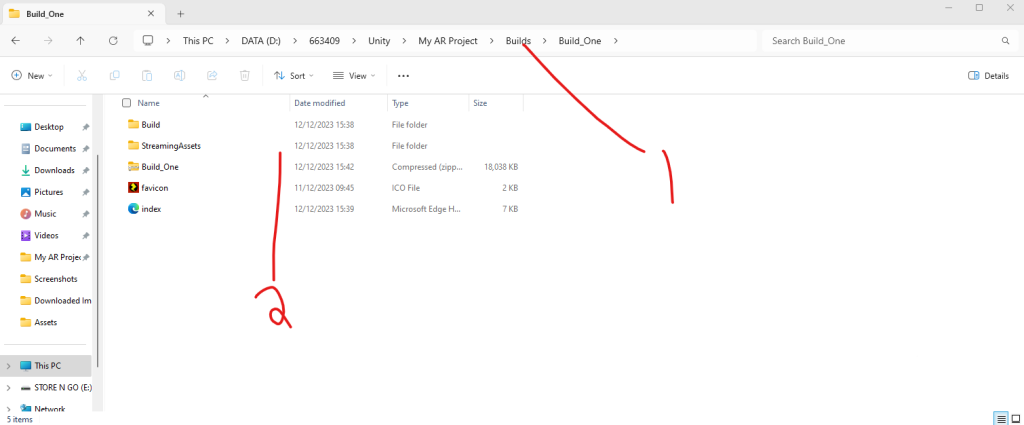
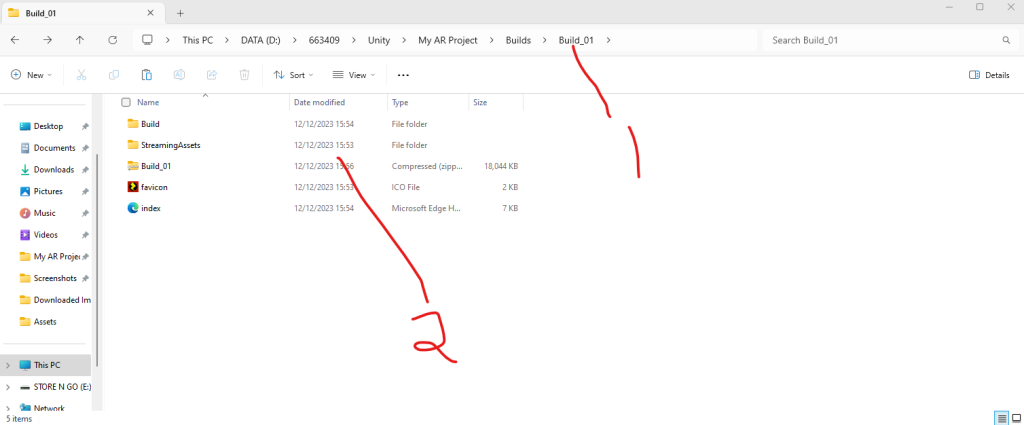
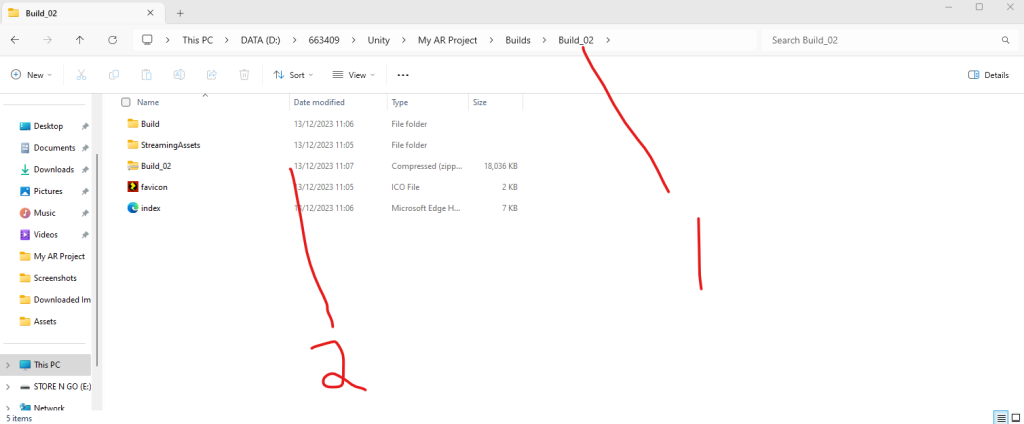
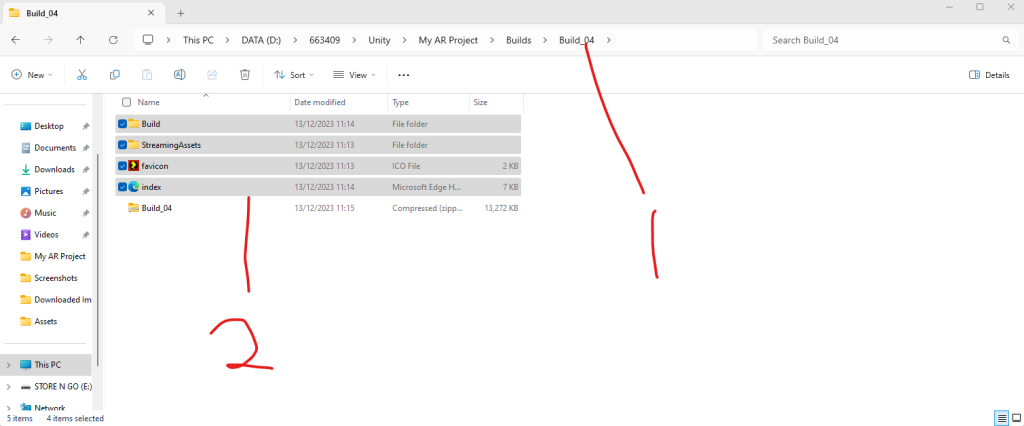
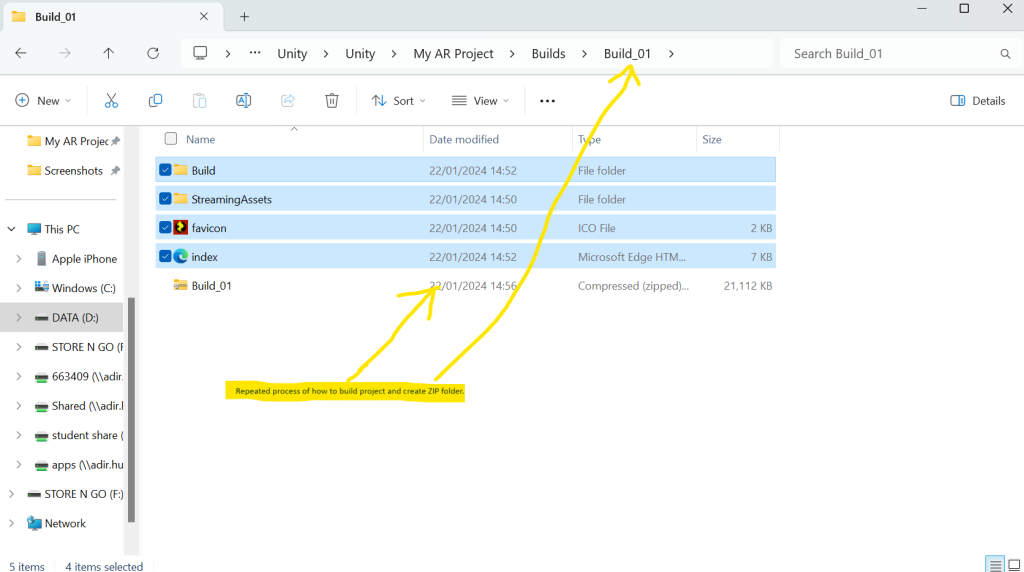
Afterwards, I have made a Zipped folder of my Build_One folder. The image shows the Part_One zip which is for one of my Sea Shack AR projects, but for one of my proper AR project build test, I put Build_One and made a zipped folder with the same name.
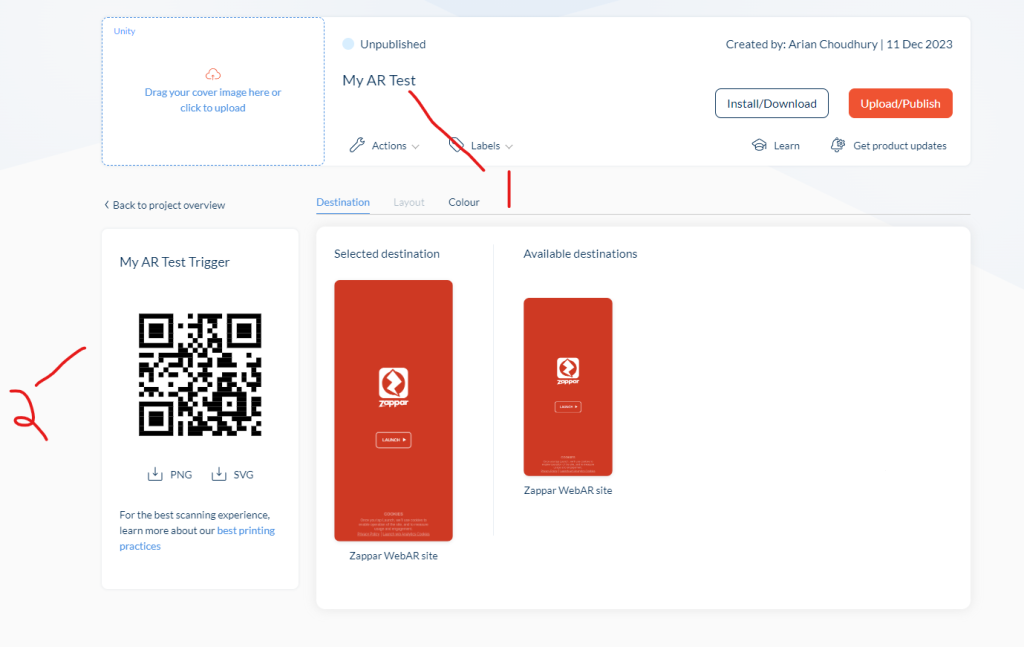
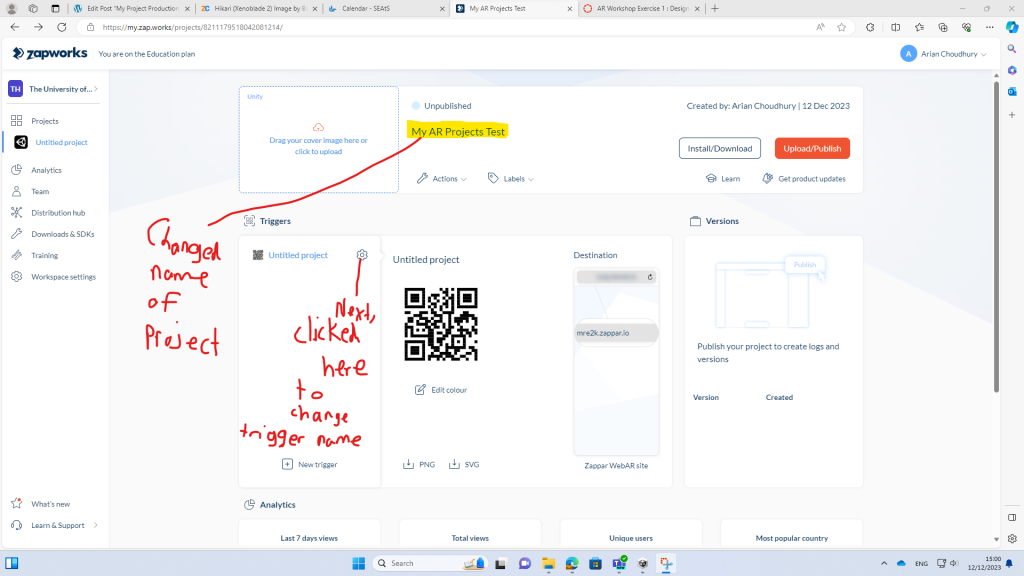
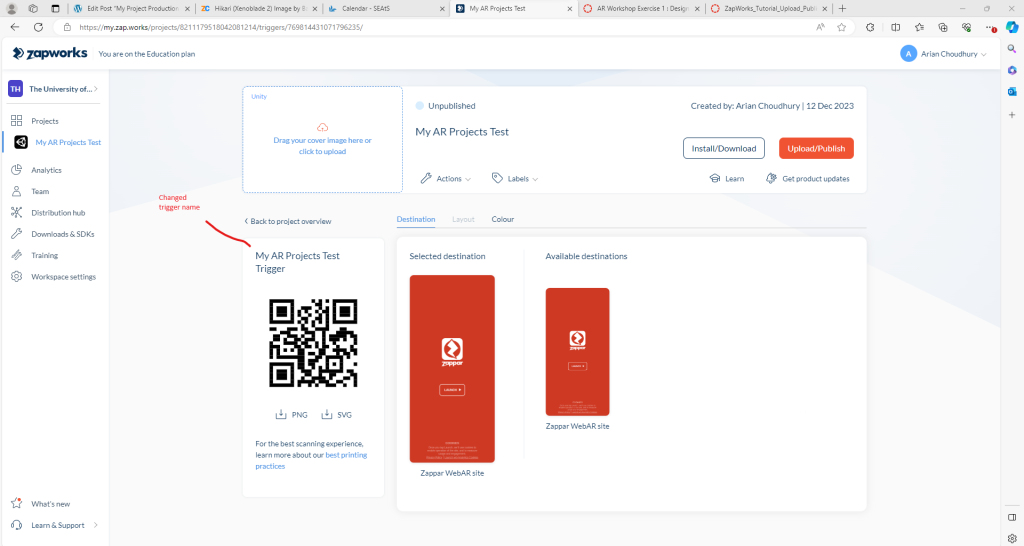
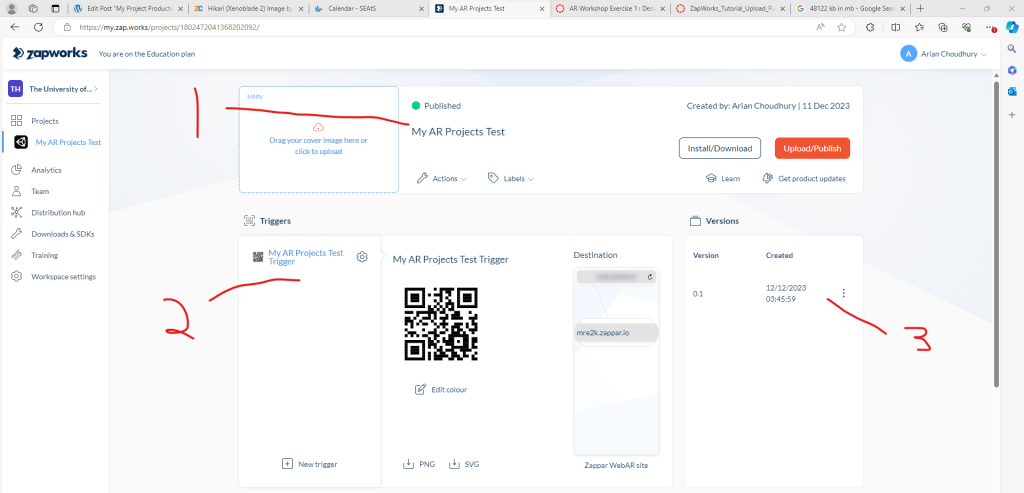
Next, I went through the same process of publishing my Build test for my AR Test project as carefully as I was in order to test the project out, which I saw the Optimus model and image, renaming the project and its trigger.
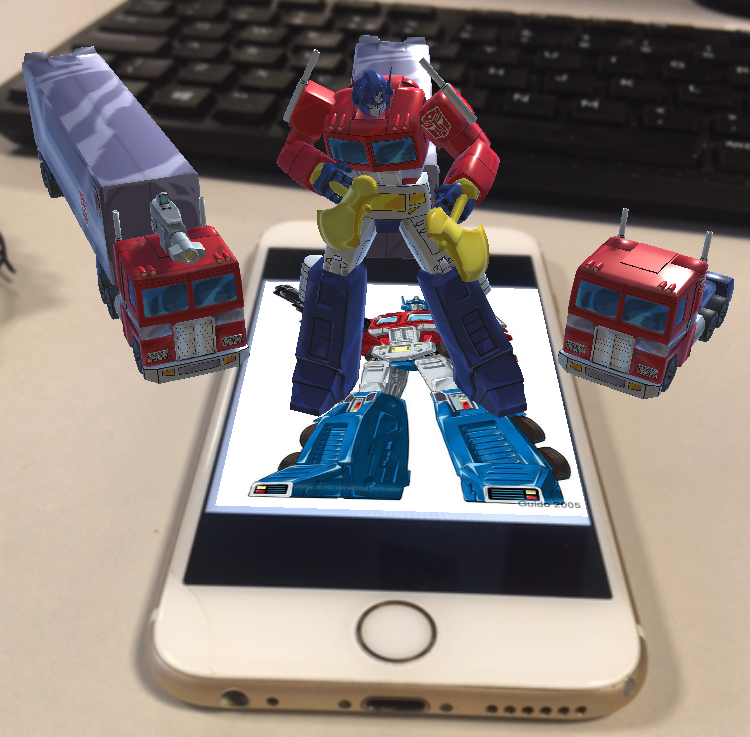
I then tested the Optimus Prime model out on my phone, going to its QR code to test the project out and it worked out well.
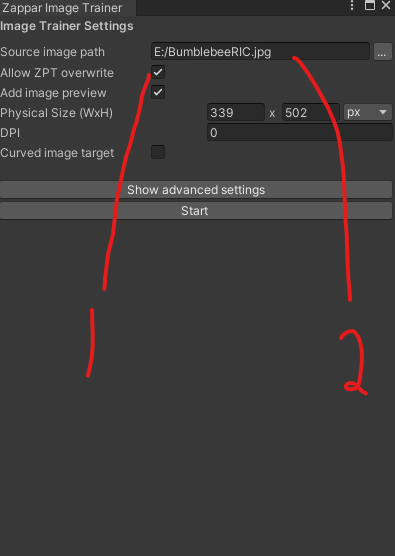
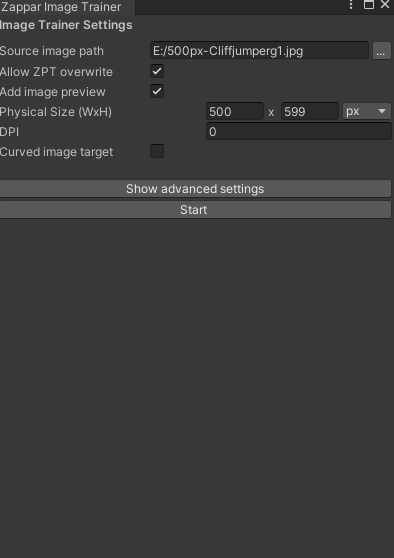
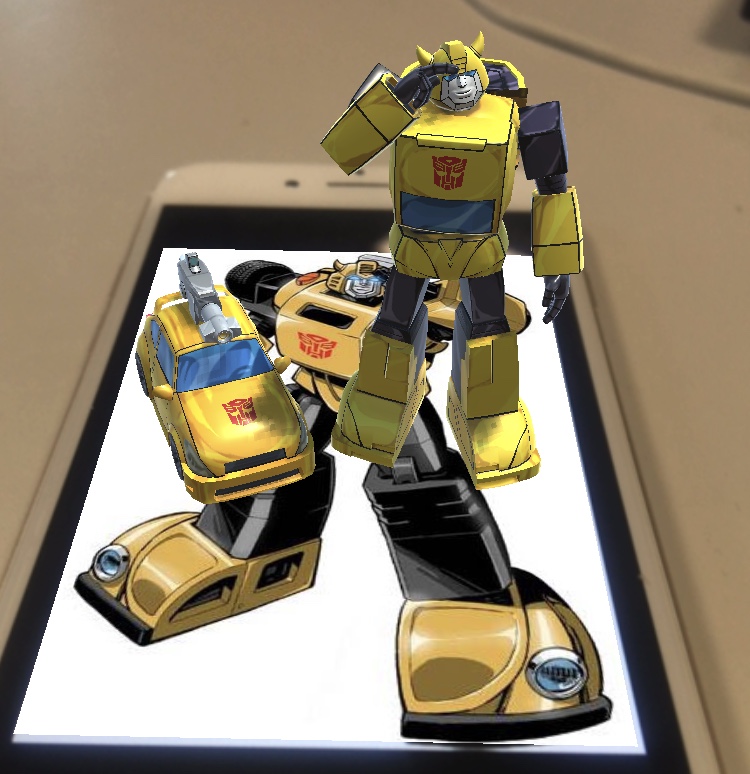
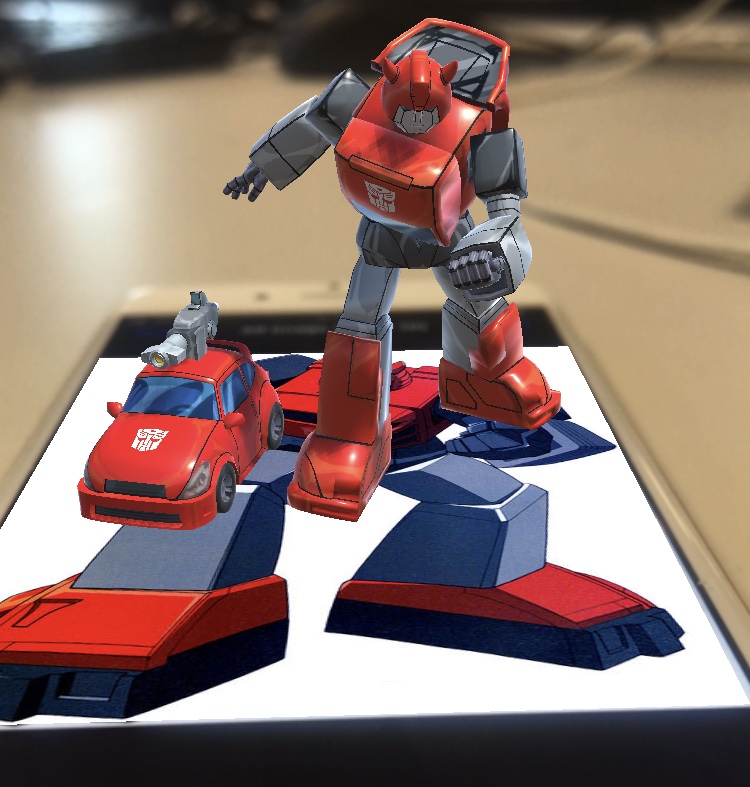
I downloaded 7 more Images for 7 more characters and stored them in the same exact USB memory stick where my Optimus Images and Models are stored before I went back on Unity, back on Image Trainer, starting with images for Bumblebee and Cliffjumper that are referenced in this post.
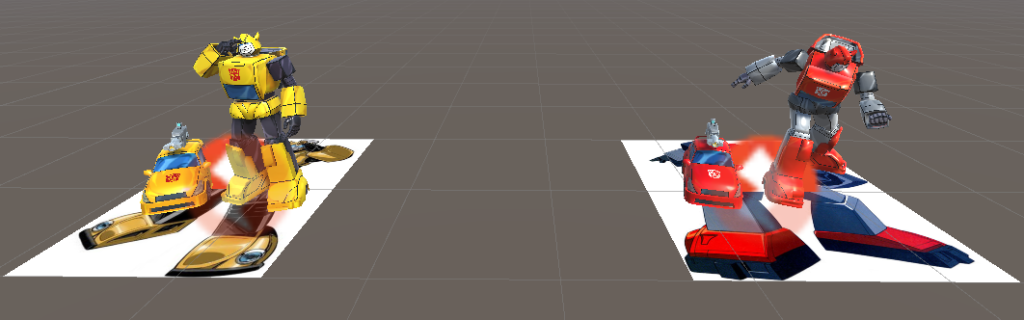
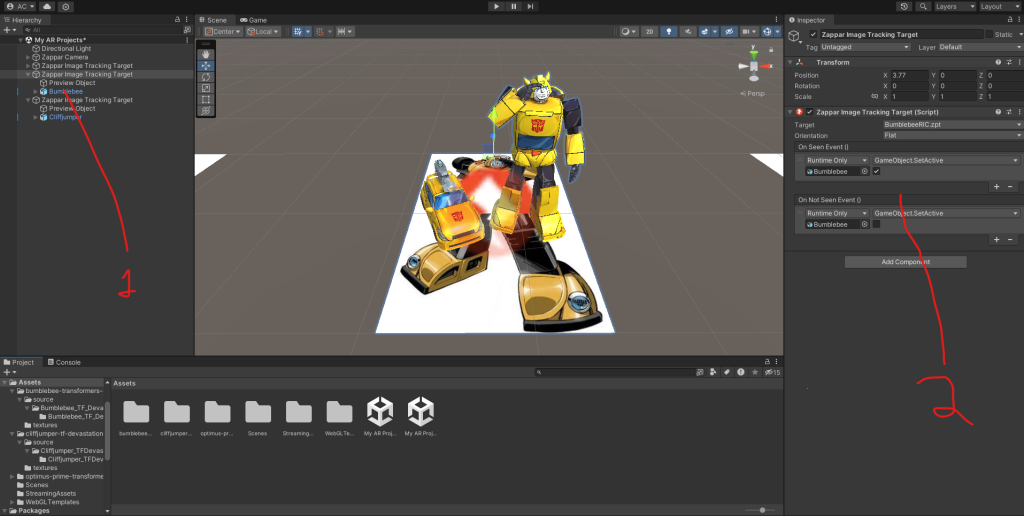
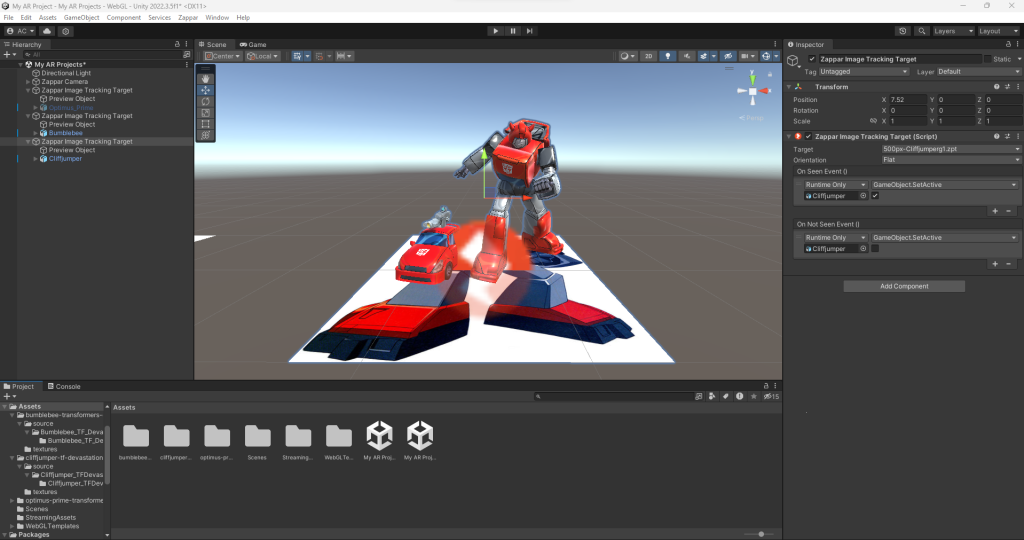
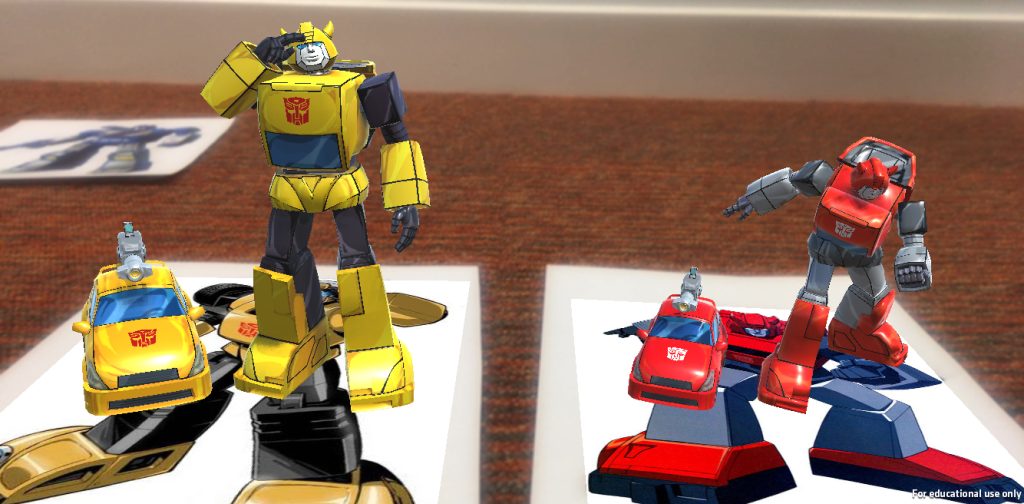
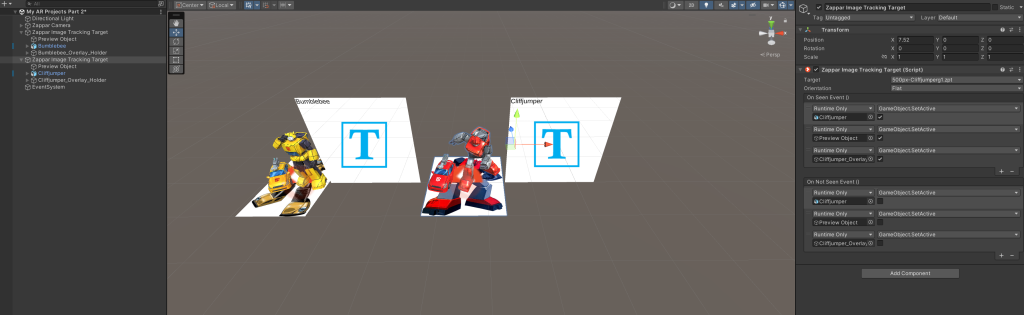
Afterwards, I added models for Bumblebee and Cliffjumper I have downloaded from Sketchfab that are stored in the exact same USB memory stick as other stuff I downloaded for my AR projects. I then went through the same process for the Bumblebee and Cliffjumper models and image trackers as I did for the Optimus image tracker and model, adding On Seen and On Not Seen events with set active booleans for both models of Bumblebee and Cliffjumper on both On Seen and On Not Seen events and only ticking boxes for them only on their On Seen events, ensuring they also work when saving them and having the AR projects build zipped to test them out on Zappar. The models for Bumblebee and Cliffjumper are referenced in this post.
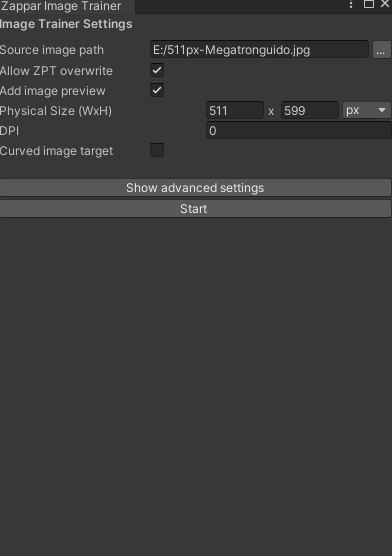
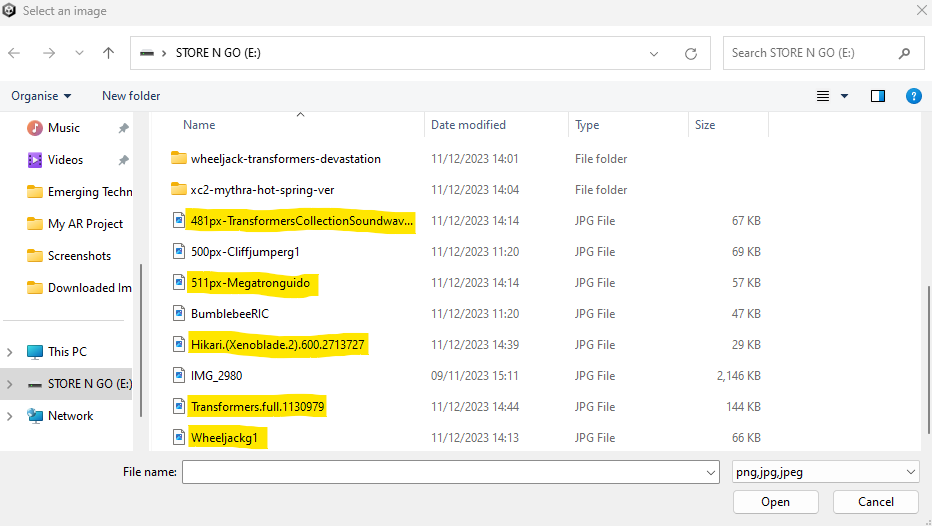
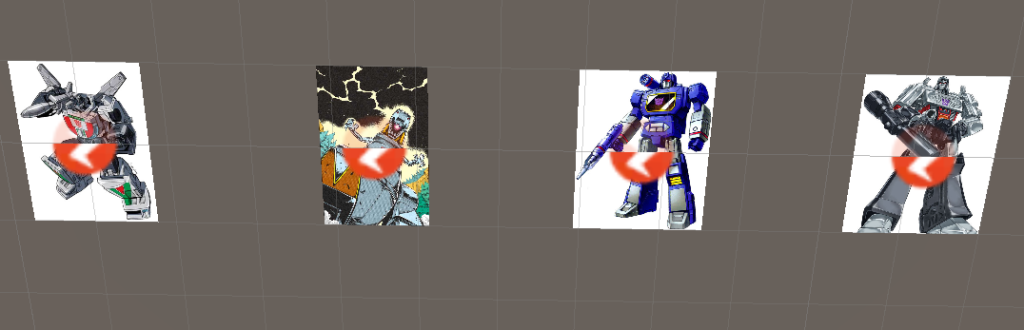
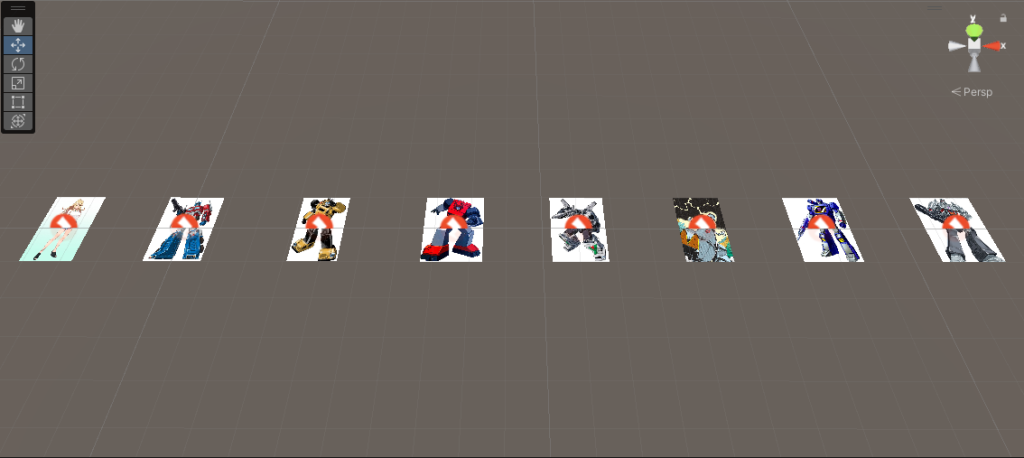
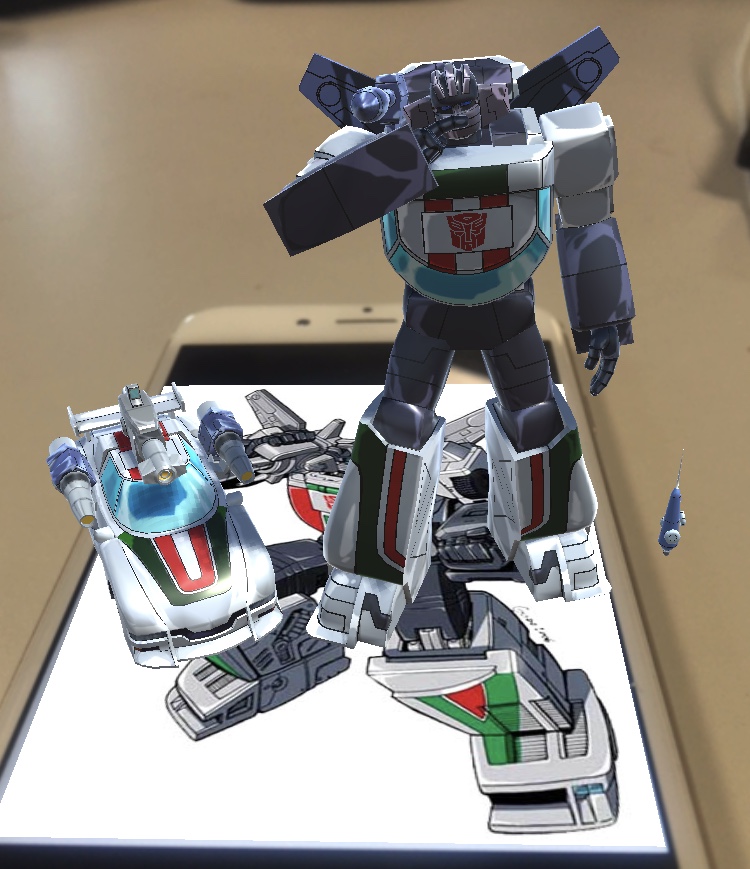
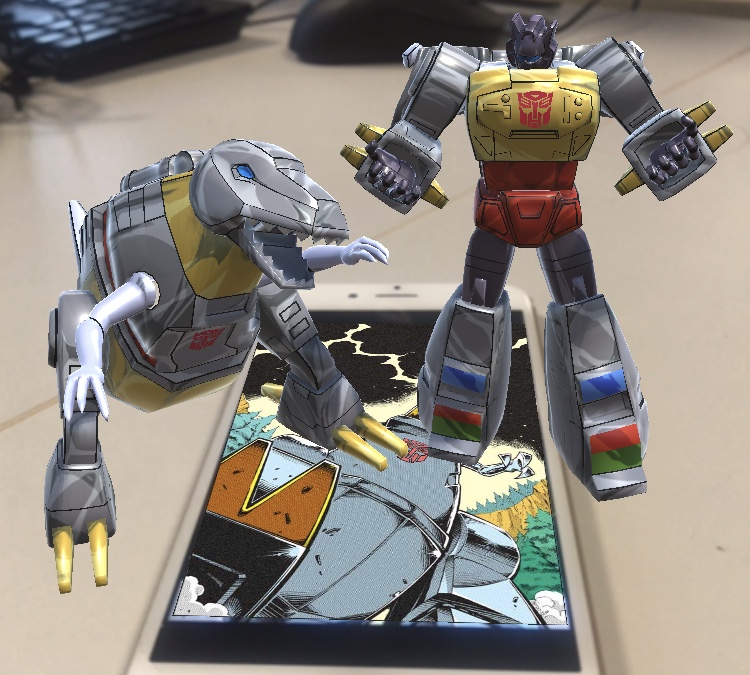
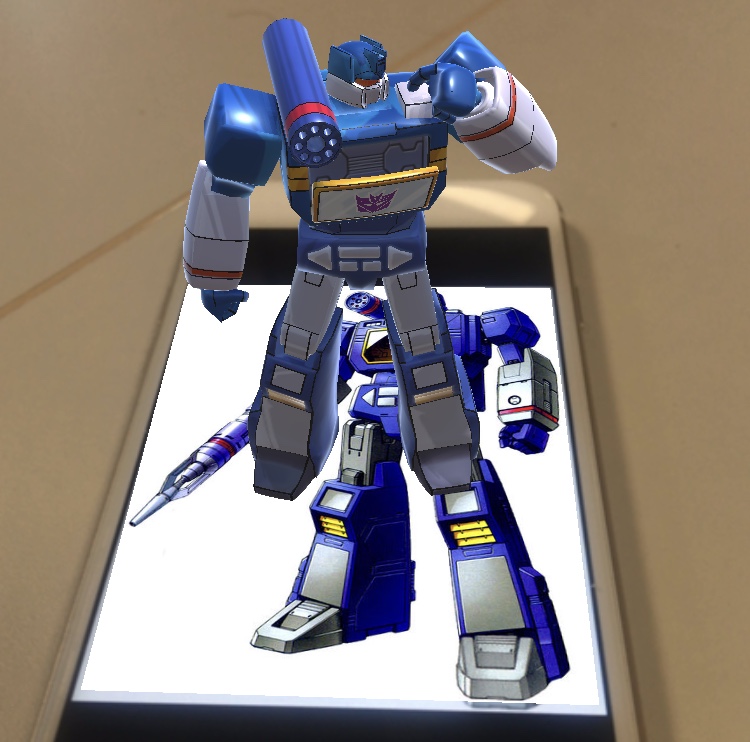
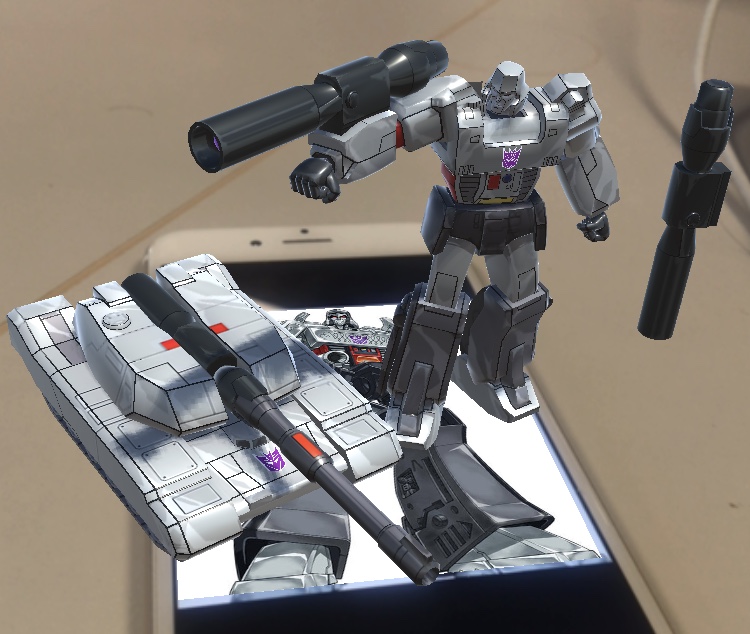
Next, I added 5 more images for Mythra, Wheeljack, Grimlock, Soundwave and Megatron I have downloaded onto the same USB memory stick as every other model and image I downloaded at that time and that I added as 5 more image trackers. The images I added to the Unity scene at that time are referenced in this post.
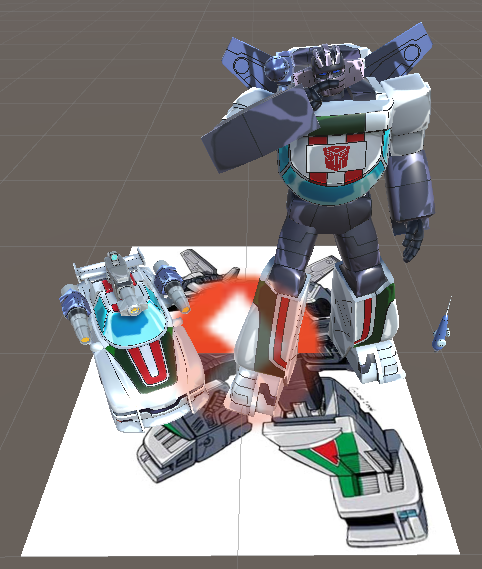
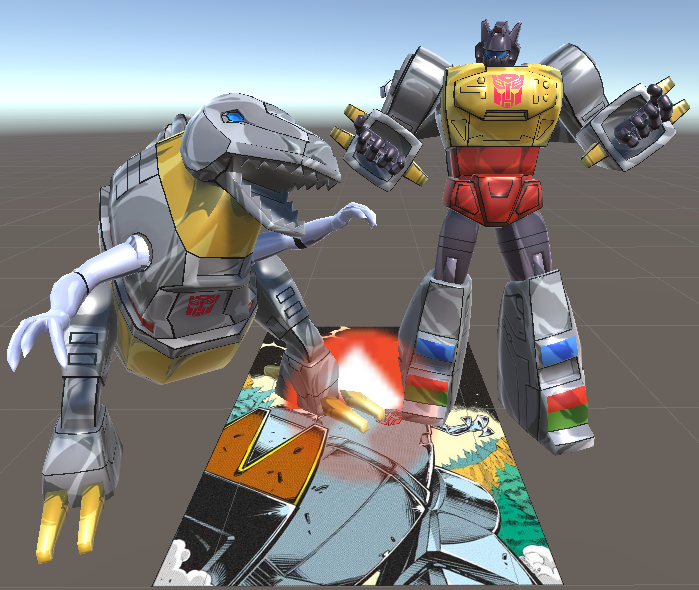
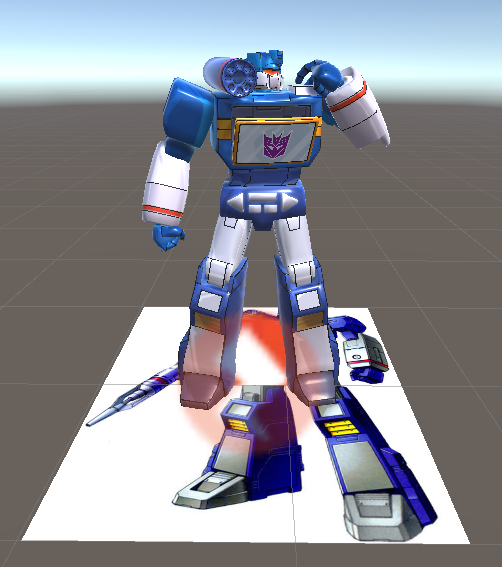
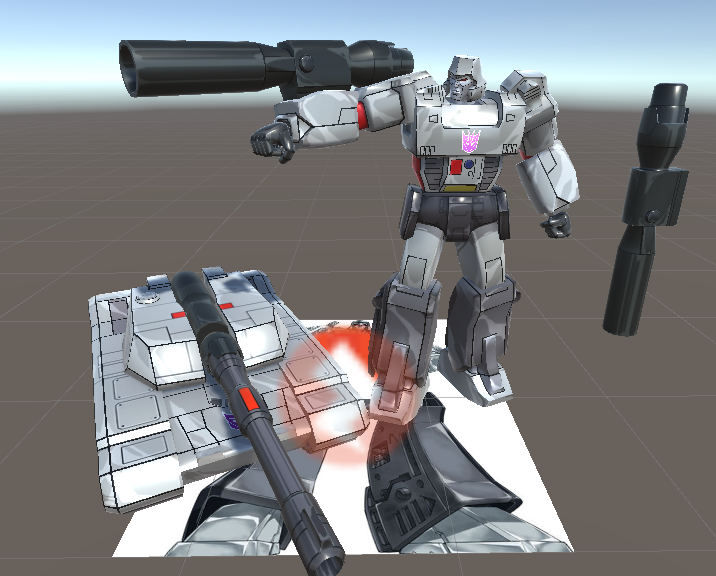
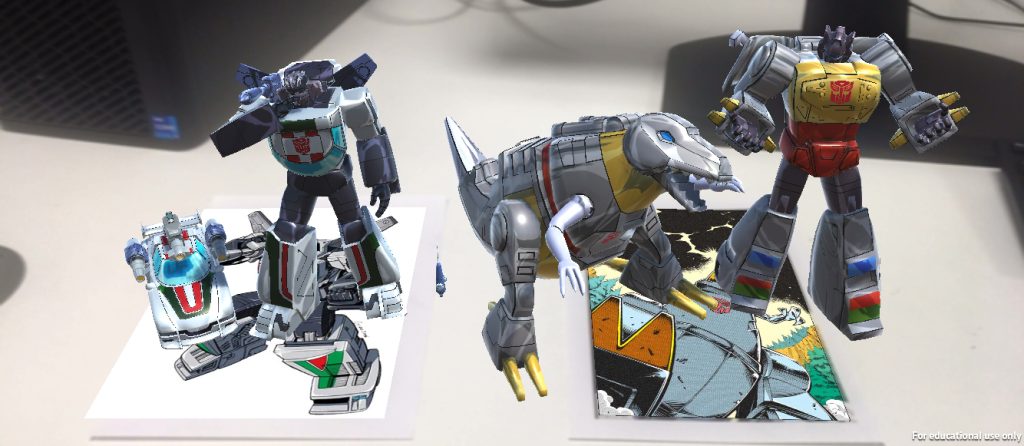
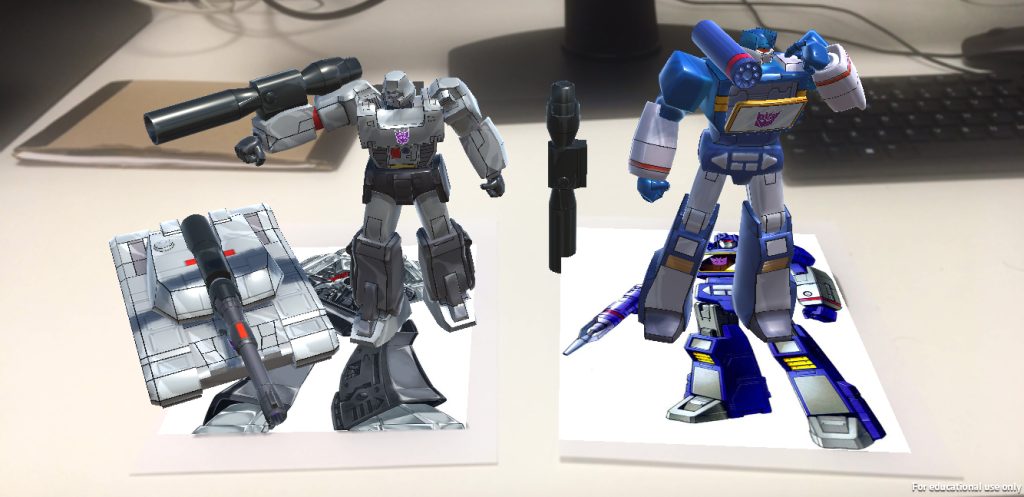
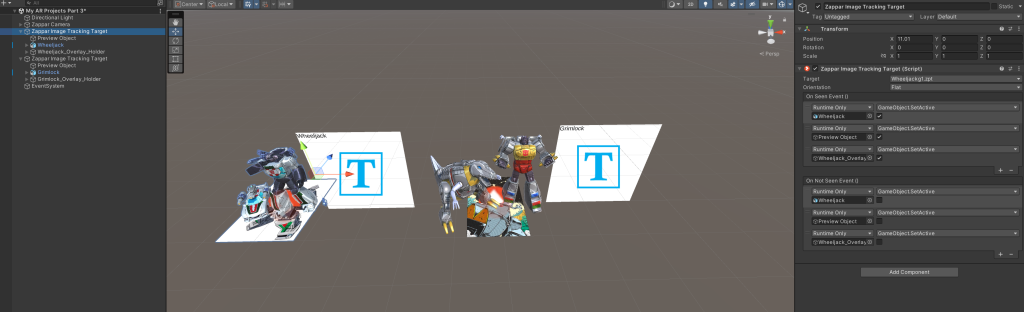
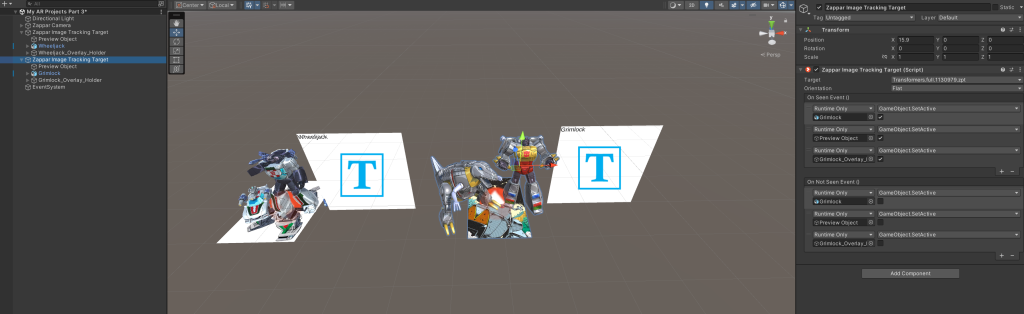
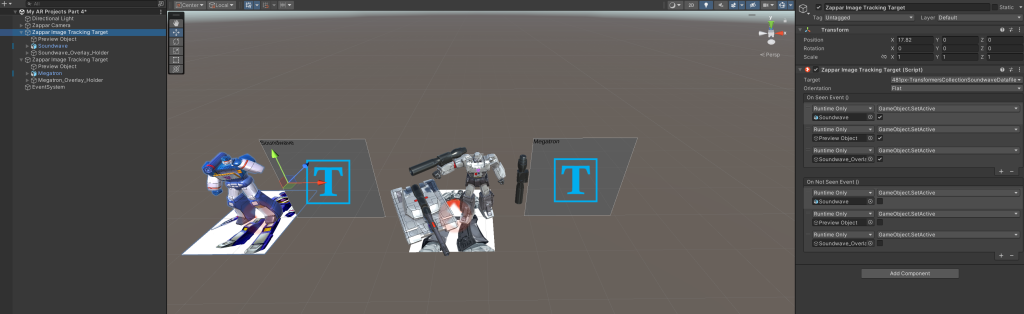
Then I added 5 more models for Mythra, Wheeljack, Grimlock, Soundwave and Megatron I have downloaded, in which the Mythra model was downloaded from The Models Resource whilst models for Wheeljack, Grimlock, Soundwave and Megatron were downloaded from Sketchfab. I downloaded them to put them in the exact same USB memory stick as other models and images I downloaded them onto. The models for Mythra, Wheeljack, Grimlock, Soundwave and Megatron are referenced in this post.


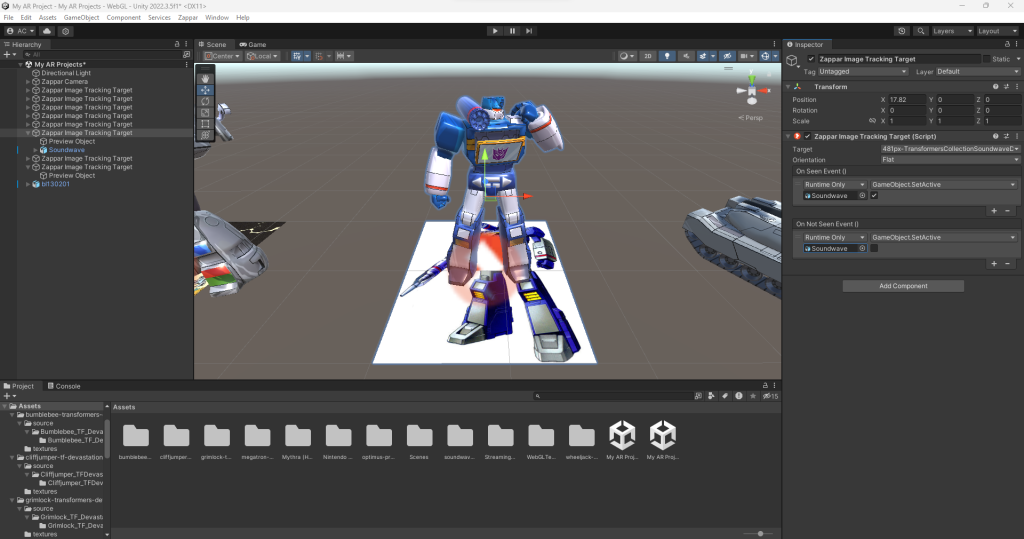
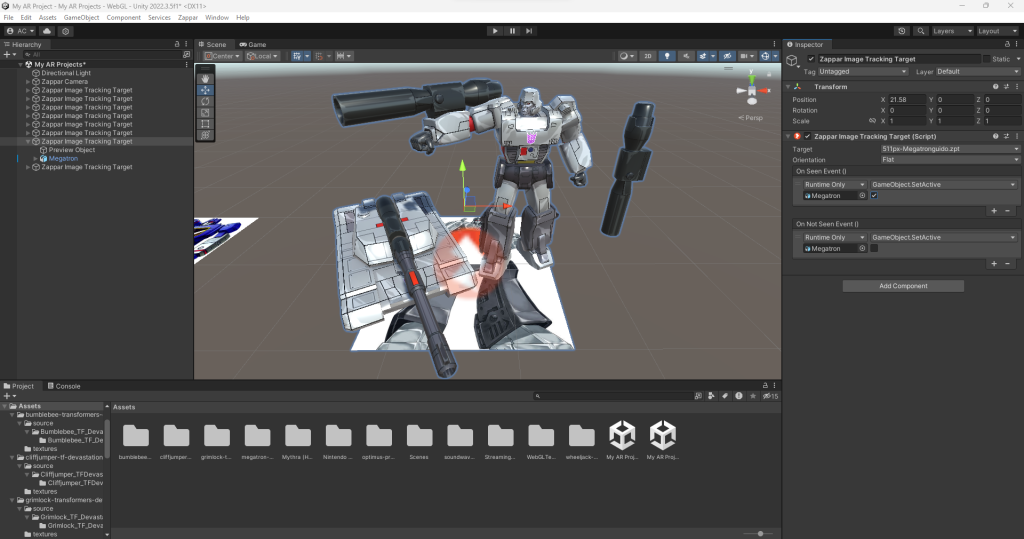
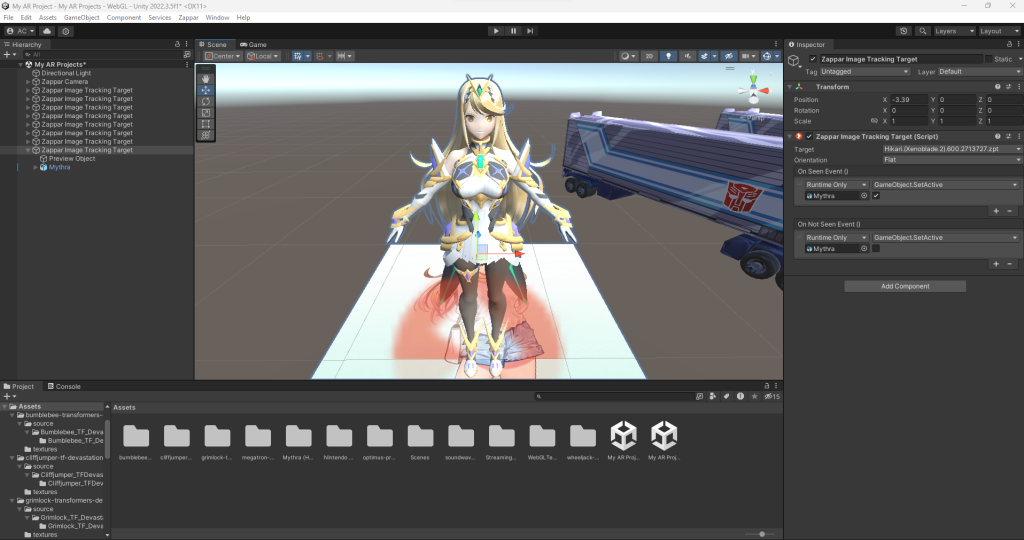
Then I went through the same process of adding On Seen and On Not Seen events with set active booleans for the remaining models for Mythra, Wheeljack, Grimlock, Soundwave and Megatron and ensuring they are all ticked only on their On Seen events in order to test them out after they are saved and had their AR project build zipped.
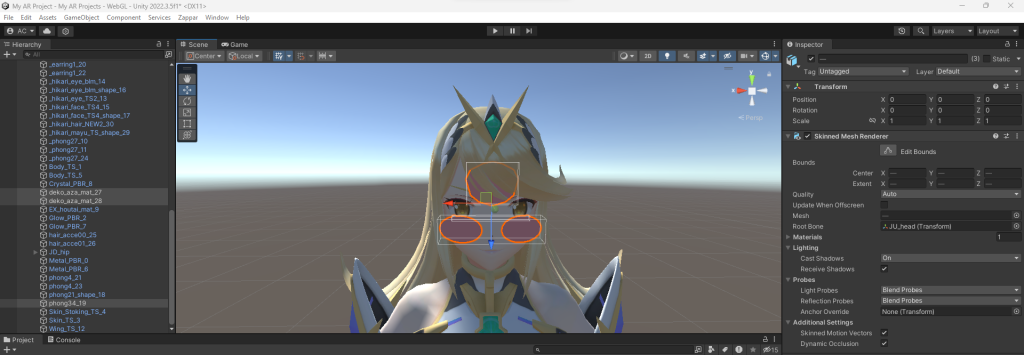
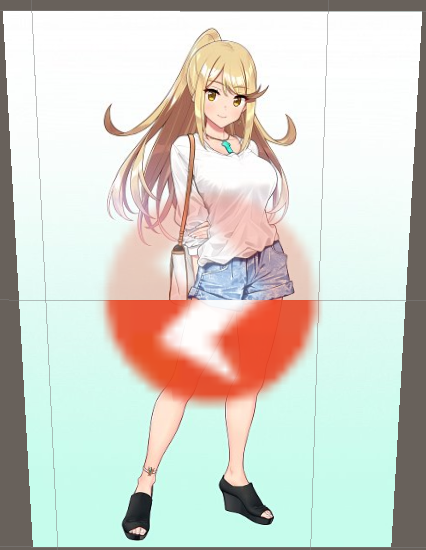
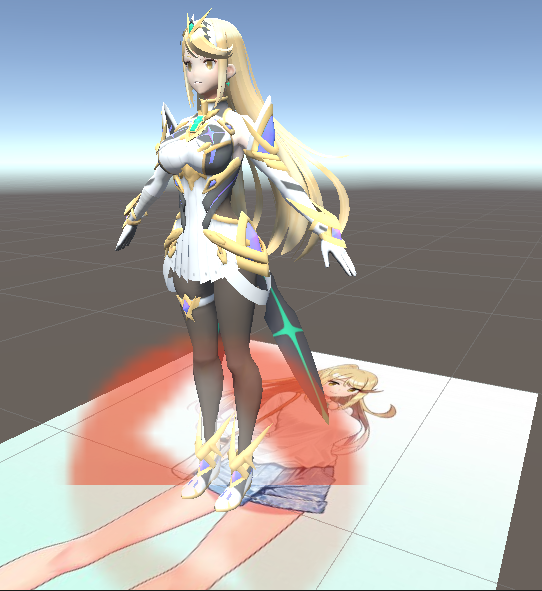
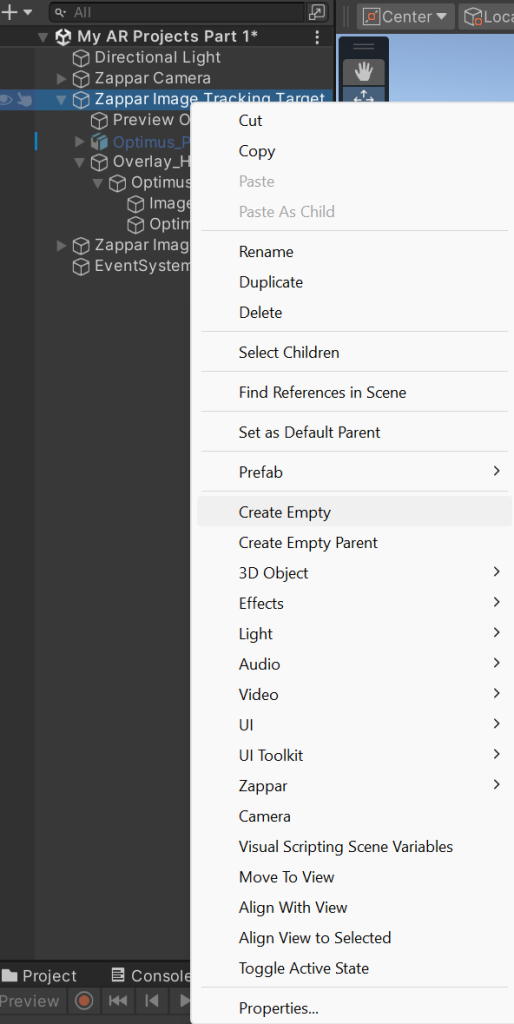
A new technique I have learnt is deleting objects I do not need for my AR projects. This applied to the Mythra model that had objects that are put for her forehead and cheeks, but I didn’t need those objects as shown in the image where I highlighted these unwanted objects and right clicked them to delete them.

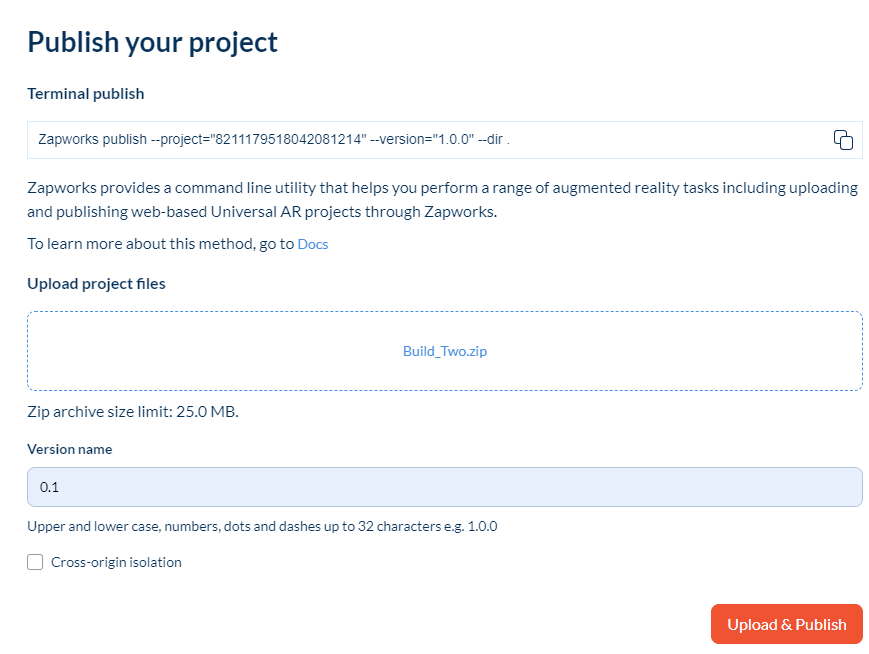
Once I was happy with testing all AR Image trackers out in one build for Zappar, I repeated the same process for the build and zipped the folder. Then I went back on Zappar to upload the build, only to find out its size has gone over the limit of 25MB (around 45MB at that time), which was perhaps a bad idea.
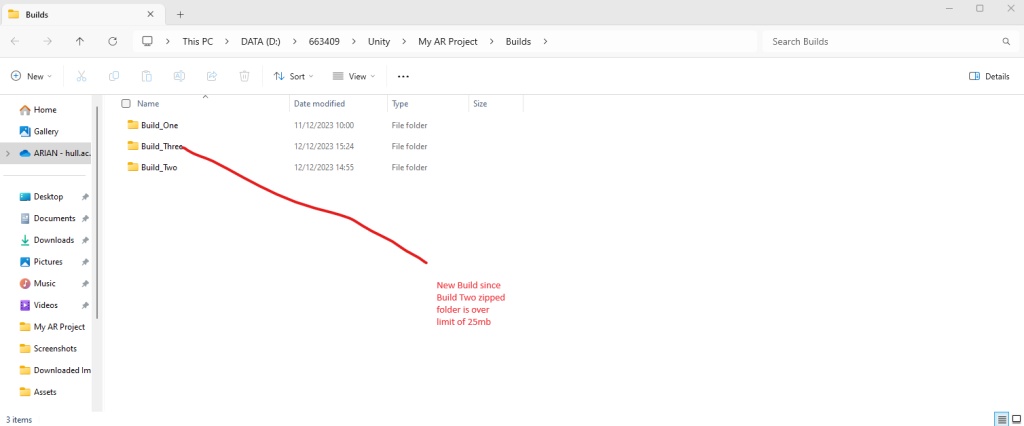
To resolve the issue, I have added new builds in which I had to create 4 scenes for each 2 AR trackers to create 4 AR projects.
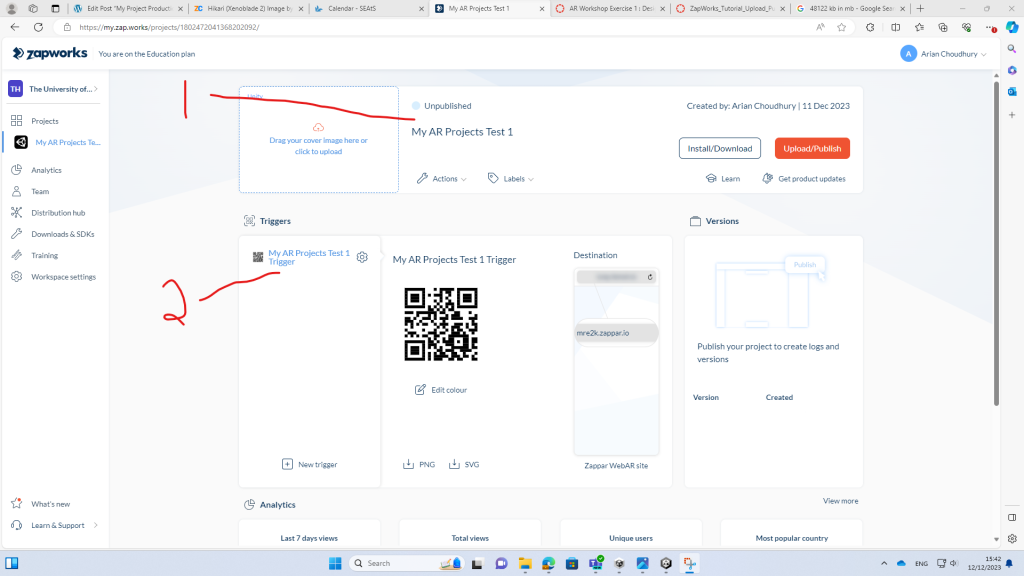
Had to rename this project and its trigger as it was another AR test project.
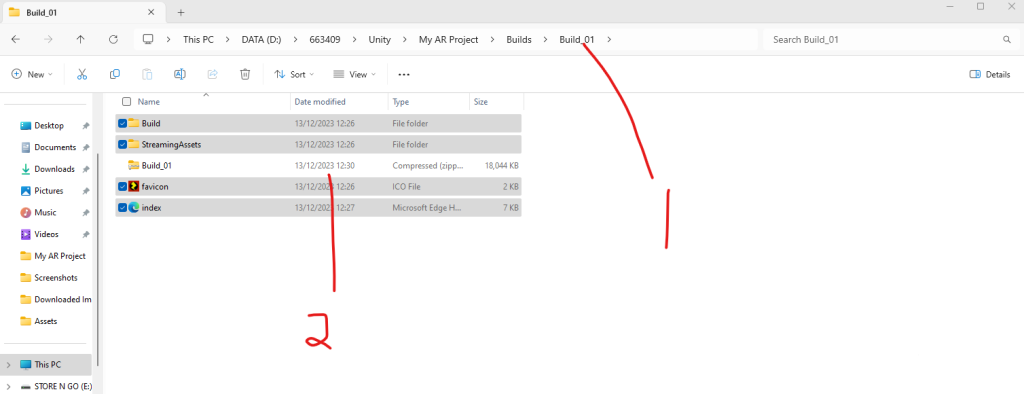
I have deleted Build_One and rebuilt the scene to name it Build_01 before making a Build_01 zip folder, rebuilding it to make an update to this AR test project.

Went back into Unity to build the first proper Unity scene for my Optimus and Mythra AR trackers.
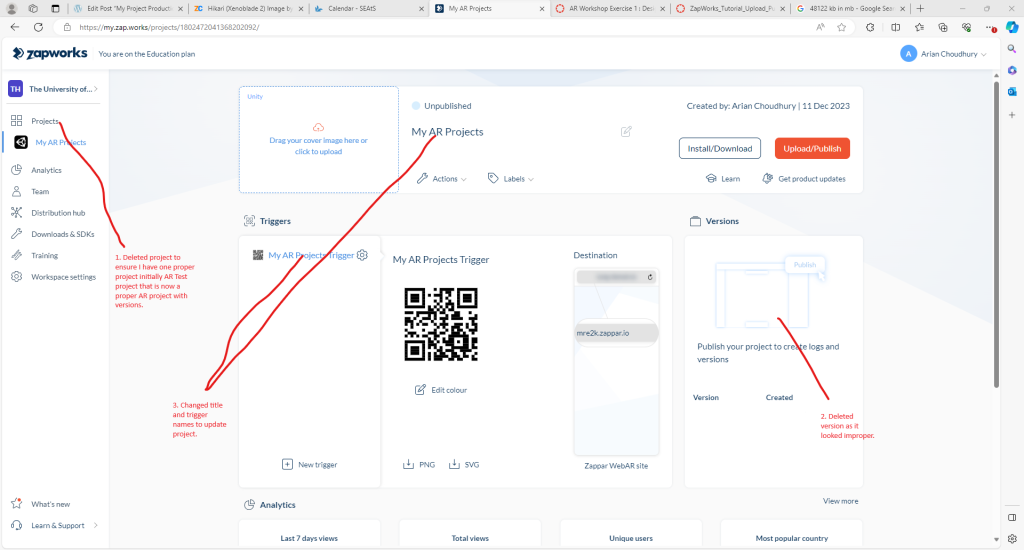
I deleted a project (a new technique I have learnt that can be shown if you scroll further down) to ensure I had one project that I thought at that time was a proper AR project with versions. Then I renamed the project and its trigger that matched what I wanted to rename them as. Then, I deleted the version which I admit looked improper (a new technique I have learnt that can be shown if you scroll further down).
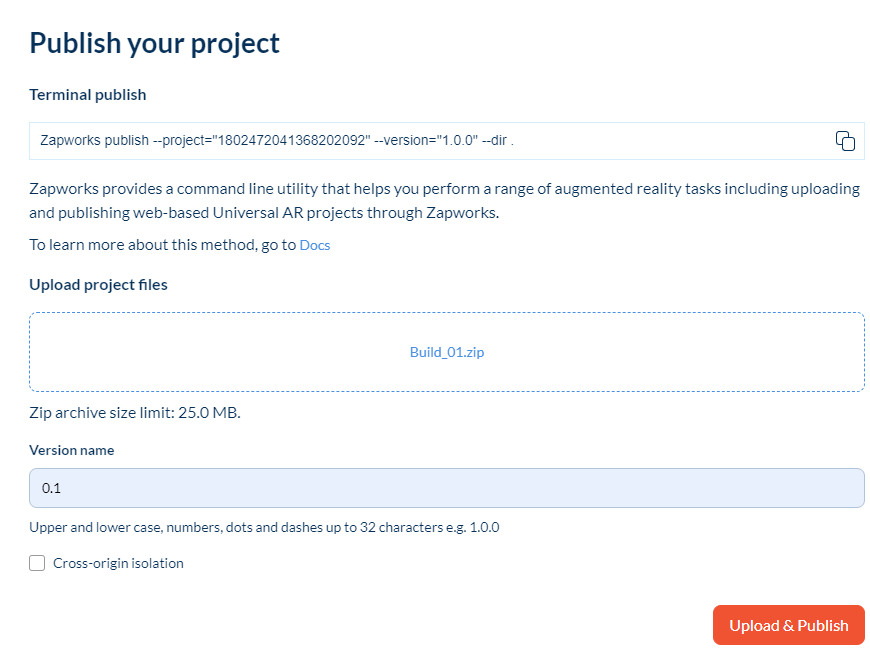
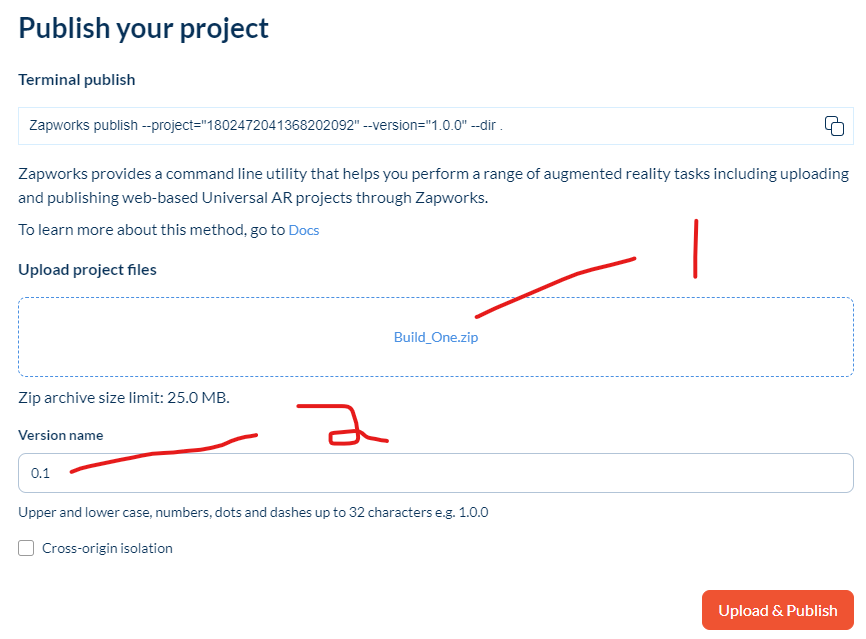
I then put the version back to 0.1 and added the Build_01 zip folder which at that time had less than 25mb, making it small enough to have a play with.
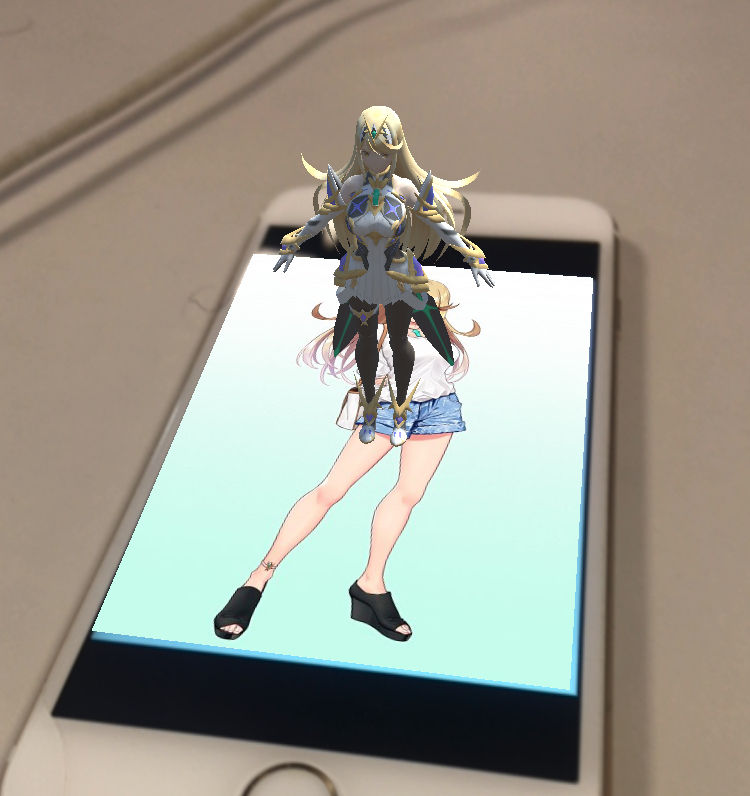
I tested out the AR project for Mythra, and it turned out the model for her looks small, so I had to go back onto Unreal to adjust the size of Mythra’s model.


I repeated the same building process for 3 remaining scenes in their 3 remaining builds respectively.
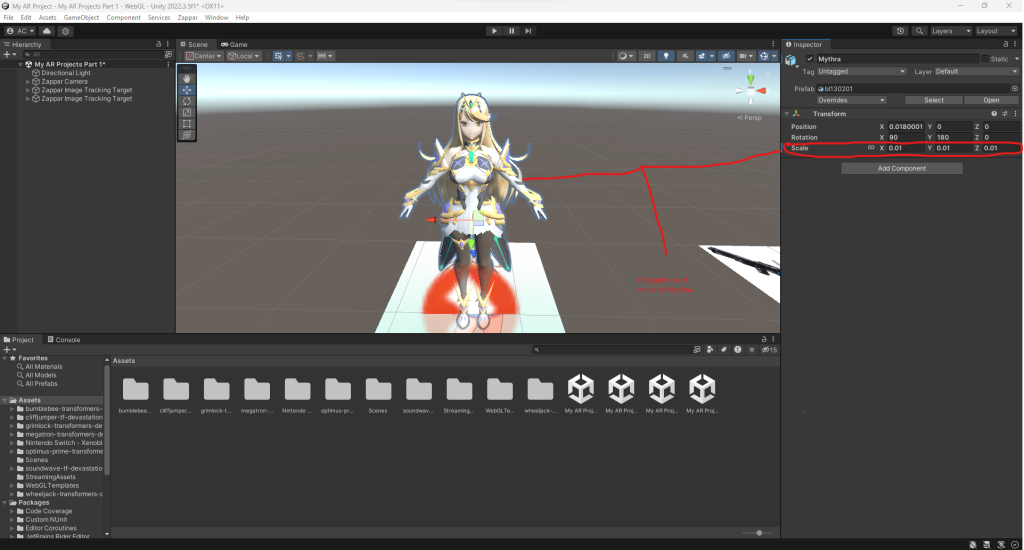
I then decided to back on Unity and rescaled her x, y and z sizes to 0.01 to ensure the model for Mythra is tall enough to see, since I tested Optimus Prime and Mythra’s AR trackers out, finding out that the model for Mythra was too small.
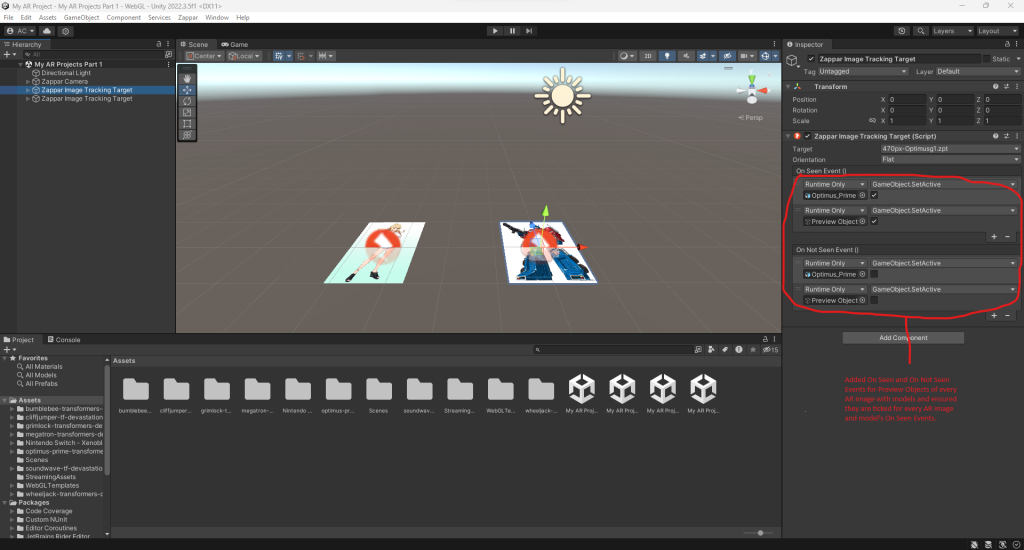
I then added On Seen and On Not Seen events for every Preview Object resembling AR trackers for every single character and repeated the same process as I did for every character’s model, ensuring AR images and Models of every character are only seen when users phones/tablets point at their trackers.
I then repeated the same building process for every AR project scene as I felt I was ready to test the trackers out.
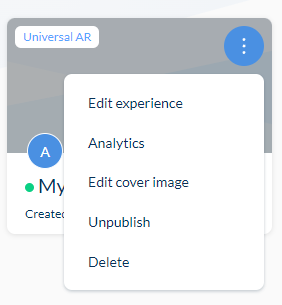
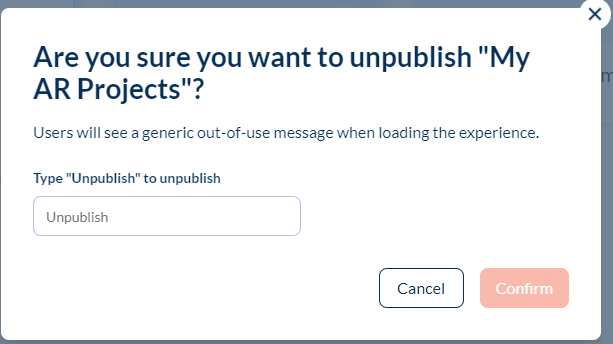
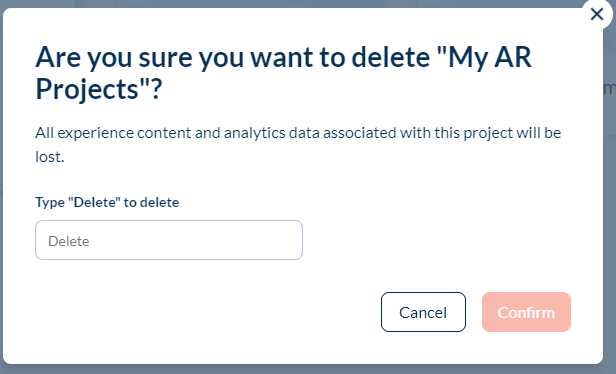
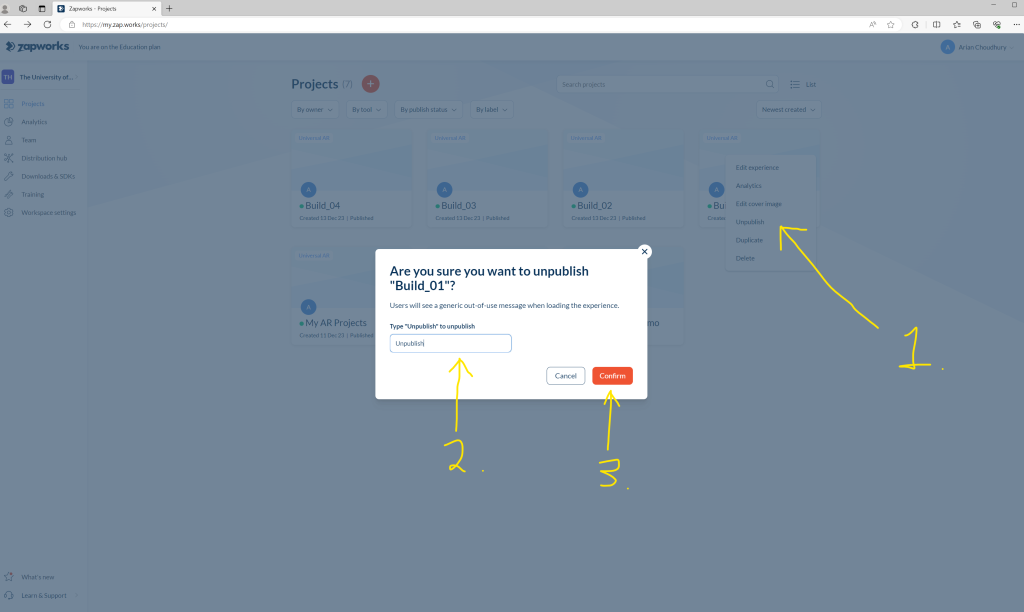
These are a couple of new techniques I have learnt at the time I had to sort projects out since adding a build for all character AR tracker in one wasn’t a good idea. I had to read pop-ups of unpublishing and deleting projects and proceeded to type Unpublish to unpublish projects and versions and Delete to delete any that I do not need.
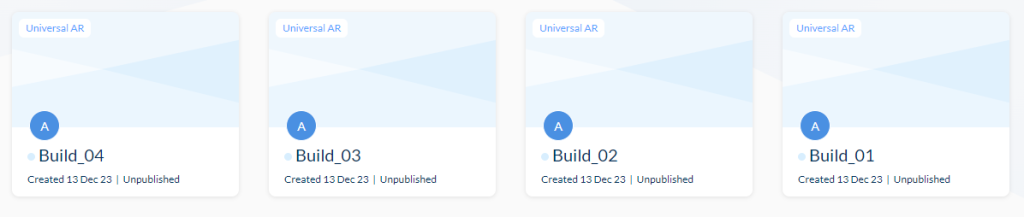
I then have added 4 new AR projects that I thought would become 4 proper AR projects as the ‘My AR Projects’ project at that time showed the Mythra model that was too small to see.


I then repeated the same publishing process for all 4 AR projects, bringing their respective builds and ensuring their versions start with 0.1 at that time.
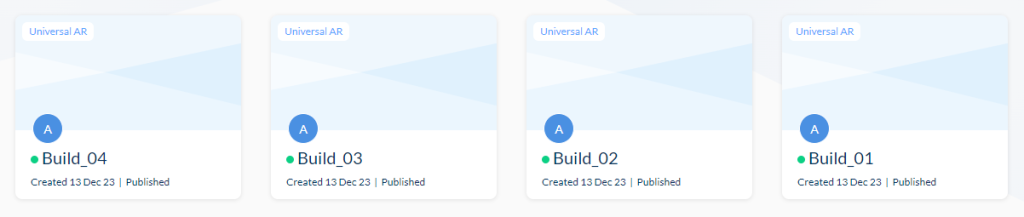
This image shows and indicates all 4 proper AR projects that were published, ready to test the AR trackers out.
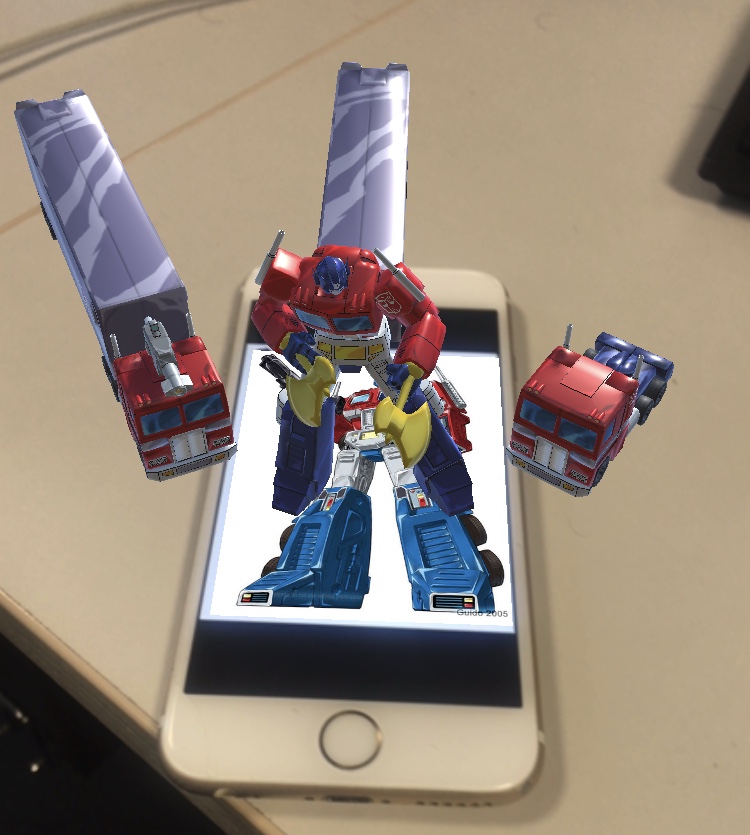
Once I was happy with everything at that time, I went to all QR codes of all four AR projects to give each AR tracker a go and they all looked good, even when seeing the model of Mythra being bigger than last time I tested her tracker out.
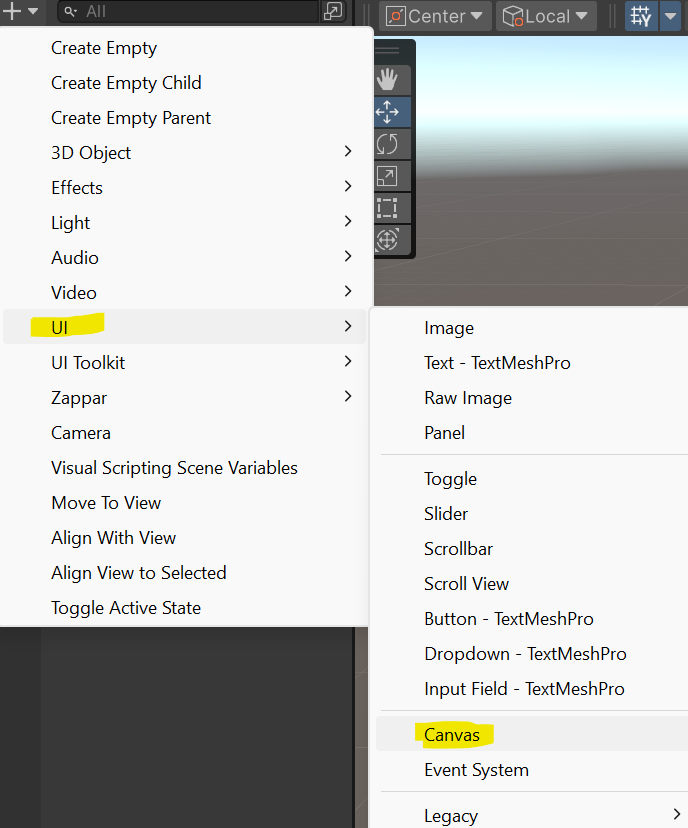
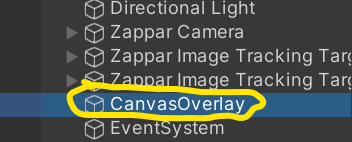
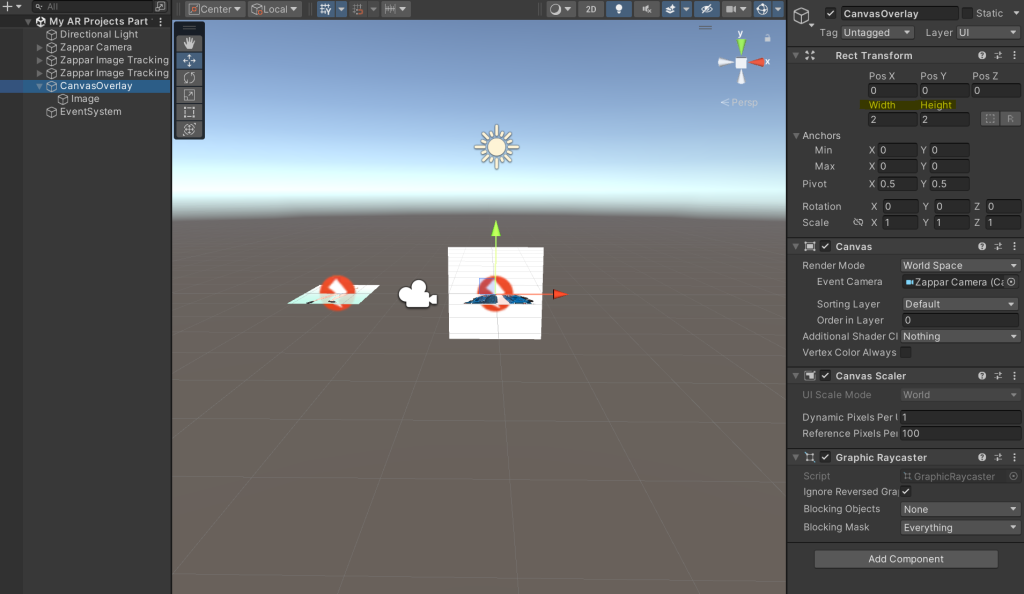
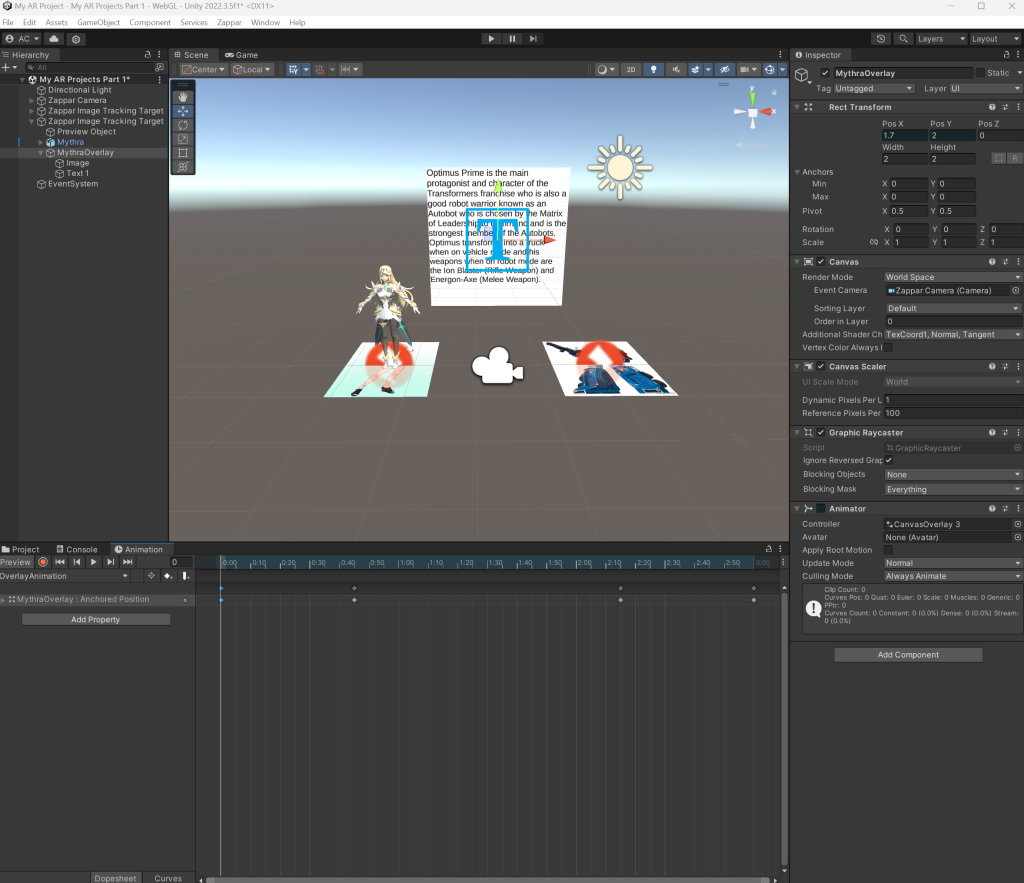
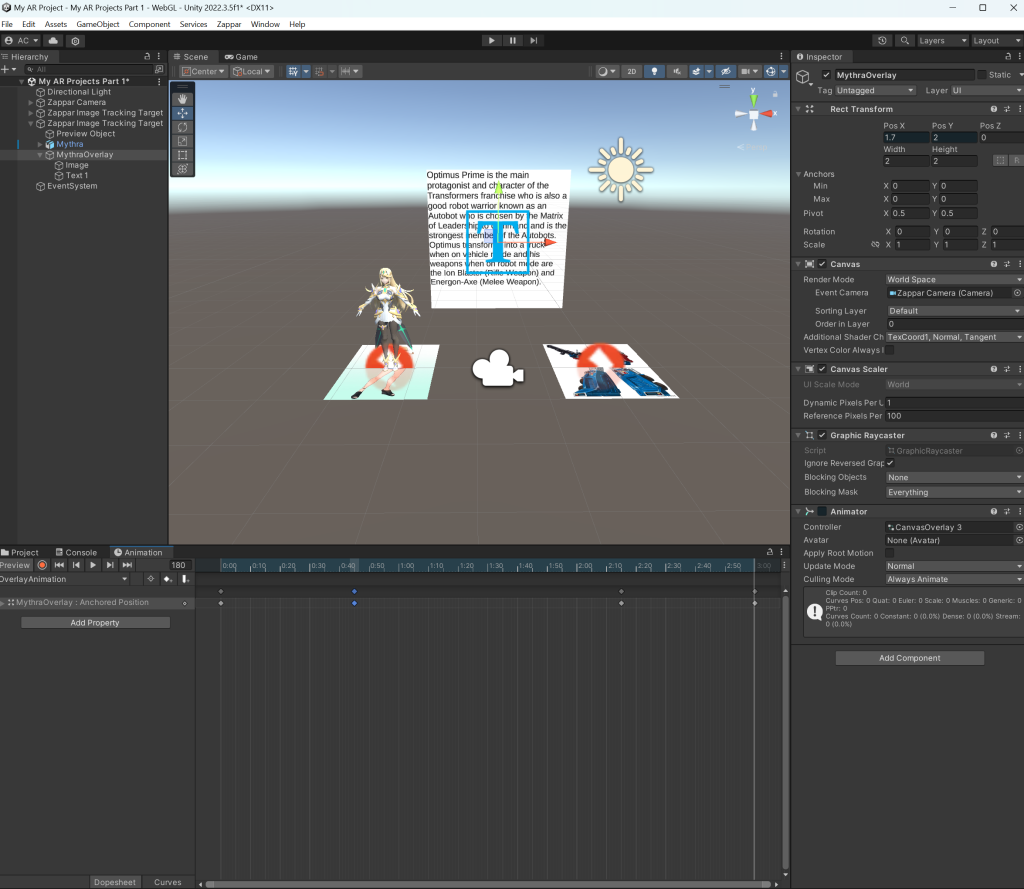
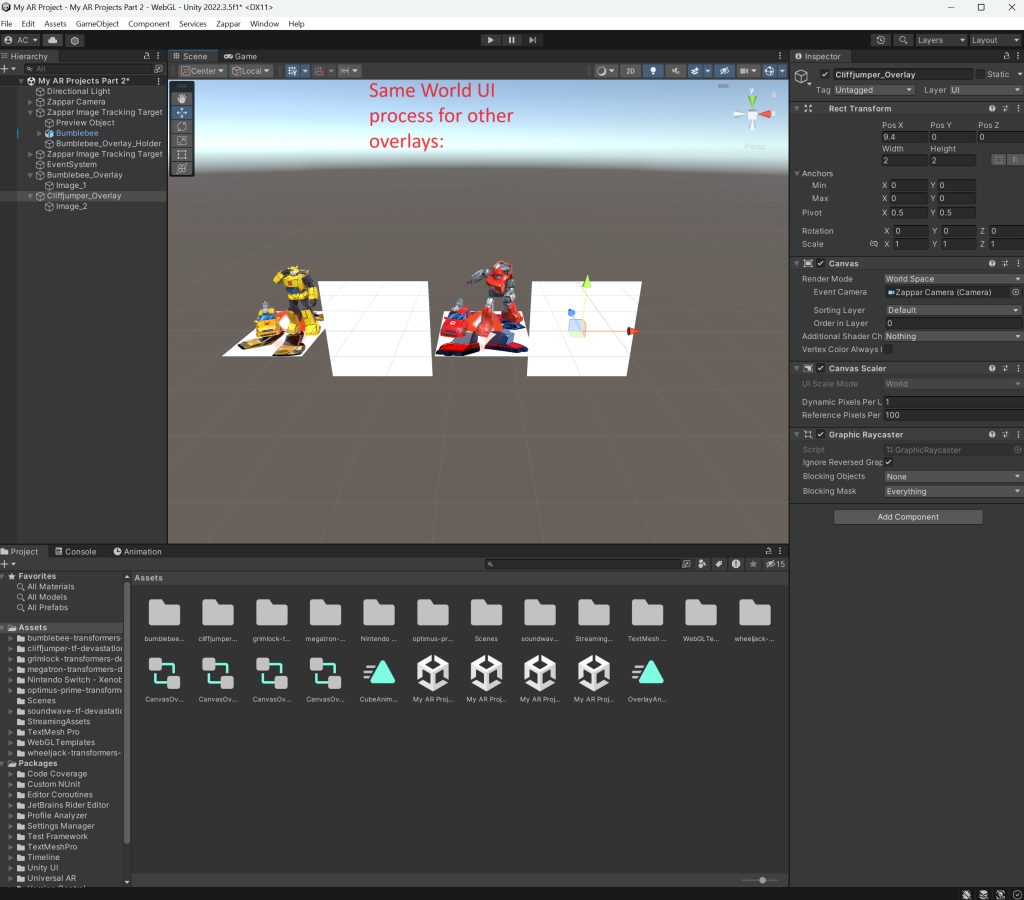
There are a whole variety of new techniques I have learnt as I decided to add overlays with animations and showing texts with a few sentences to make a paragraph of facts about characters I have brought for AR projects. First I made a canvas via the + sign, UI and Canvas, bringing up a CanvasOverlay for my Optimus Prime AR tracker.

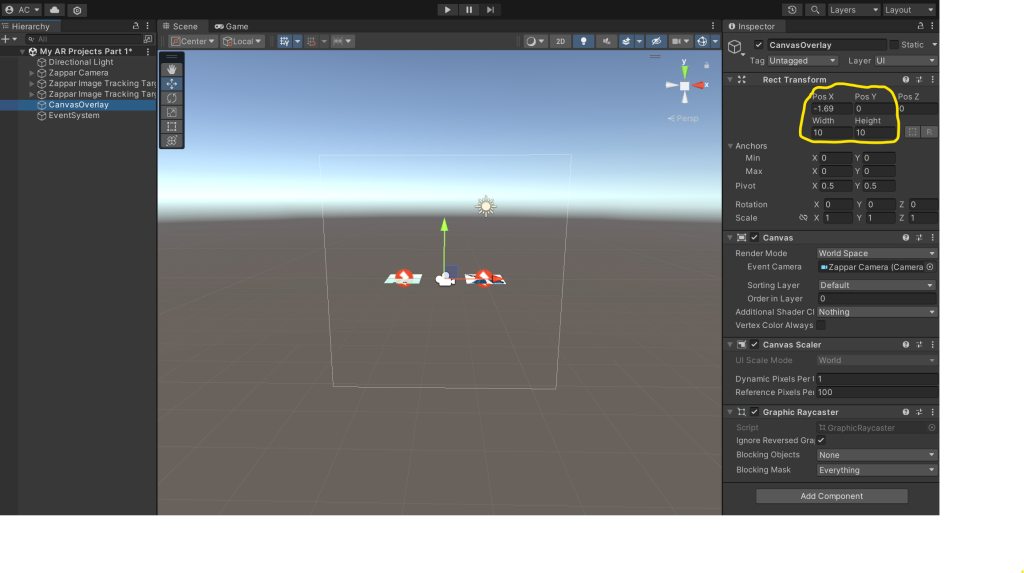
I then clicked on the Canvas Overlay where I dragged the Zappar Camera to a black box next to Event Camera to ensure every Overlay would be seen in AR projects. I also adjusted the overlay’s x and y position axis, as well as its width and height, which are more new techniques have learnt.
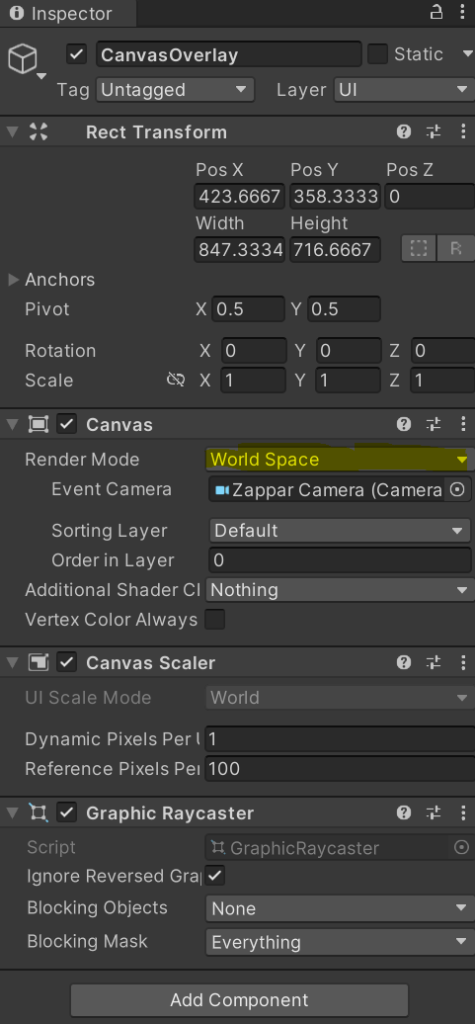
Another new technique I have also learnt is setting the Render Mode in the Inspector to World Space that also ensured Canvas Overlays used would appear in AR projects.
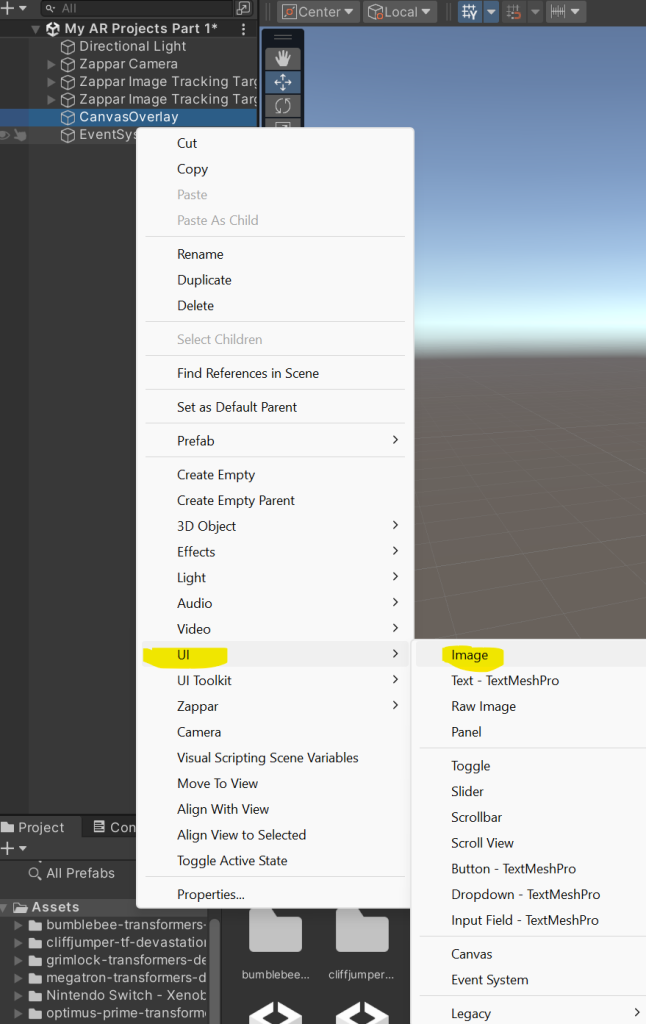

I then added an image that is made as an overlay for texts to write every character fact in a few sentences for every overlay every character should have next to them, another new technique I have learnt. I then made the image a child of the overlay.
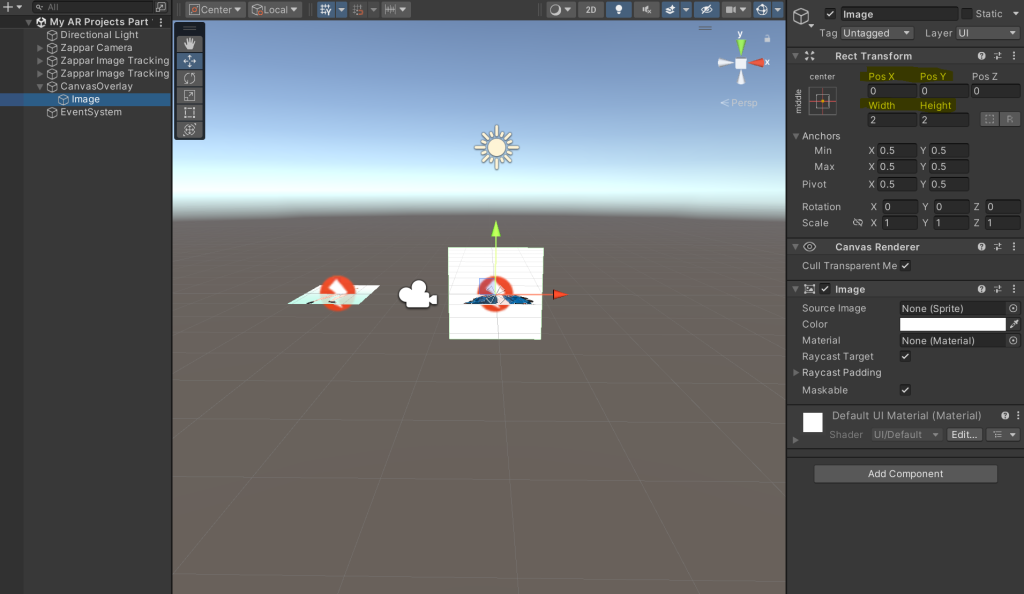
Clicked on CanvasOverlay and Image, ensuring their position axis are set to 0 and its width and height are set to 2 to start with. Set the image’s colour to white after ticking its colour gradient.
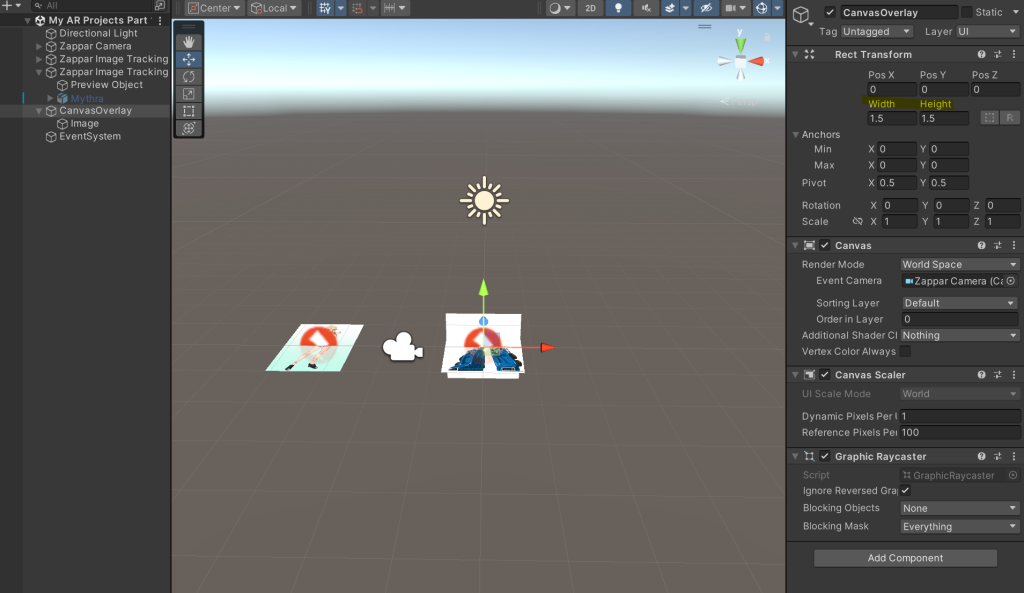
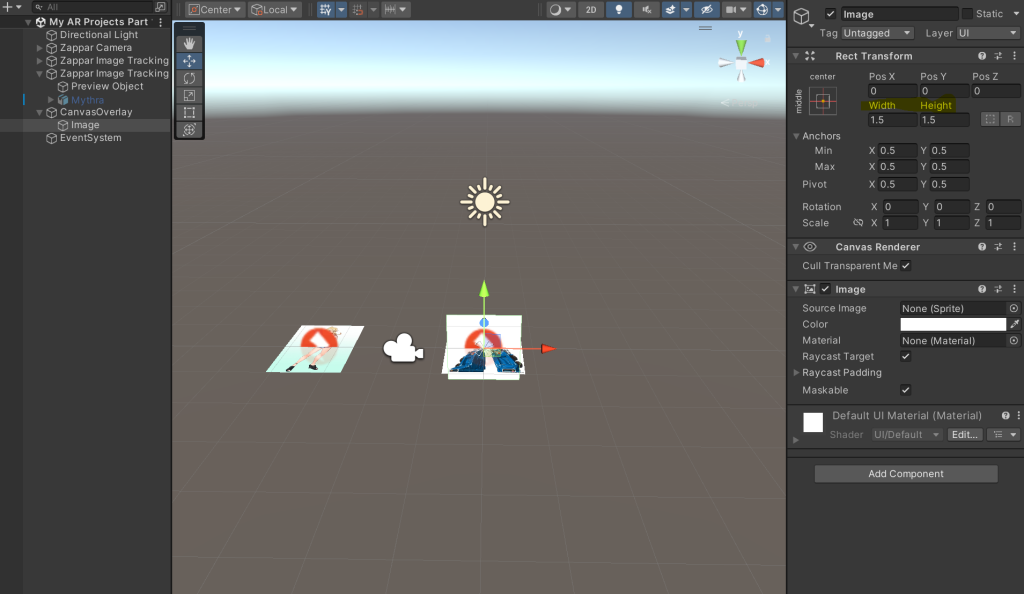
I then decided to put the width and height of the Overlay and Image to 1.5, ensuring it was the right size I required.
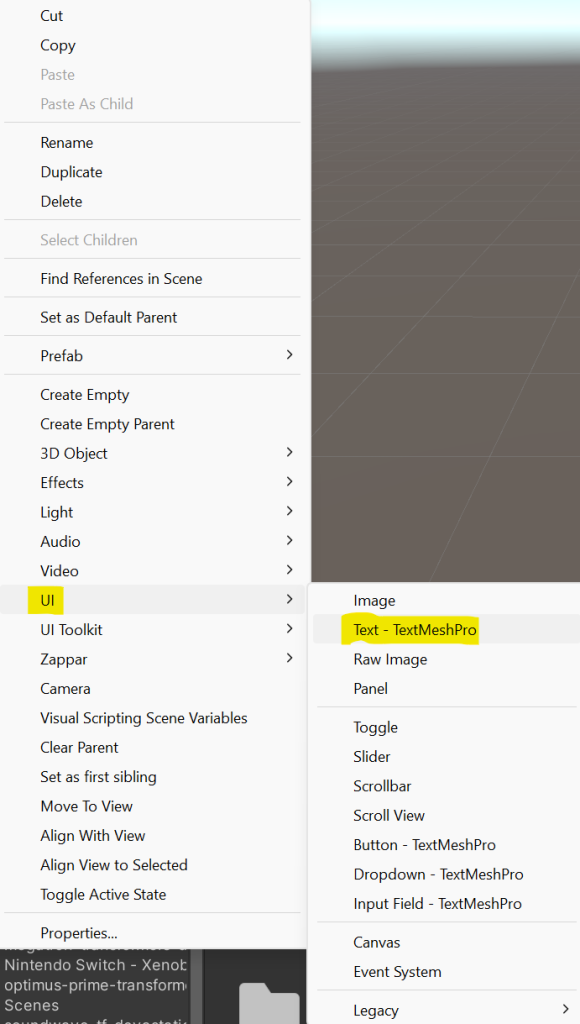

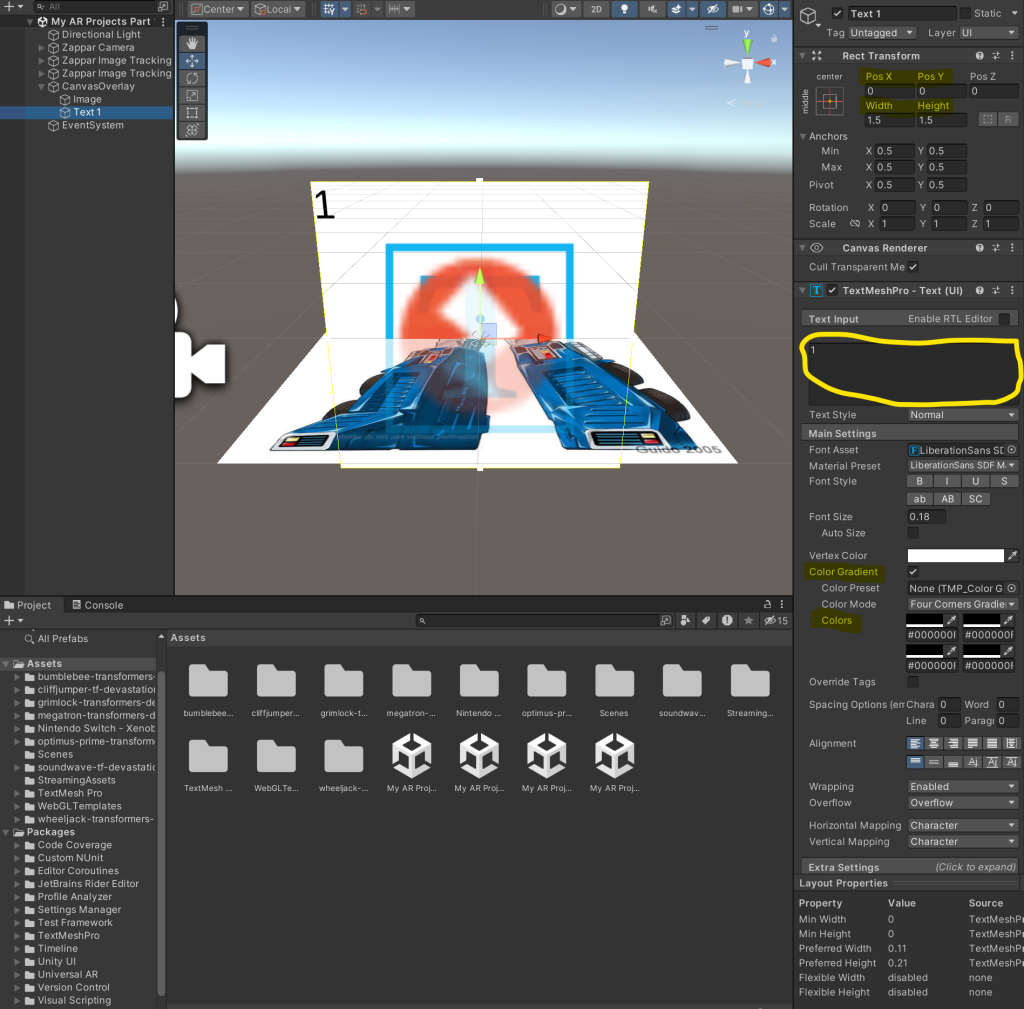
I created a text via Right Click on CanvasOverlay, UI and Text – TextMeshPro, ticked its colour gradient and set its font colour to black so I can see whatever I type.

I clicked on CanvasOverlay via Hierarchy before adding an animation for it.
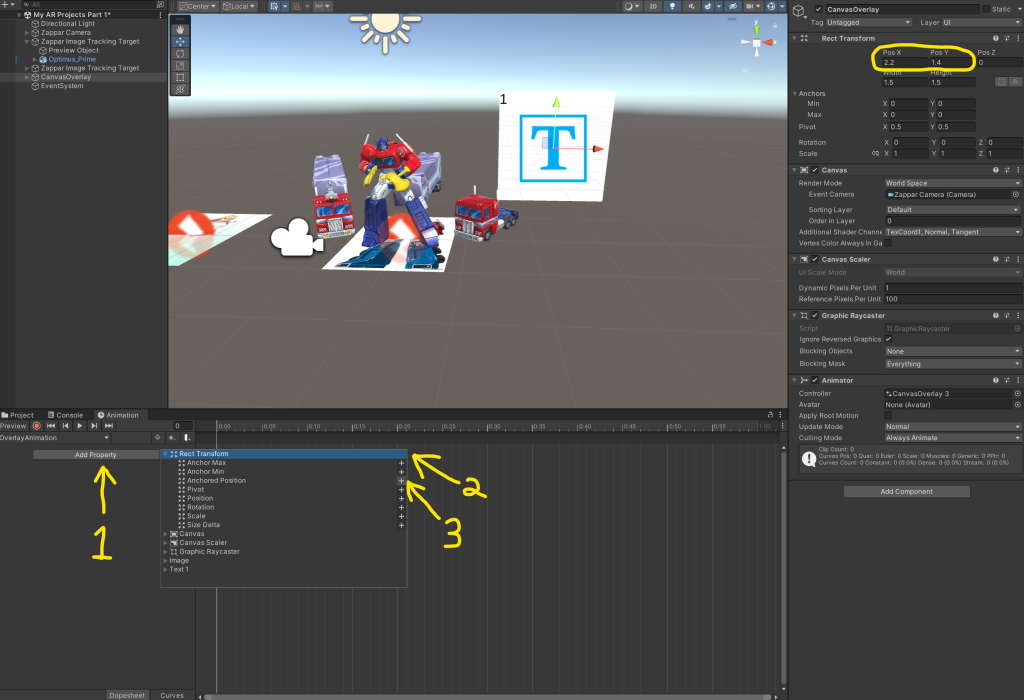
I clicked on Add Property, went on Rect Transform and clicked the plus button next to Anchored Position to add an animation that uses x and y position axis for the Overlay.
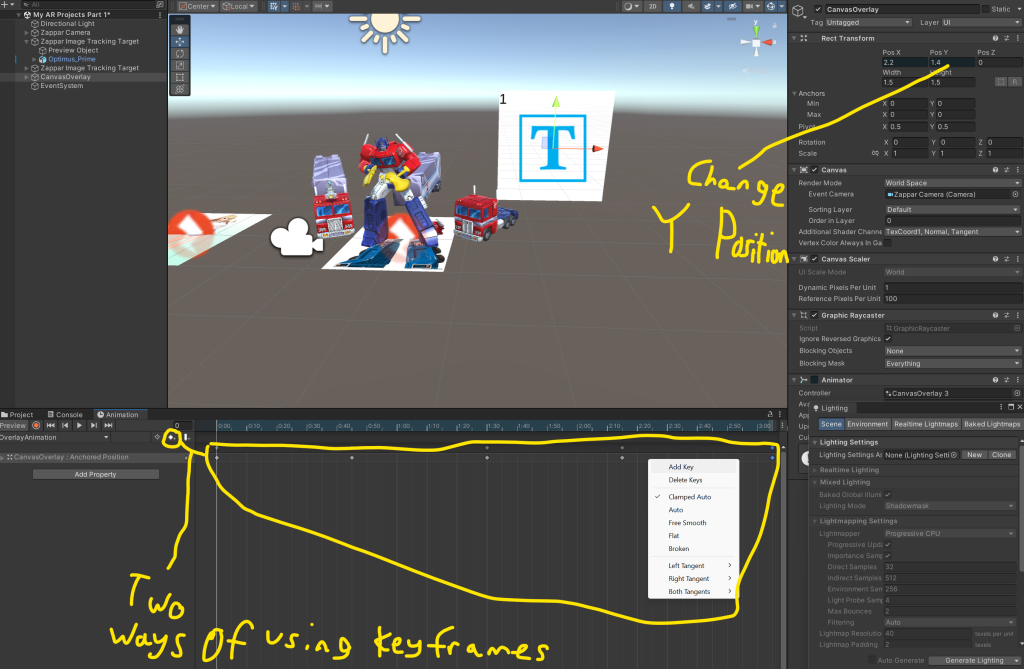
I added keyframes for every character’s Overlay, but there are two ways I added keyframes, one by clicking the add keyframe icon or right-clicking on the keyframe area and clicking on add key. Then I made all overlays for my characters move up and down, adding 5 keyframes where I set the first, third and fifth keys to the same Pos Y values, the second key to a larger Pos Y value and the fourth key a smaller Pos Y value. Those are more new techniques I have learnt.
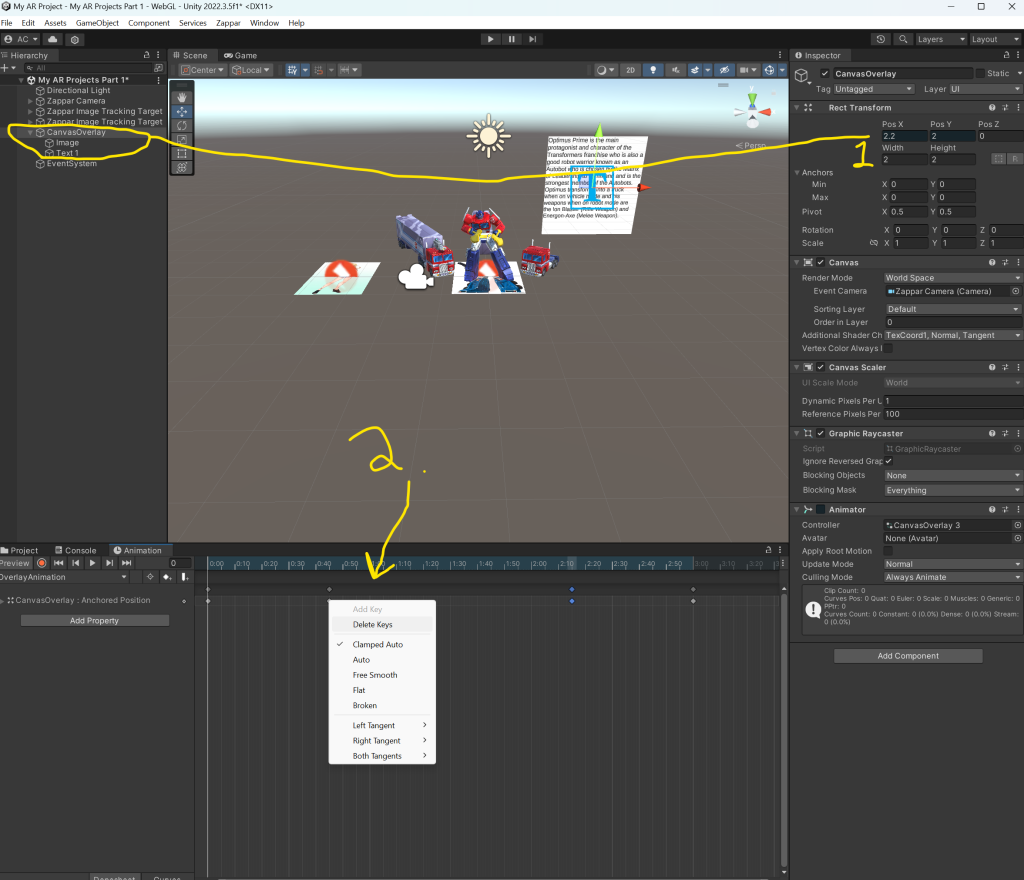
Another new technique I learnt is to delete keys by right-clicking on a key and click Delete Keys whenever I felt the animation for every Overlay is incorrect.

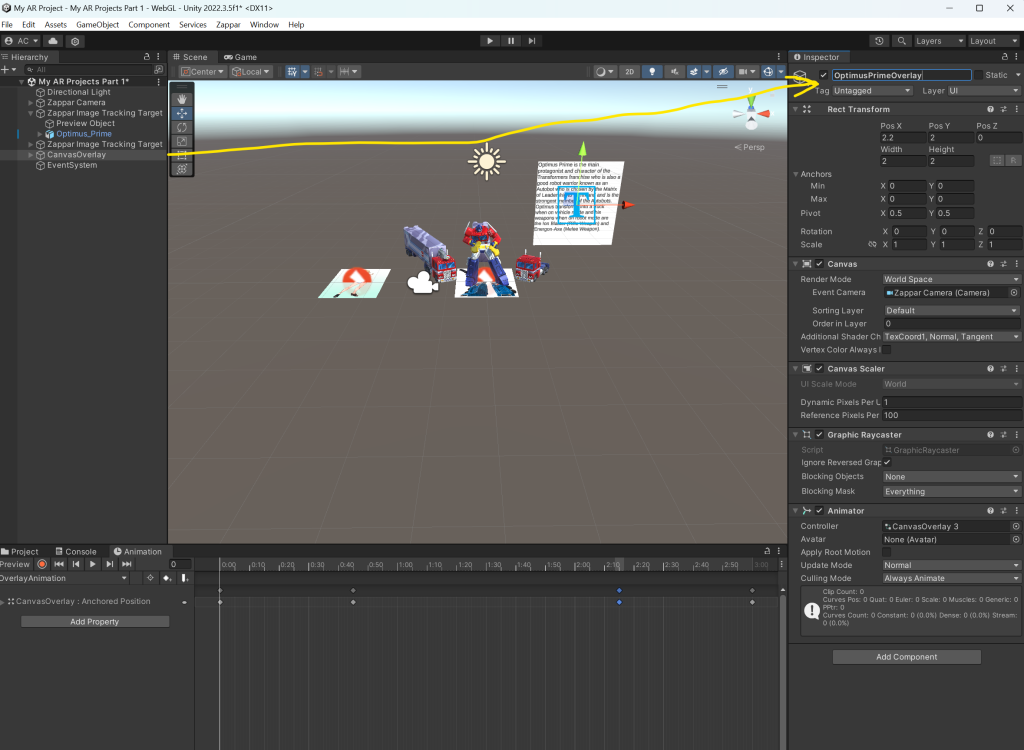
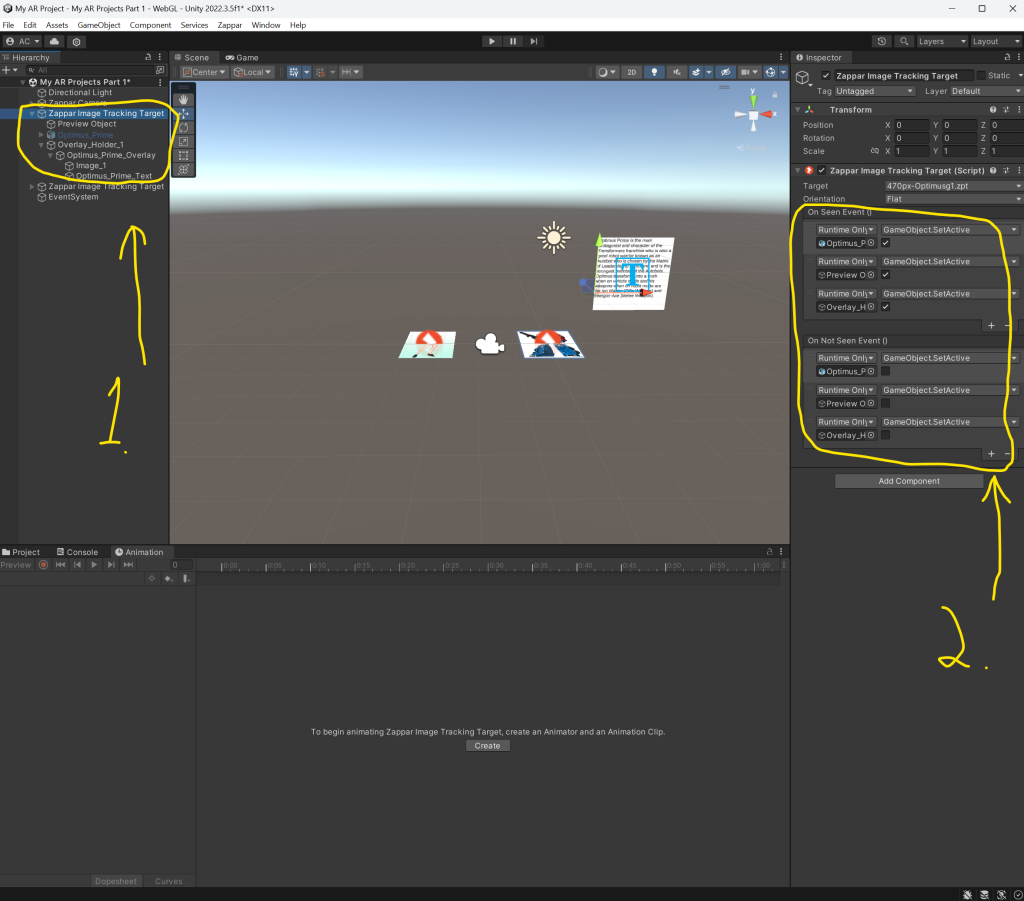
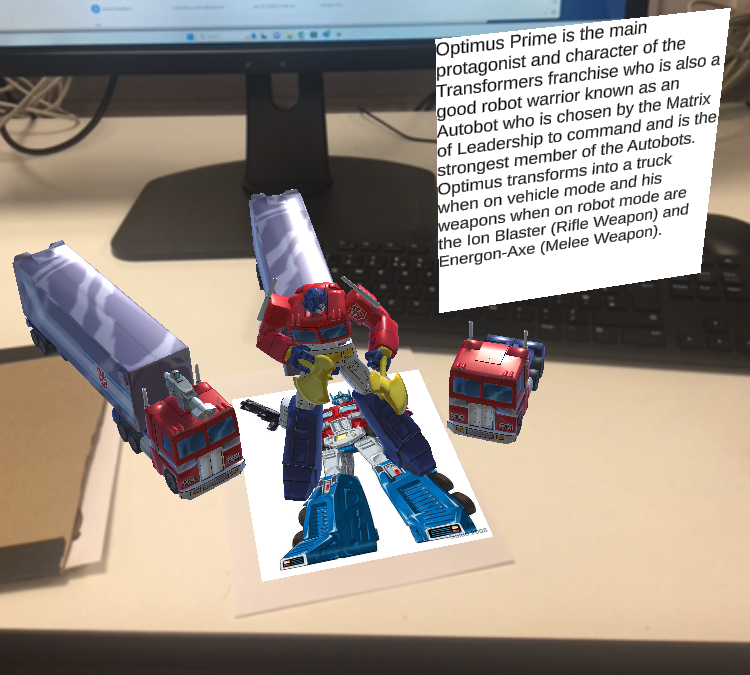
I then typed a few paragraphs about Optimus Prime, which is a new technique I have learnt and afterwards, I changed the name of the canvas overlay to OptimusPrimeOverlay to ensure the overlay is a description on the main Transformers character.
I then repeated the same process of adding On Seen and On Not Seen events for the overlay of Optimus Prime.

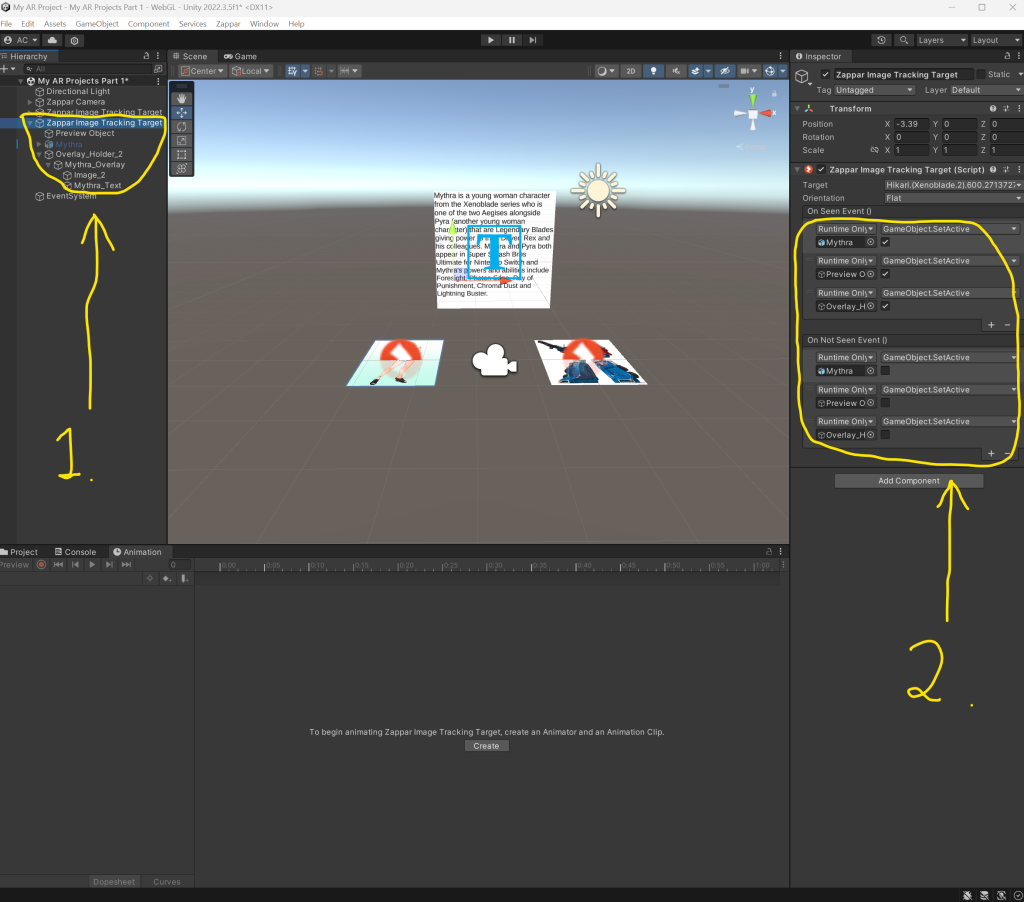
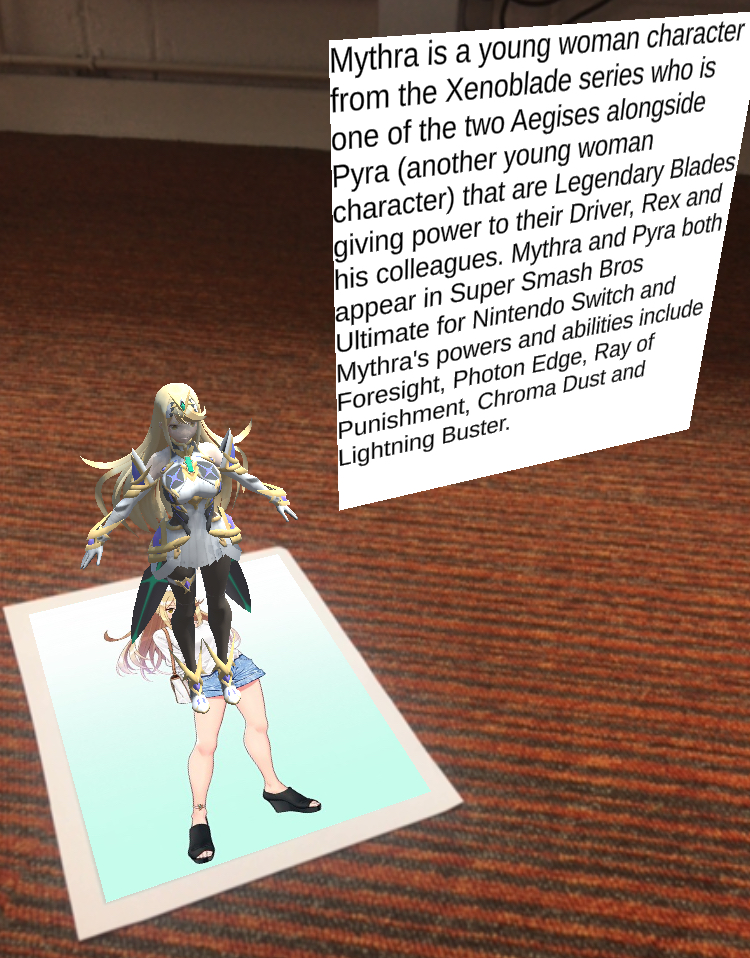
This image has labels that show what I have done looking at it, but firstly, I cloned the Optimus Prime overlay before I hid the main character’s overlay and model by unticking them in order to make an overlay for Mythra. Afterwards, I removed the anchored position property for Mythra’s overlay to re-add it to ensure the animation would work.


I repeated the same process of animation for the Mythra overlay, changing the Position Y values of every key. Whenever my animation for Mythra’s overlay went wrong for staying clicked on one of the keys to change Pos Y values, I went back and put 2.2 for Animation Key 2, clicked on Animation Key 3 to put 1.8 and clicked on Animation Key 4 to put 2 for their Pos Y values ensuring it is animated well enough to be ready to be published.
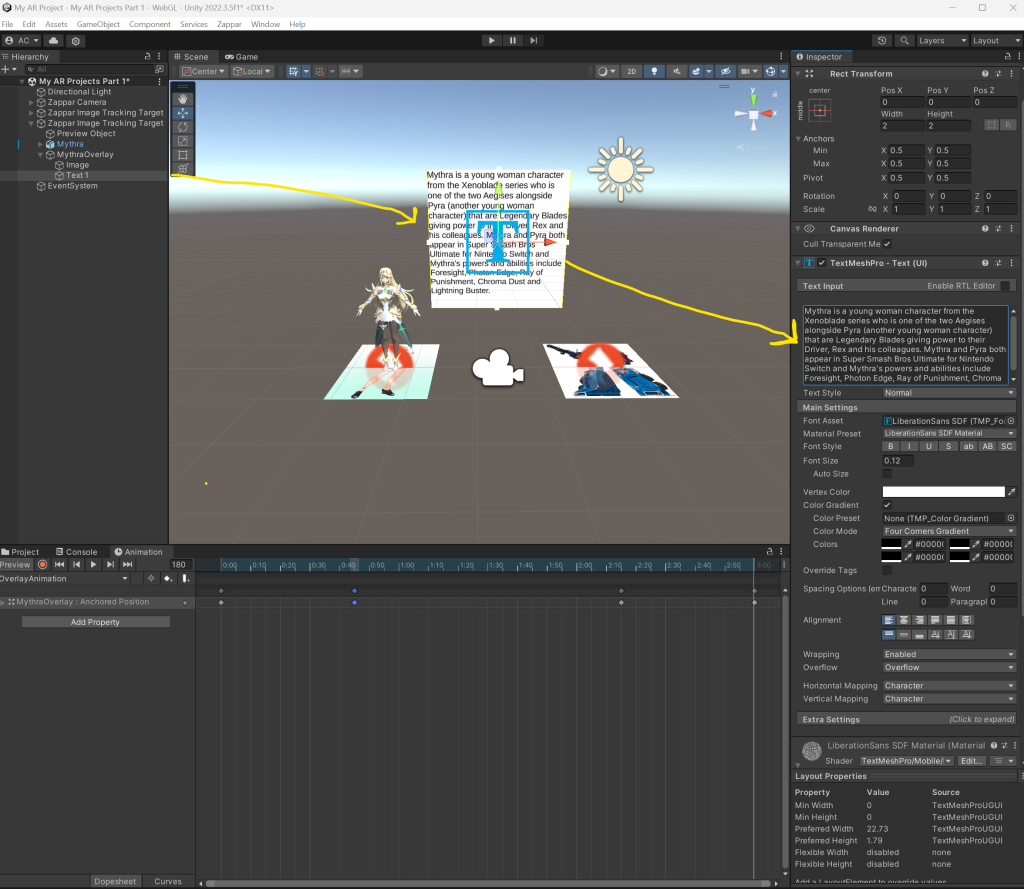
After sorting my overlay animation out, I went through the same process of changing text fonts to black on a white overlay background and typing a few sentences for the description about Mythra.
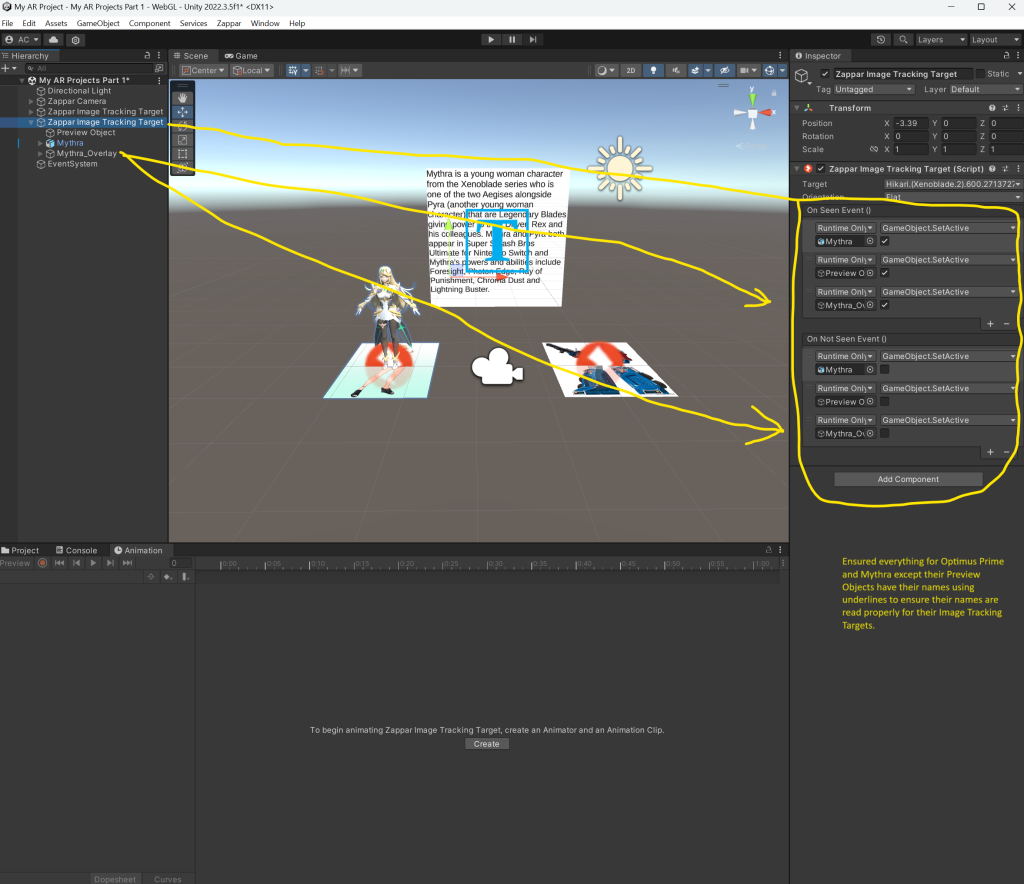
As seen in this image, I ensured every object for Optimus Prime and Mythra except their preview objects have their own names to remember whatever character the overlays are used for.
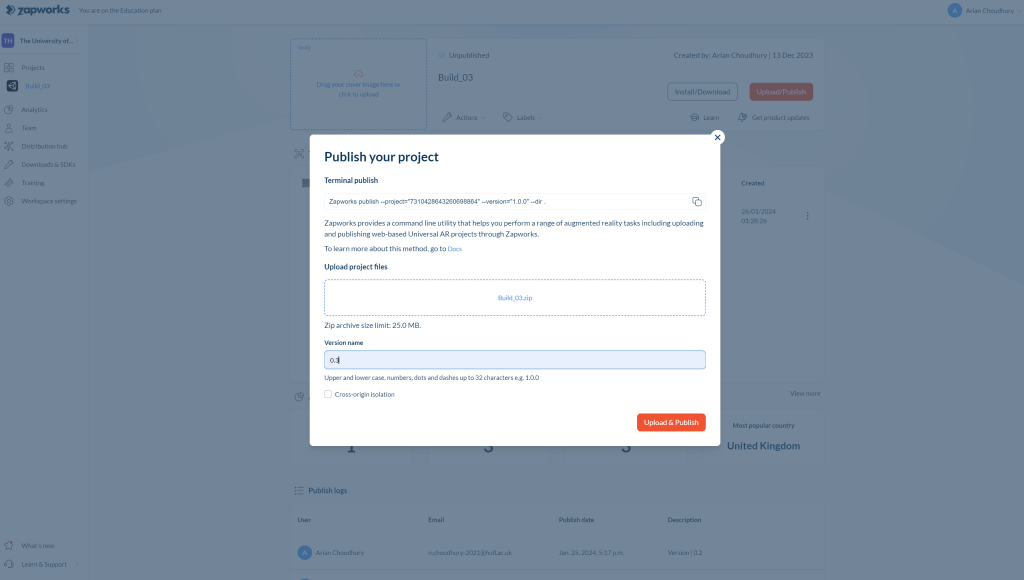
I then went through the same process of building my project as I have rebuilt Build_01 in order for its zipped folder to have under 25 MB in size ready to be published on Zapworks.
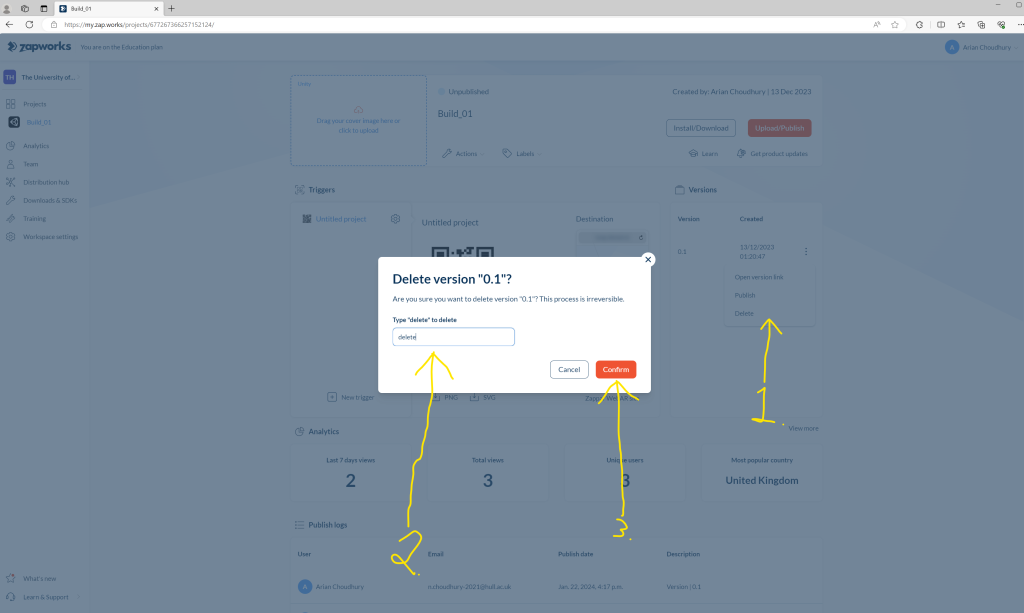
As I rebuilt my Build_01 zip, I went through the same process of unpublishing my build and deleting its version. The latter of what is at that time a new technique I have learnt on Zapworks.
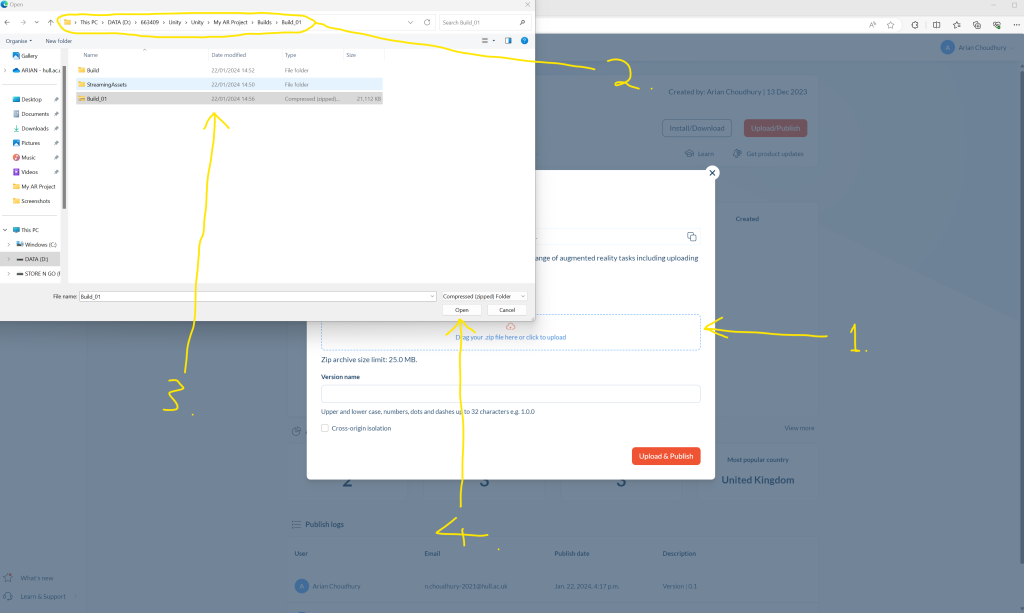
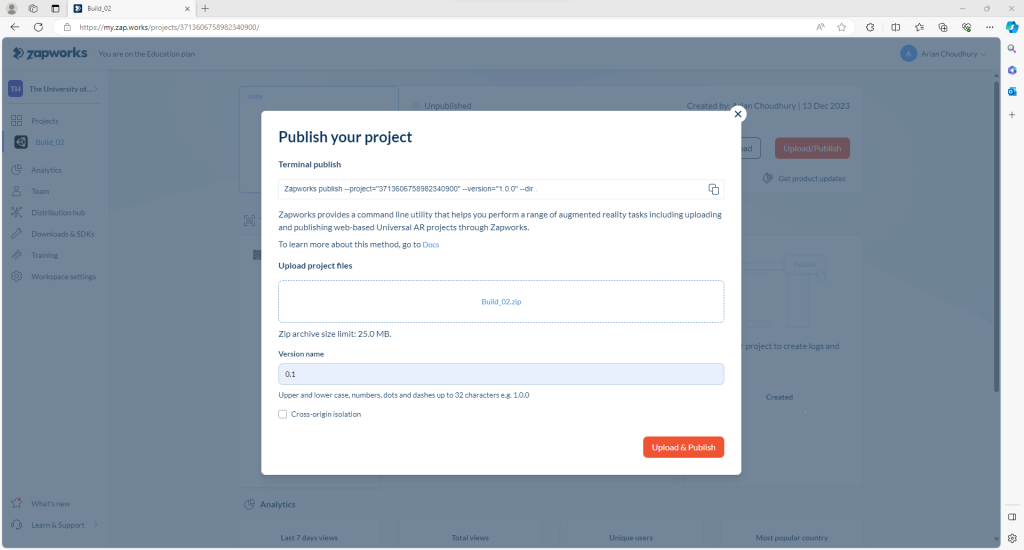
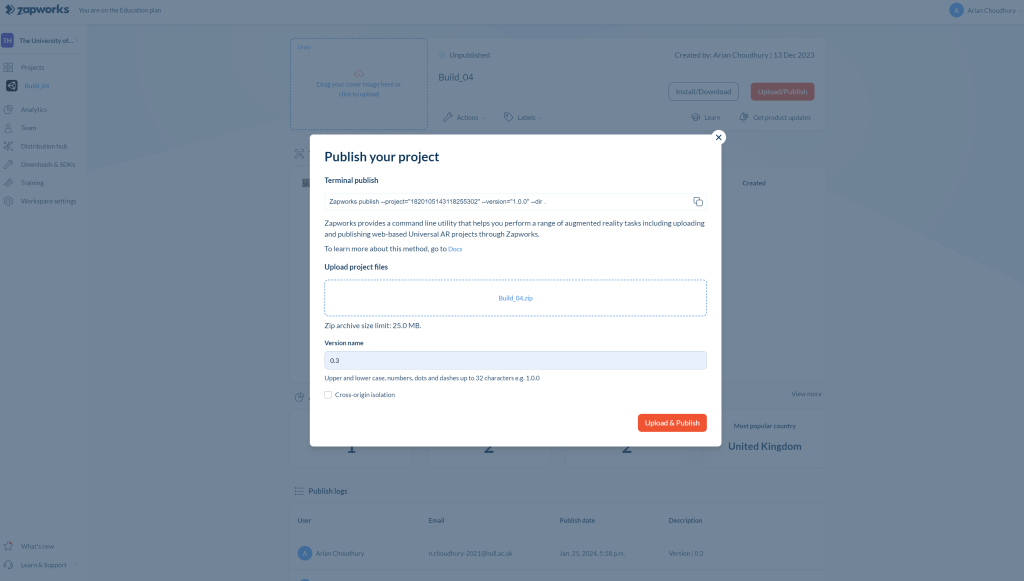
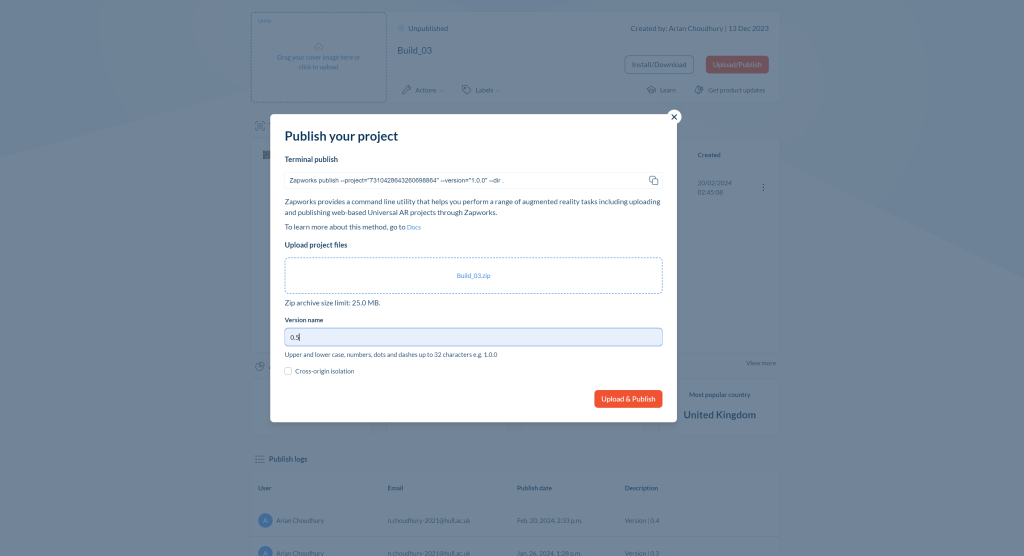
Then I went through the same process of publishing my zip folder of my project ad naming its version as 0.1
As something went wrong for my project, I went back into my Unity AR project for Optimus and Mythra, and added a new create empty project where I would rename it as Overlay_Holder_1 for Optimus Prime’s overlay.
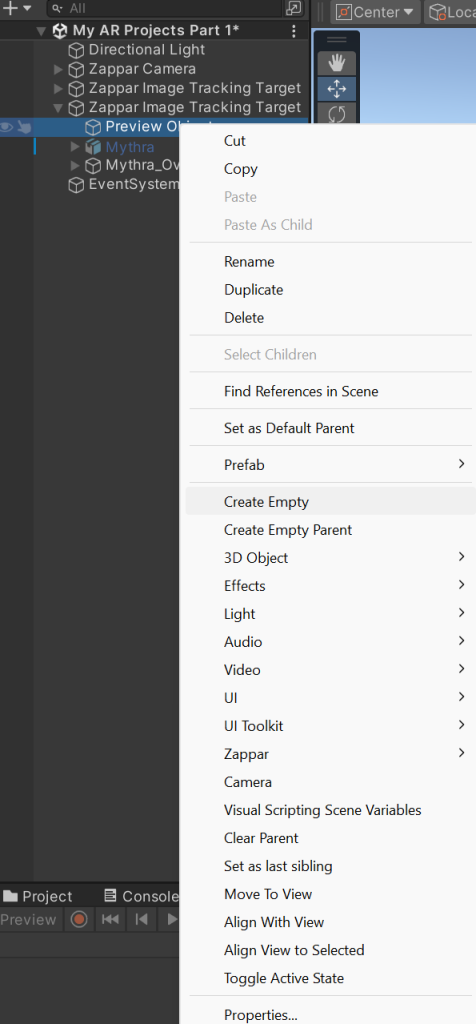
These images show how I added another create empty for another overlay holder in which afterwards, I renamed it as Overlay_Holder_2 for Mythra’s overlay.

Afterwards, I checked to see if everything is correct and ready in order to then rebuild my Build_01 zip and follow the same process of unpublishing my work and adding a new version named 0.2, ready to test the trackers out for Optimus and Mythra.
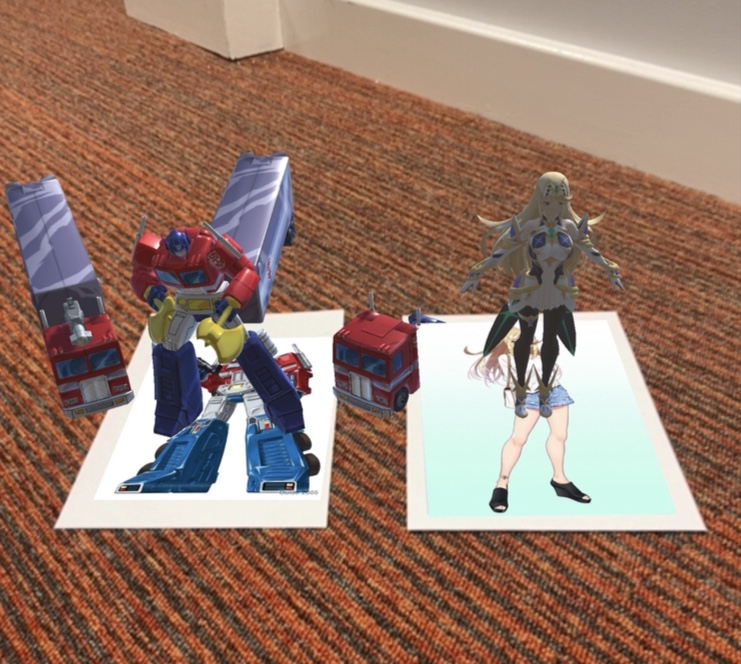
I tested out the trackers for Optimus and Mythra and it all worked out well, seeing their bio overlays move up and down smoothly.

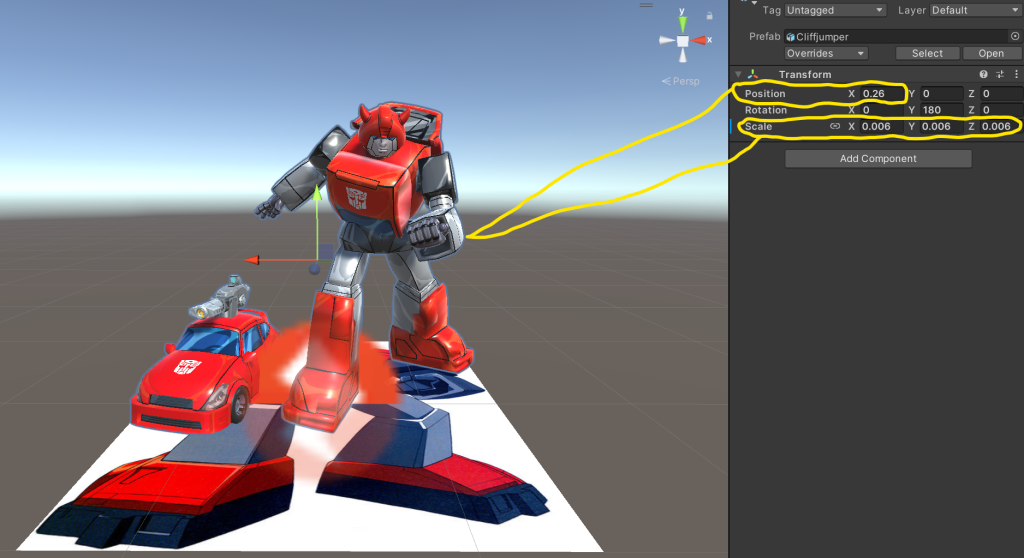
I then went back into Unity where I went to my project with Bumblebee and Cliffjumper where I rescaled sizes of their models.
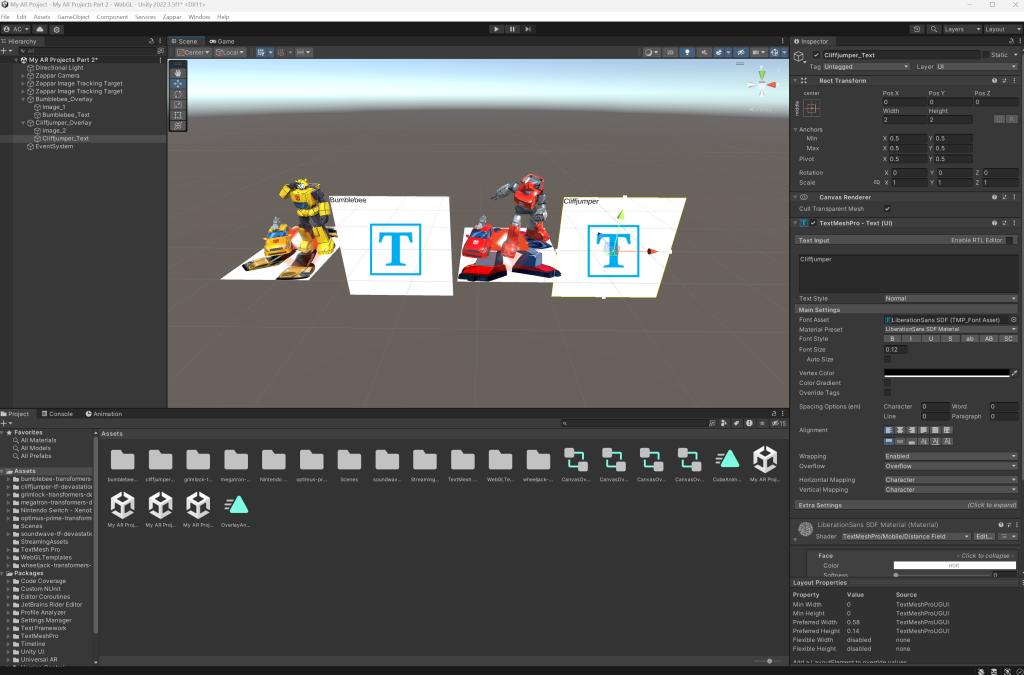
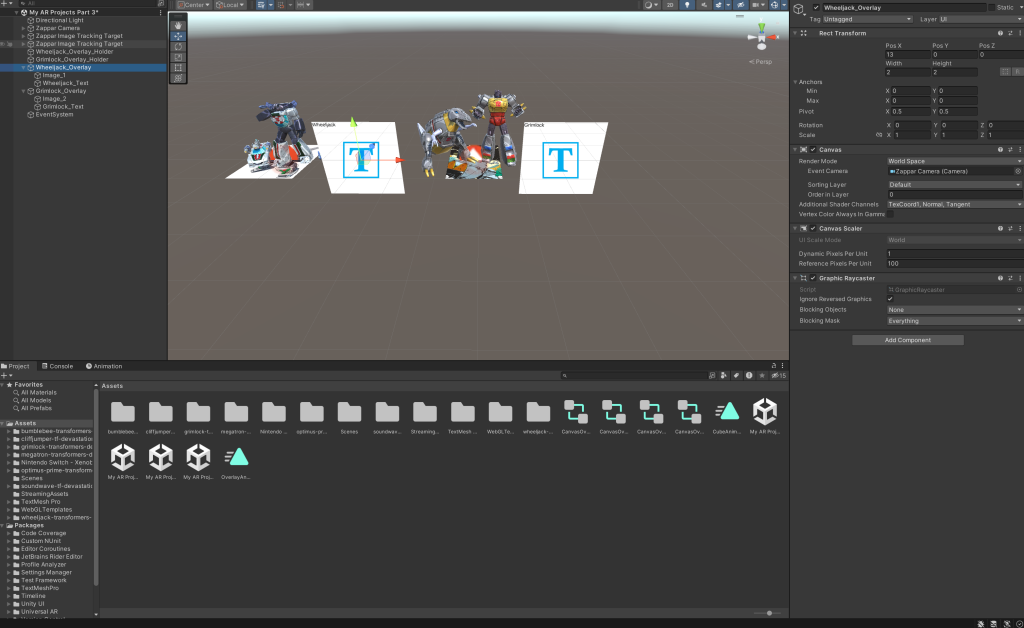

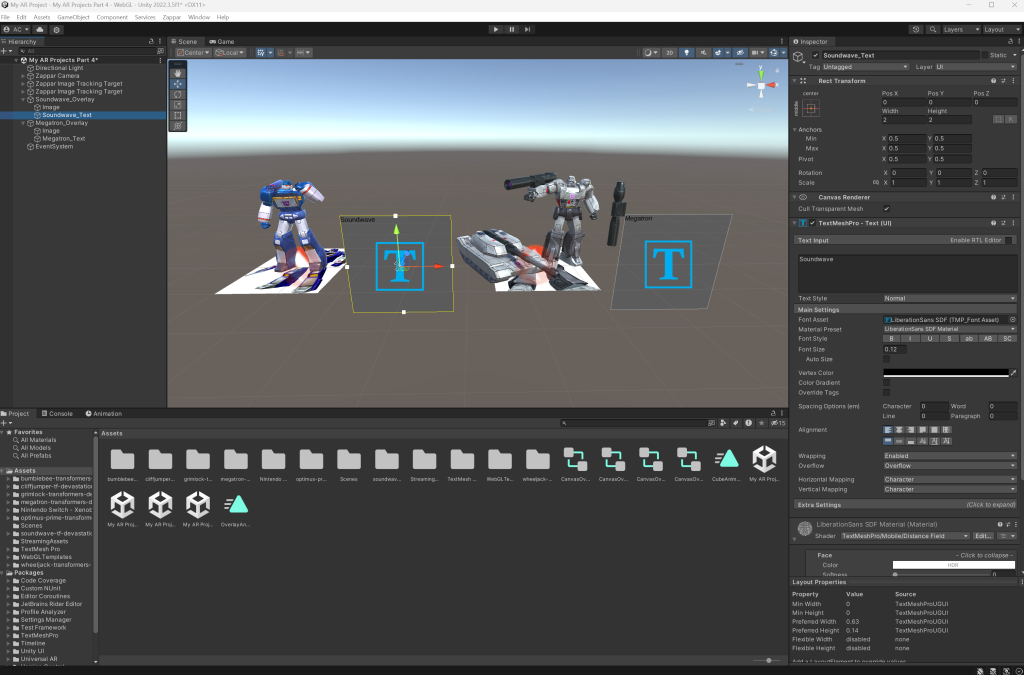

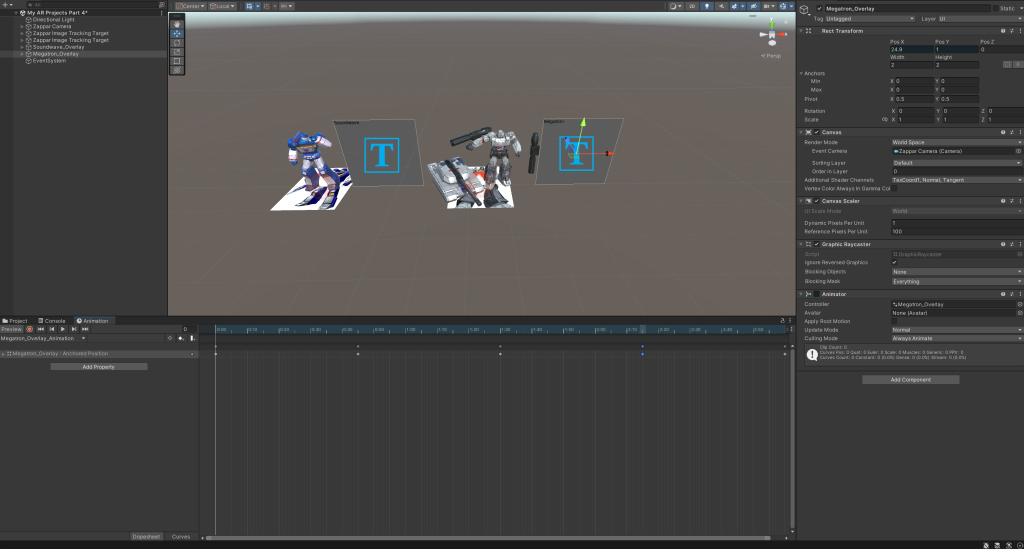
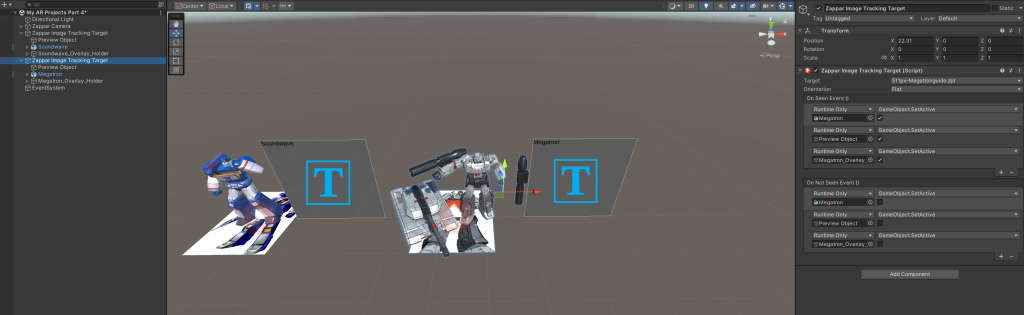
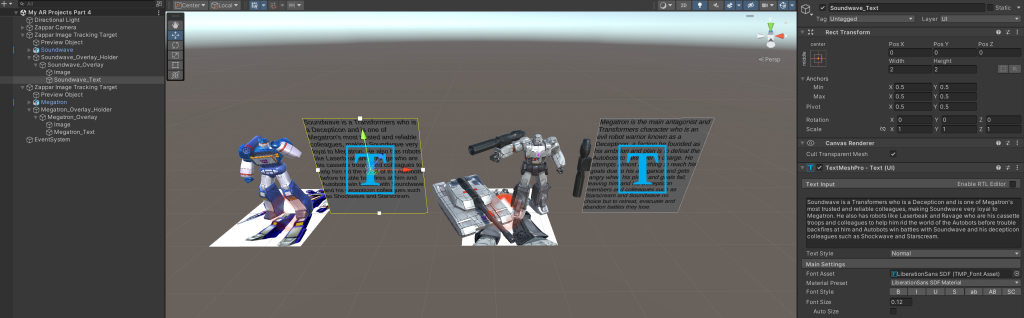
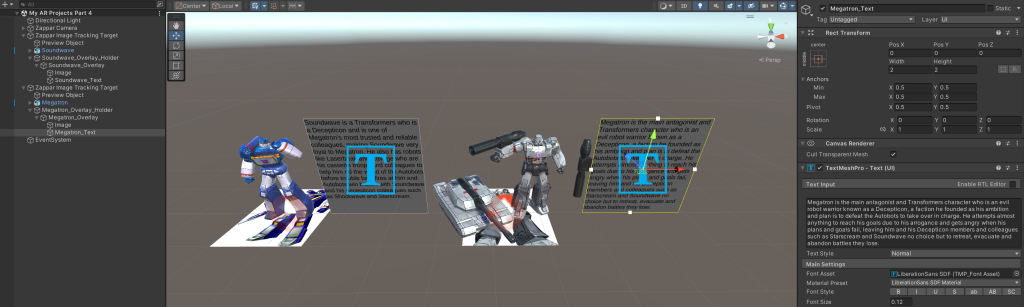
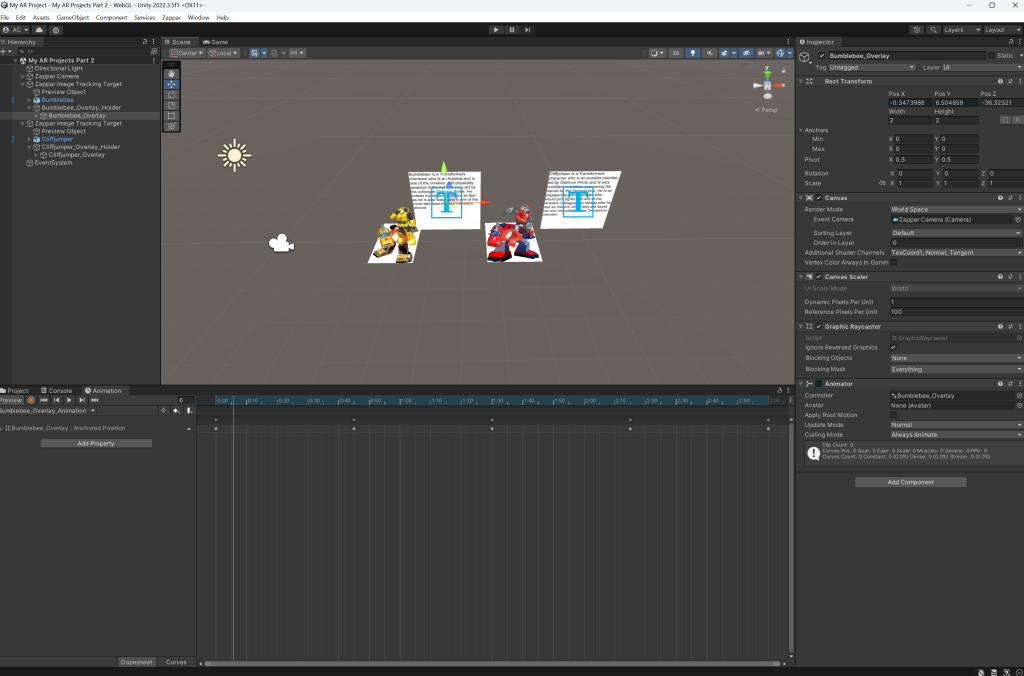
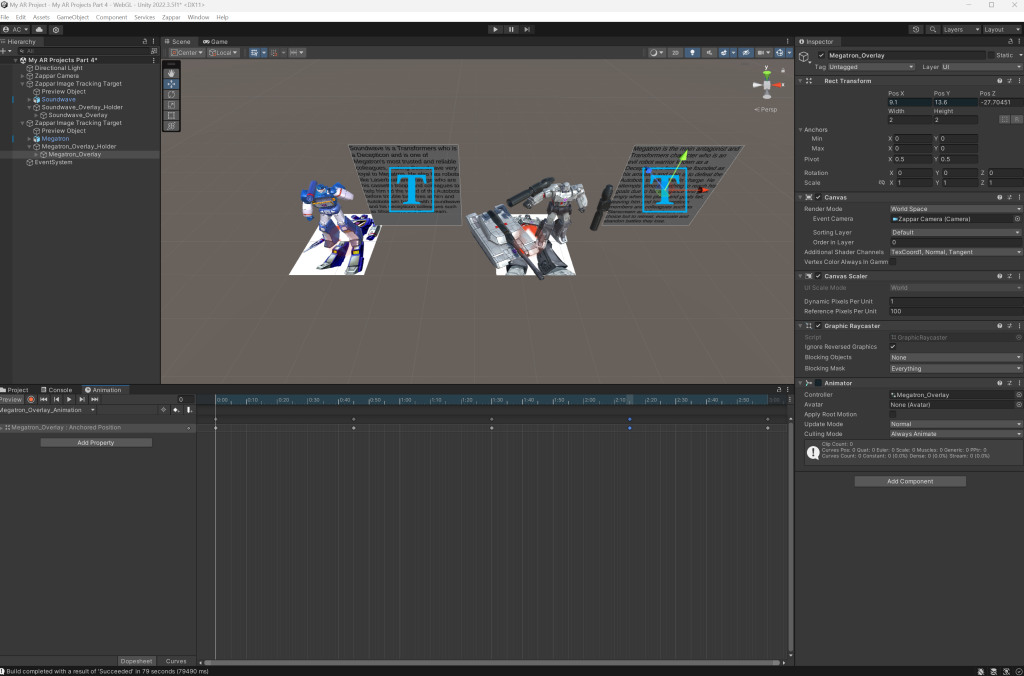
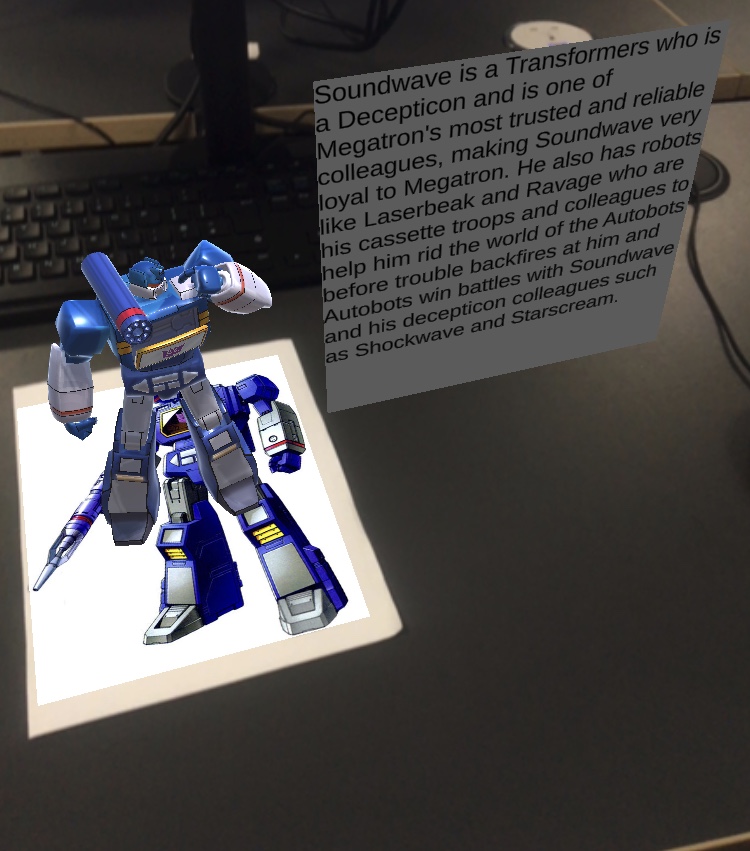
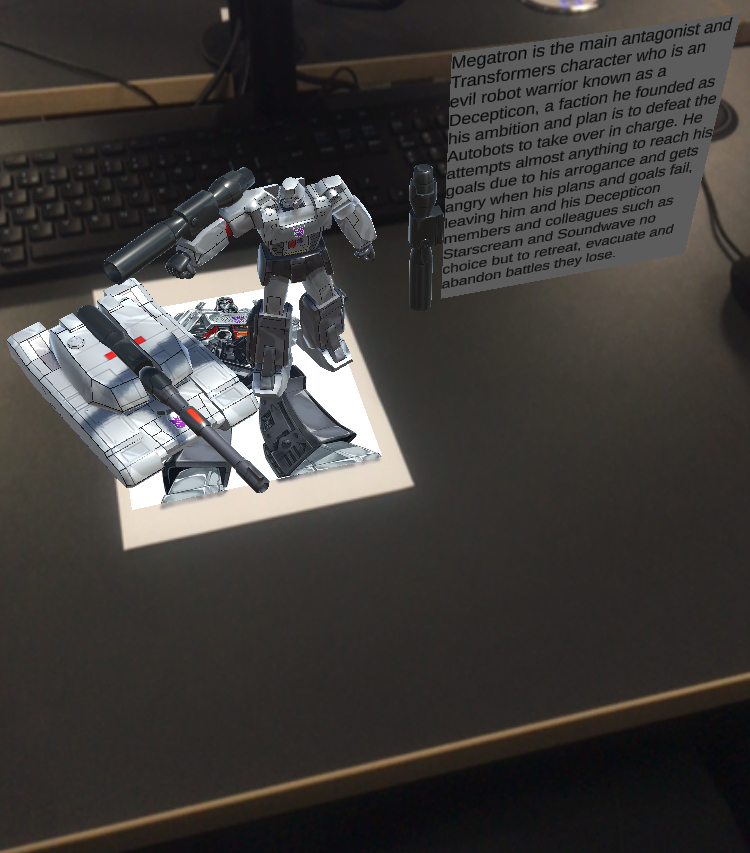
I then went through the same process of making overlays and overlay holders for other characters including Bumblebee and Cliffjumper, where for Soundwave and Megatron, I changed their overlay background colour to grey as both Soundwave and Megatron are Decepticons that are villains of Autobots.

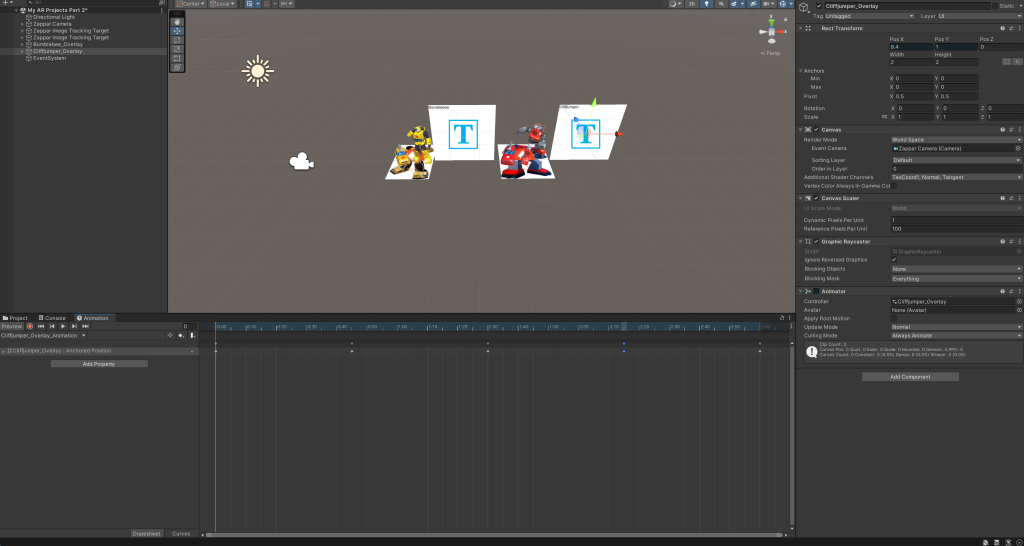

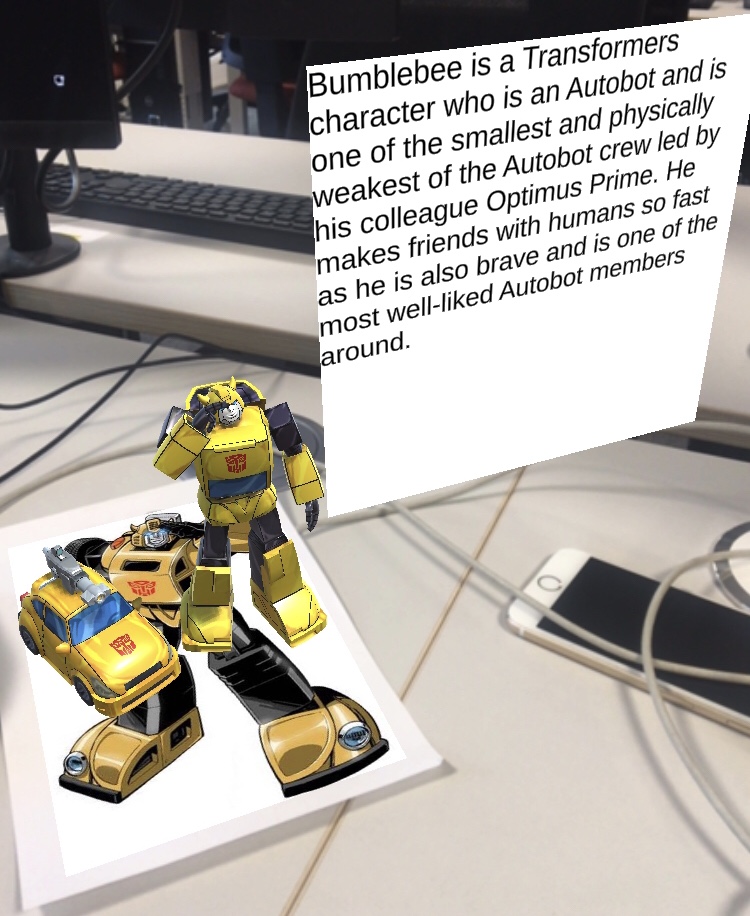
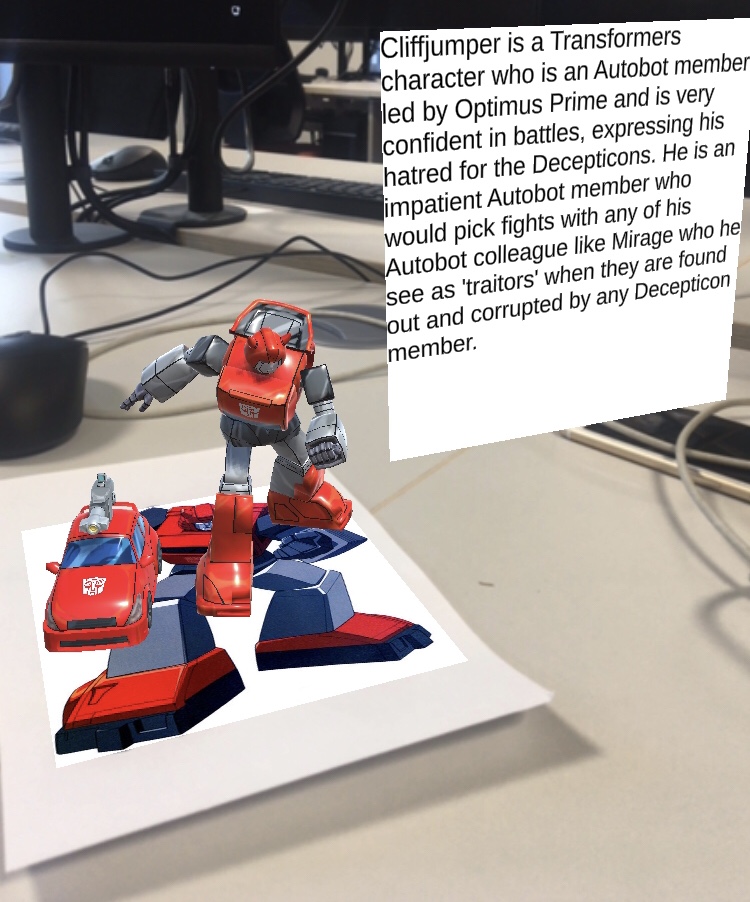
As seen by the image of Bumblebee and Cliffjumper with a yellow text, I used animation names using the remaining overlays to avoid animation errors before following the same animation process as how I have done for the 2 previous overlays.

As told in an image showing yellow text, I repeated the same process of adding on seen and on not seen events for the remaining characters and their overlays.
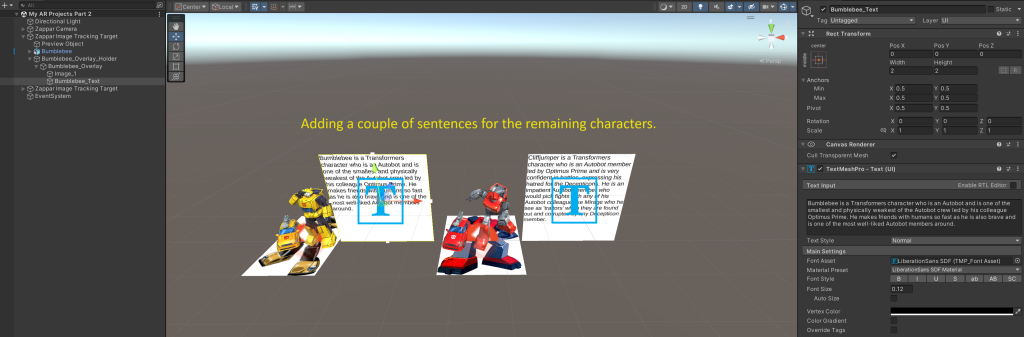
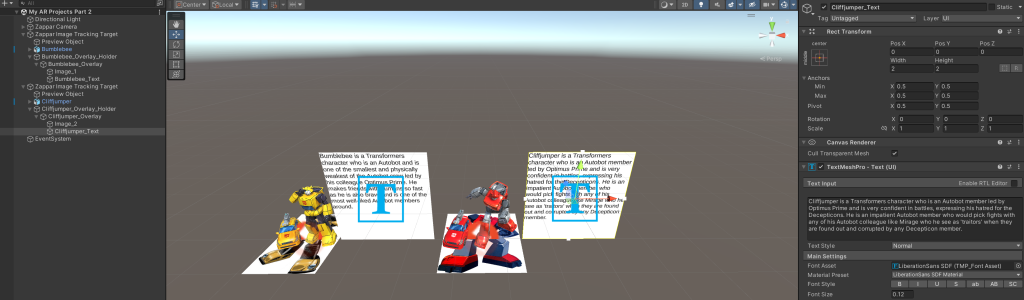
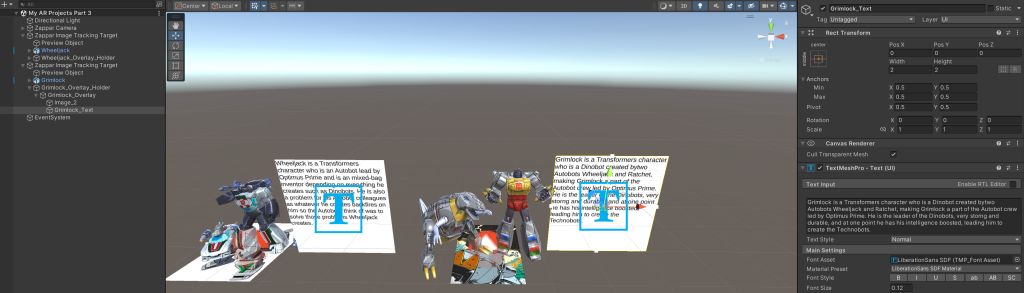
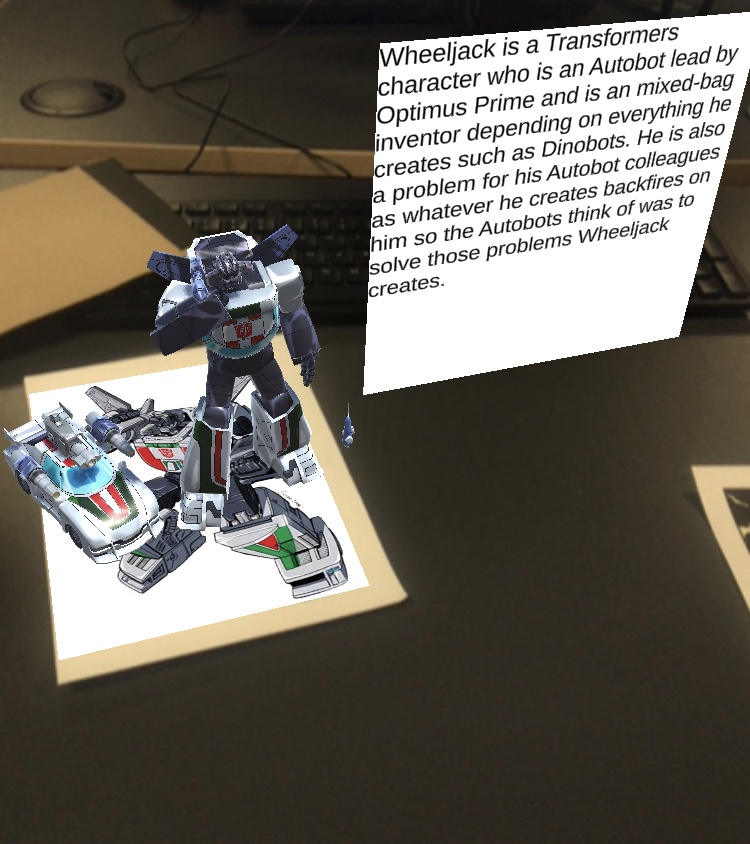
I then clicked on every overlay text where I typed a few sentences for descriptions of every remaining character.
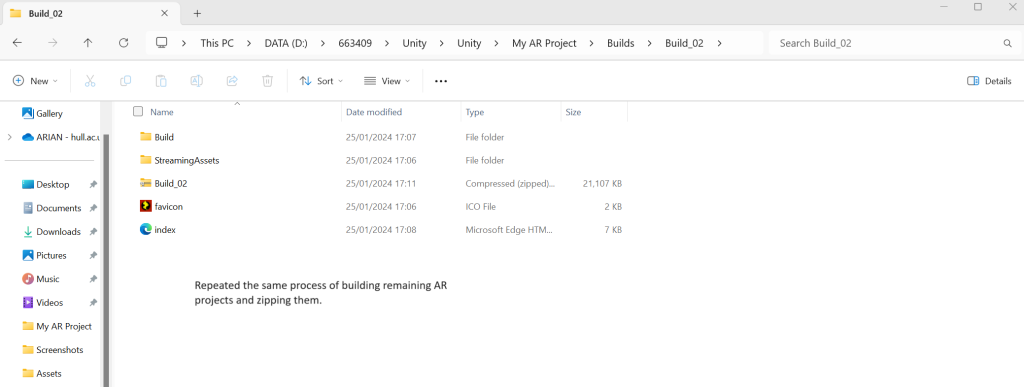
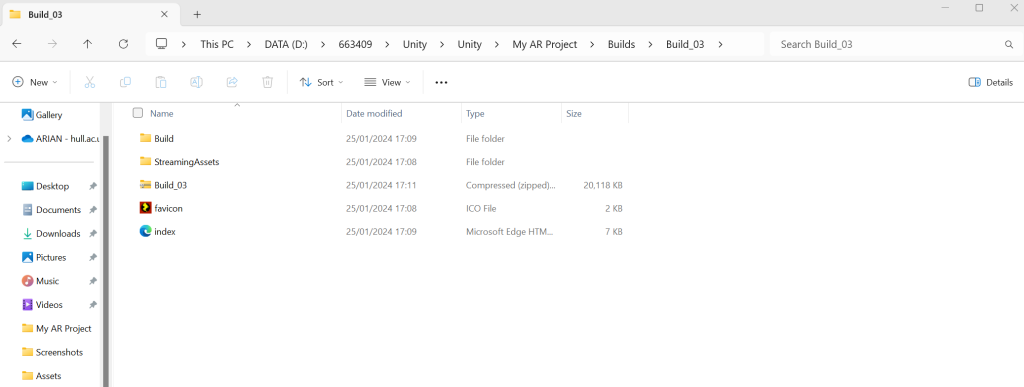
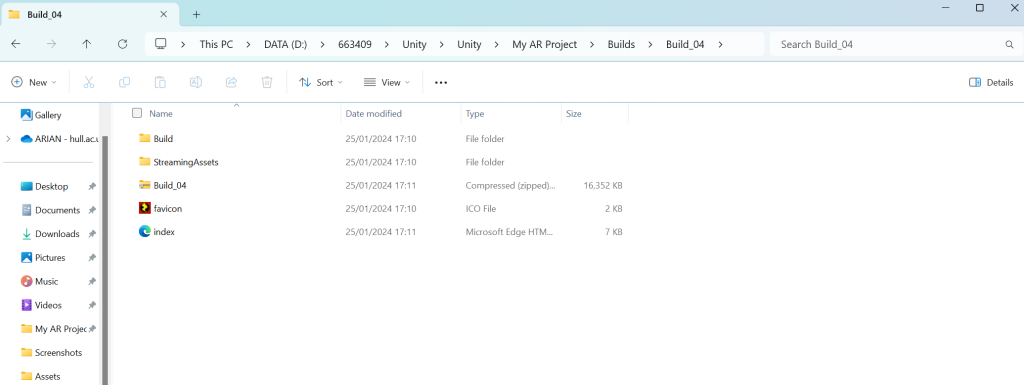
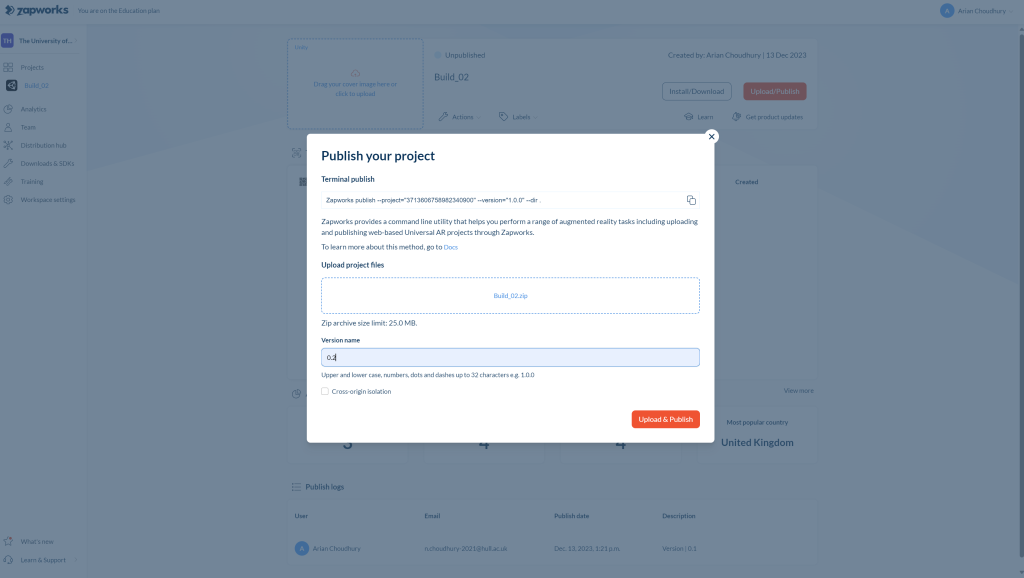

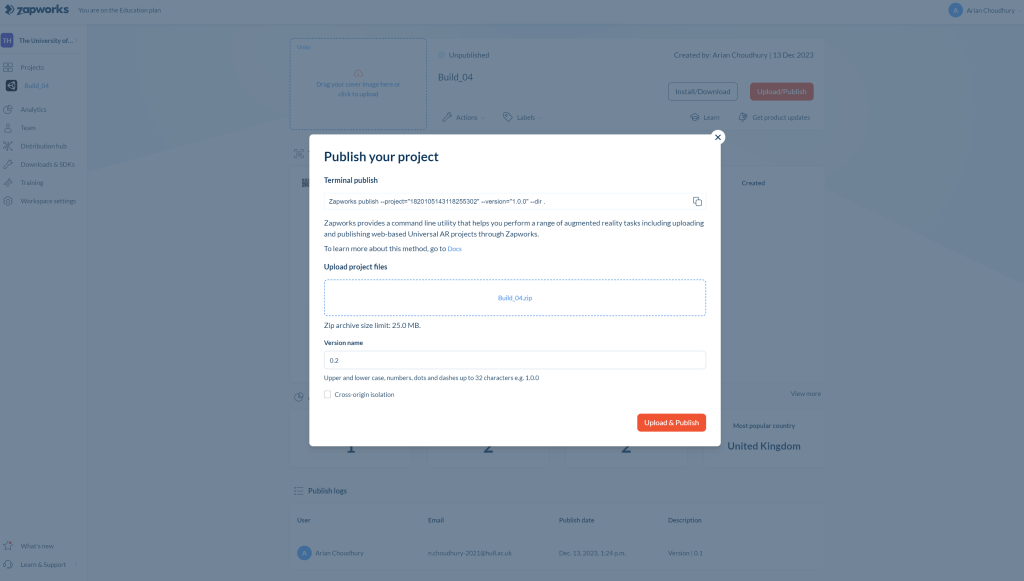
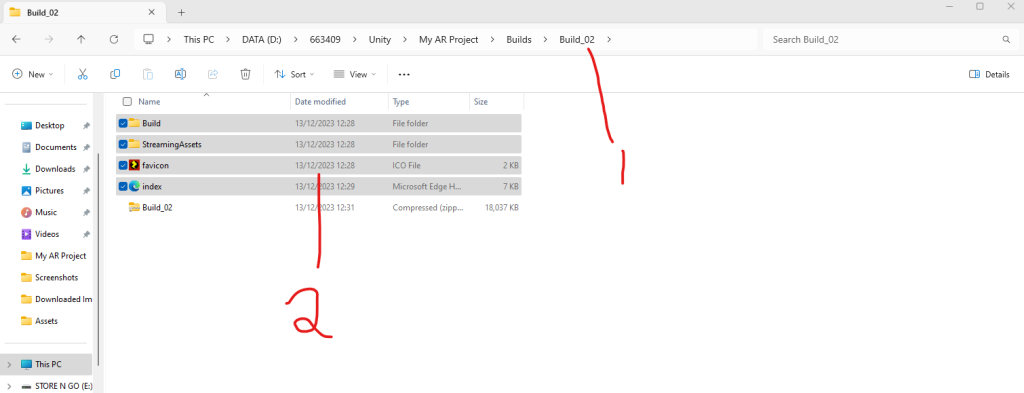
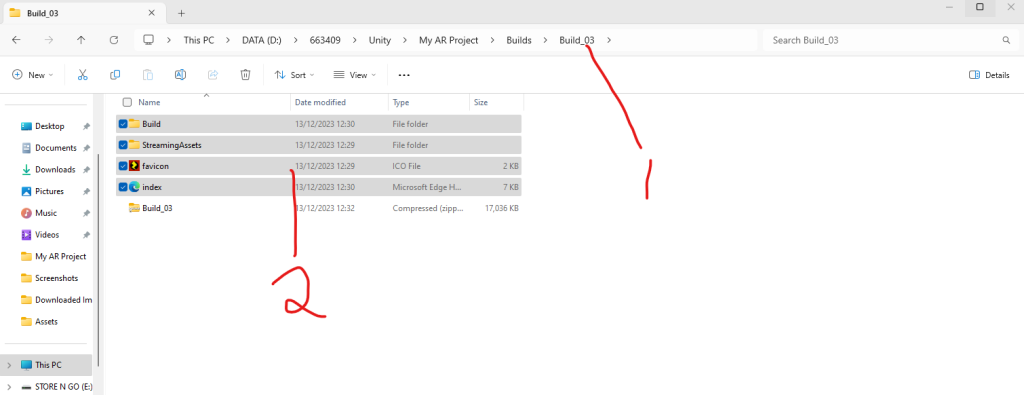
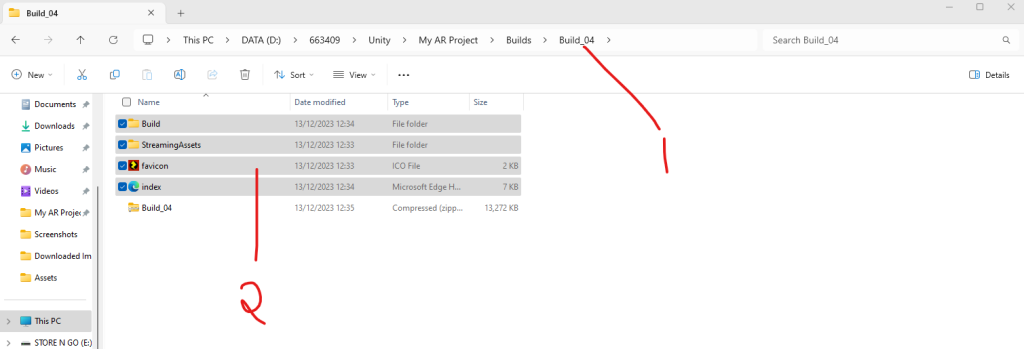
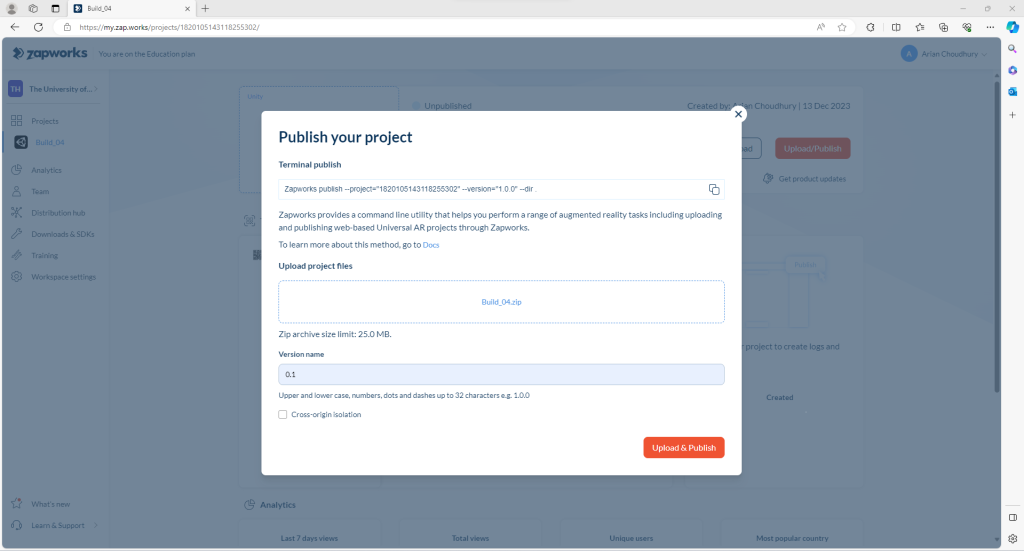
Once everything is ready, I followed the same process of building Build_02, Build_03 and Build_04 zips and publishing them in Zapworks and then putting their new versions at that time.
There were issues with the Bumblebee and Cliffjumper AR project as they were missing their overlay holders, so I went back and added them for Bumblebee and Cliffjumper’s overlays.

Afterwards, I went through the same process of rebuilding the Build_02 zip for Zapworks and publishing it, putting a new version, ensuring there were no issues at that time.
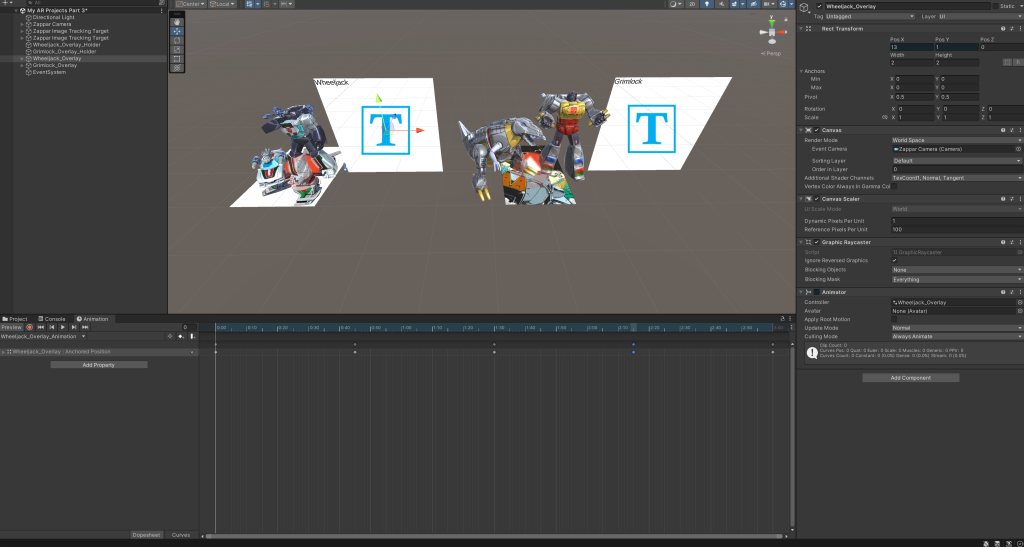
I then went back on Unity to check on the two remaining projects with four remaining characters, checking on their overlay animations and holders before going through the same process of rebuilding their Build zip files for Zapworks and publishing them, adding their newest version to make sure everything worked well.

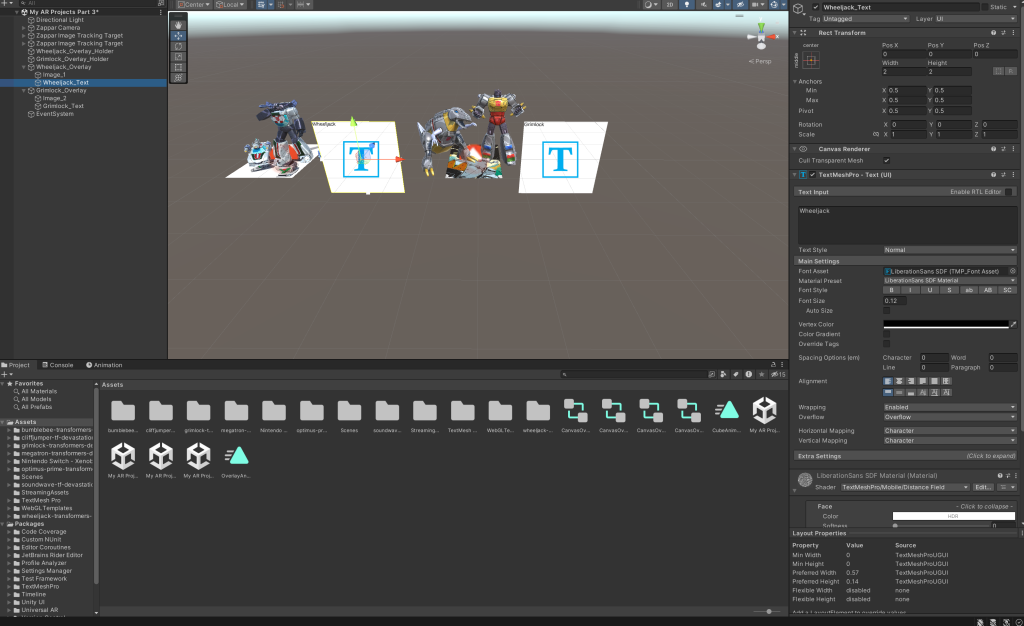
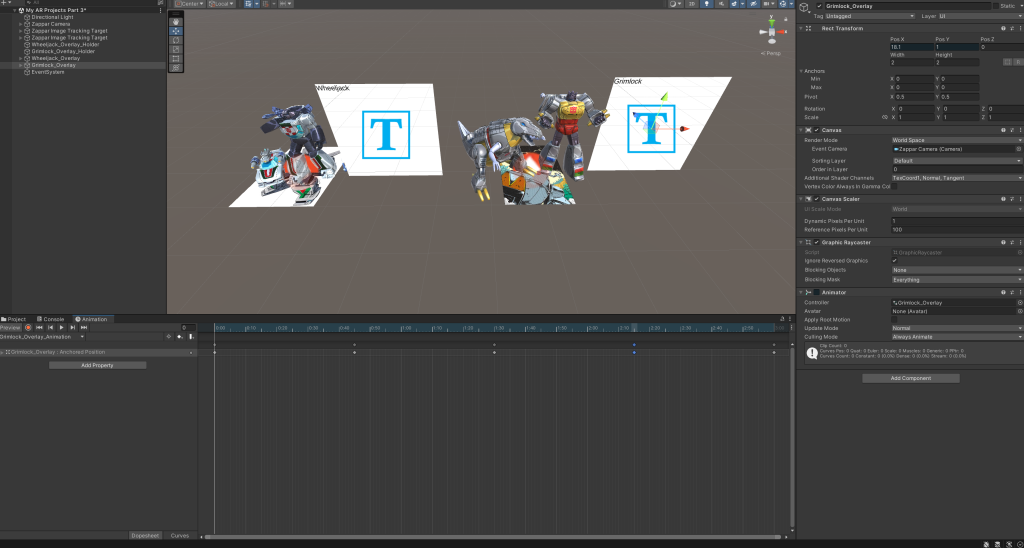
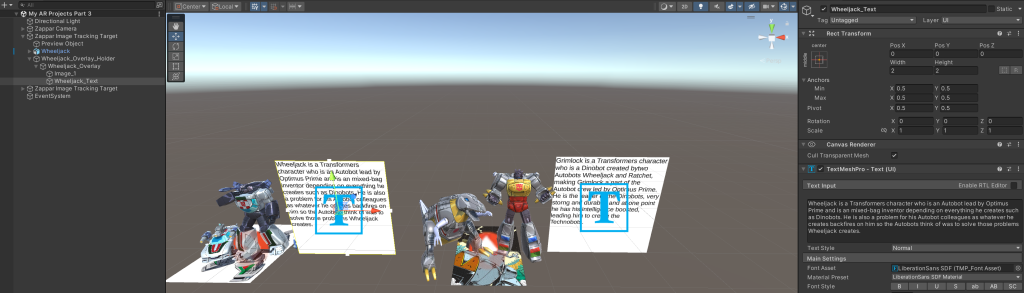
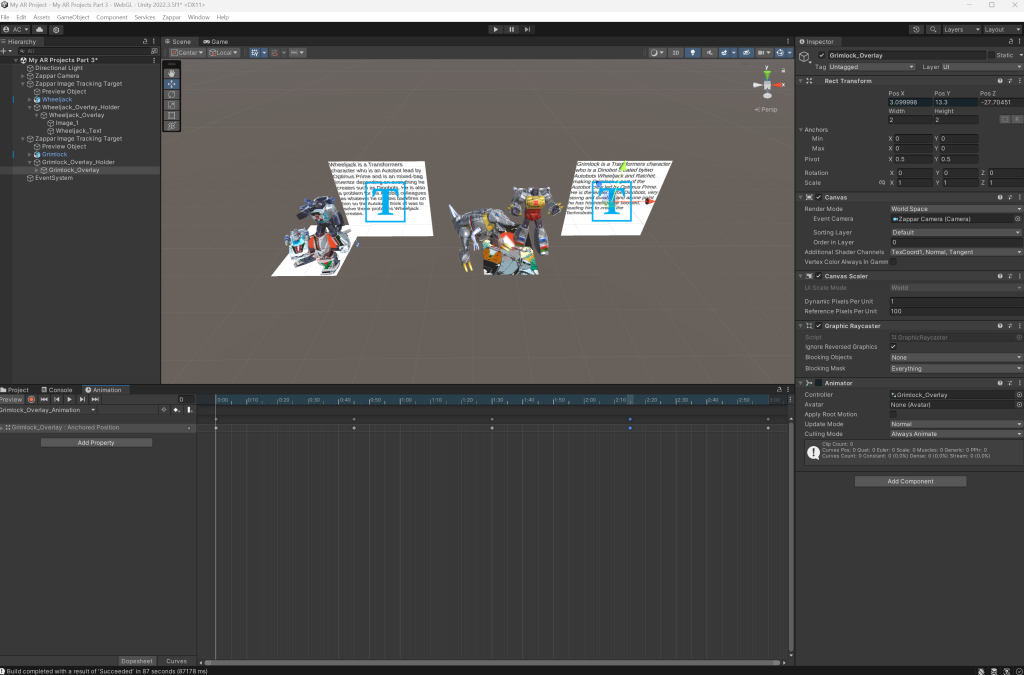
I tested out every remaining AR Project and all remaining AR trackers worked out very well, but I realised there was a spelling/grammar mistake where I forgot to space out two words on Grimlock’s bio overlay.
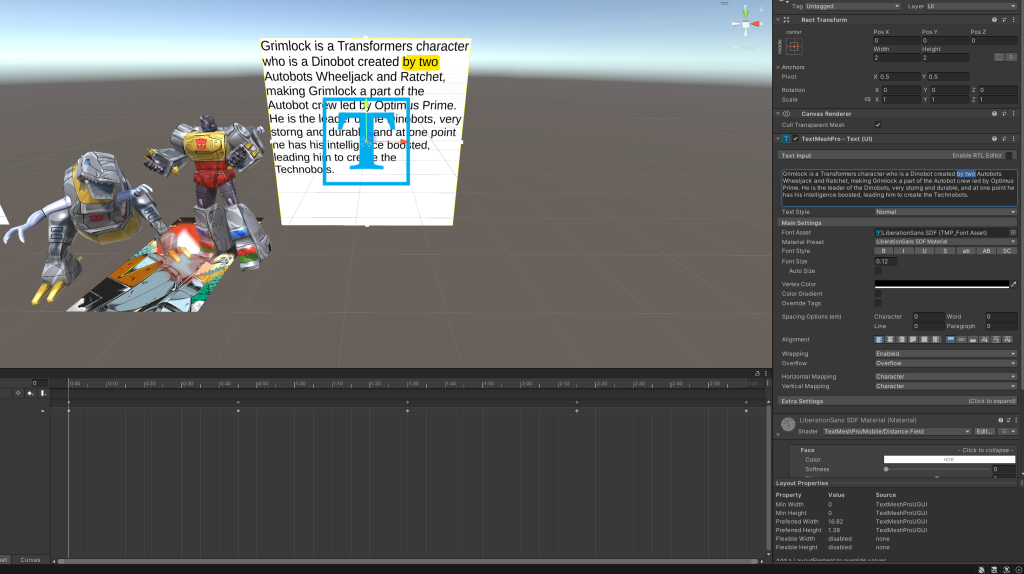
I went back on Unity and clicked on Grimlock’s overlay text to click between the words ‘by’ and ‘two’ to space them out one time.
Afterwards, I repeated the process of rebuilding the updated build zip file for trackers of Grimlock and Wheeljack to put onto Zapworks and publishing its project with the latest version to ensure it worked well.

When testing out Grimlock’s tracker for the final time, I could see that the words by and two had spaced out and thus all of my 4 AR projects worked out well.
Conclusion
I thoroughly enjoyed the ride of making AR projects as my choice due to that AR can be a fun experience to witness. I would recommend anyone trying out my AR Projects for fun.
My Production Piece Video
My AR Projects
References
Image Trackers
Buffu (2019) Hikari (Xenoblade 2) [Photograph]. Available online: https://www.zerochan.net/2713727 [Accessed 28/1/2024].
Cyberlink420 (2022) Optimusg1 [Photograph]. Available online: https://tfwiki.net/wiki/File:Optimusg1.jpg [Accessed 28/1/2024].
(2009) BumblebeeRIC [Photograph]. Available online: https://tfwiki.net/wiki/File:BumblebeeRIC.jpg [Accessed 28/1/2024].
Monzo (2023) Cliffjumperg1 [Photograph]. Available online: https://tfwiki.net/wiki/File:Cliffjumperg1.jpg [Accessed 28/1/2024].
ItsWalky (2010) Wheeljackg1 [Photograph]. Available online: https://tfwiki.net/wiki/File:Wheeljackg1.jpg [Accessed 28/1/2024].
METAL SONIC (2012) (Grimlock) Transformers Image [Photograph]. Available online: https://www.zerochan.net/1130979 [Accessed 28/1/2024].
Monzo (2021) TransformersCollectionSoundwaveDatafile [Photograph]. Available online: https://tfwiki.net/wiki/File:TransformersCollectionSoundwaveDatafile.jpg [Accessed 28/01/2024].
Cyberlink420 (2022) Megatronguido [Photograph]. Available online: https://tfwiki.net/wiki/File:Megatronguido.jpg [Accessed 28/1/2024].
Moodboard
Abates (2009) BattleProtocol Prime Gun [Photograph]. Available online: https://tfwiki.net/wiki/File:BattleProtocol_Prime_gun.jpg [Accessed 27/11/2023].
HomerSimpson1983 (2023) Bumblebee (G1) vector 8 [Photograph]. Available online: https://www.deviantart.com/homersimpson1983/art/Bumblebee-G1-vector-8-948279256 [Accessed 27/11/2023].
HomerSimpson1983 (2023) Cliffjumper (G1) vector [Photograph]. Available online: https://www.deviantart.com/homersimpson1983/art/Cliffjumper-G1-vector-977818597 [Accessed 27/11/2023].
EryckWebbGraphics (2012) Wheel Jack -Transformers G1 – Commission [Photograph]. Available online: https://www.deviantart.com/eryckwebbgraphics/art/Wheel-Jack-Transformers-G1-Commission-315089059 [Accessed 27/11/2023].
HomerSimpson1983 (2023) Grimlock (G1) vector 4 [Photograph]. Available online: https://www.deviantart.com/homersimpson1983/art/Grimlock-G1-vector-4-911422149 [Accessed 27/11/2023].
HomerSimpson1983 (2023) Soundwave (G1) vector 11 [Photograph]. Available online: https://www.deviantart.com/homersimpson1983/art/Soundwave-G1-vector-11-977305229 [Accessed 27/11/2023].
elgrimlock (2014) MEGATRON G1 [Photograph]. Available online: https://www.deviantart.com/elgrimlock/art/MEGATRON-G1-426224307 [Accessed 27/11/2023].
haiyun (2021) Smash Summer Mythra & Pyra [Photograph]. Available online: https://www.artstation.com/artwork/qQPVxR [Accessed 27/11/2023].
Models
Mysticus (2023) Mythra (Massive Melee) [3D Model]. Available online: https://www.models-resource.com/nintendo_switch/xenobladechronicles2/model/60862/ [Accessed 28/01/2024].
Angel300_LQ (2023) Optimus Prime – Transformers Devastation [3D Model]. Available online: https://sketchfab.com/3d-models/optimus-prime-transformers-devastation-df88619415e84596b9e02ab94c31b567 [Accessed 28/01/2024].
Angel300_LQ (2023) Bumblebee – Transformers Devastation [3D Model]. Available online: https://sketchfab.com/3d-models/bumblebee-transformers-devastation-9f20b7204aa0498e81c794829b11a180 [Accessed 28/01/2024].
Angel300_LQ (2023) Cliffjumper – Transformers Devastation [3D Model]. Available online: https://sketchfab.com/3d-models/cliffjumper-tf-devastation-c1cfdde8945e4883a0dd1ea65faa9cd4 [Accessed 28/01/2024].
Angel300_LQ (2023) Wheeljack – Transformers Devastation [3D Model]. Available online: https://sketchfab.com/3d-models/wheeljack-transformers-devastation-0e44b492c8d742198cd00b2327003b20 [Accessed 28/01/2024].
Angel300_LQ (2023) Grimlock – Transformers Devastation [3D Model]. Available online: https://sketchfab.com/3d-models/grimlock-transformers-devastation-6265b0d437bb499c9c9aaba91817e982 [Accessed 28/01/2024].
Angel300_LQ (2023) Soundwave – Transformers Devastation [3D Model]. Available online: https://sketchfab.com/3d-models/soundwave-tf-devastation-cd17de2062264c71879110946c45f9ab [Accessed 28/01/2024].
Angel300_LQ (2023) Megatron – Transformers Devastation [3D Model]. Available online: https://sketchfab.com/3d-models/megatron-transformers-devastation-f3f72820b93e46c79a3b9a64ad0dc163 [Accessed 28/01/2024].
Sites referenced for research used for characters overlays
Optimus Prime (G1) Transformers Wiki. Available online: https://tfwiki.net/wiki/Optimus_Prime_(G1) [Accessed 28/01/2024].
Mythra Xeno Series Wiki. Available online: https://www.xenoserieswiki.org/wiki/Mythra [Accessed 28/01/2024].
Bumblebee (G1) Transformers Wiki. Available online: https://tfwiki.net/wiki/Bumblebee_(G1) [Accessed 28/01/2024].
Cliffjumper (G1) Transformers Wiki. Available online: https://tfwiki.net/wiki/Cliffjumper_(G1) [Accessed 28/01/2024].
Wheeljack (G1) Transformers Wiki. Available online: https://tfwiki.net/wiki/Wheeljack_(G1) [Accessed 28/01/2024].
Grimlock (G1) Transformers Wiki. Available online: https://tfwiki.net/wiki/Grimlock_(G1) [Accessed 28/01/2024].
Soundwave (G1) Transformers Wiki. Available online: https://tfwiki.net/wiki/Soundwave_(G1) [Accessed 28/01/2024].
Megatron (G1) Transformers Wiki. Available online: https://tfwiki.net/wiki/Megatron_(G1) [Accessed 28/01/2024].
Tutorials
Creating a World Space UI Unity. https://docs.unity3d.com/Packages/com.unity.ugui@1.0/manual/HOWTO-UIWorldSpace.html [Accessed 28/01/2024].
about making game (2021) Unity : 3D UI in World Space [Video]. Available online: https://www.youtube.com/watch?v=GuWEXBeHEy8 [Accessed 28/01/2024].
Leave a Reply