VFX Plan
My VFX sequence will be a promotional game advert called Bonkers in Space where it will be set in the future at a neon themed building with five rooms a cinematic camera will fly through until it reaches the final room as it shows the future of models and assets used for future movie and video gaming projects. According to my plans, the building will have greyish white neon walls, a red neon floor and a green neon roof/ceiling where in my animatic, I will draw automatic sliding doors to give me an idea for my practical work to look different to my animatic as it shows what the future holds with future games with futuristic assets and fictional characters. I will ensure the first neon-based room will have a sign with my gaming studio company name, the second room will be filled with fictional aliens along with the use of a Sci-Fi atmosphere, the second room will be filled with three fictional monkeys with a radio, another room will be filled with a fictional gorilla with another radio and the last room will be a room with a shiny neon golden banana glowing, indicating as if it could be used as a special food that could have a special effect on monkeys and gorillas. My fictional gaming studio company for the project is ACStudios.
Inspirations
Inspirations for my VFX projects are from a retro platformer game created by historical gaming company Nintendo called Donkey Kong 64 for the Nintendo 64 and a retro Sci-Fi film, E.T. The Extra Terrestrial as I research alien, monkey and/or ape models as well as other assets/models for my project which will have two genres, Sci-Fi and Computer-Animated.
Asset/Model Lists
- Sign with name of my gaming studio company
- Alien (2 children and 2 adults)
- Monkey (3 monkeys)
- Gorilla
- Radio (2 radios)
- Shiny Neon Golden Banana
Asset/Model Plans
Asset/Model Plans (1)
For my asset/model plans, I will firstly make the first room empty where I will add a sign for my gaming studio company name to ensure who the project is made by.
Asset/Model Plans (2)
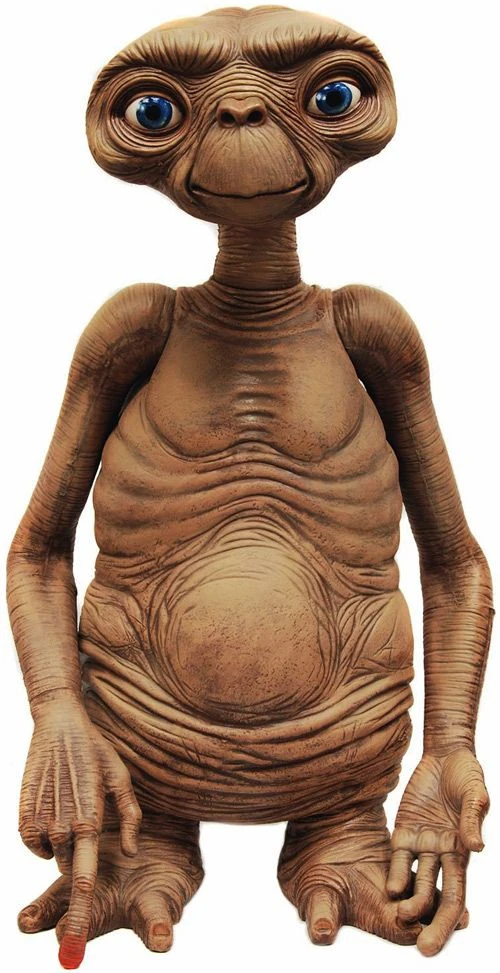
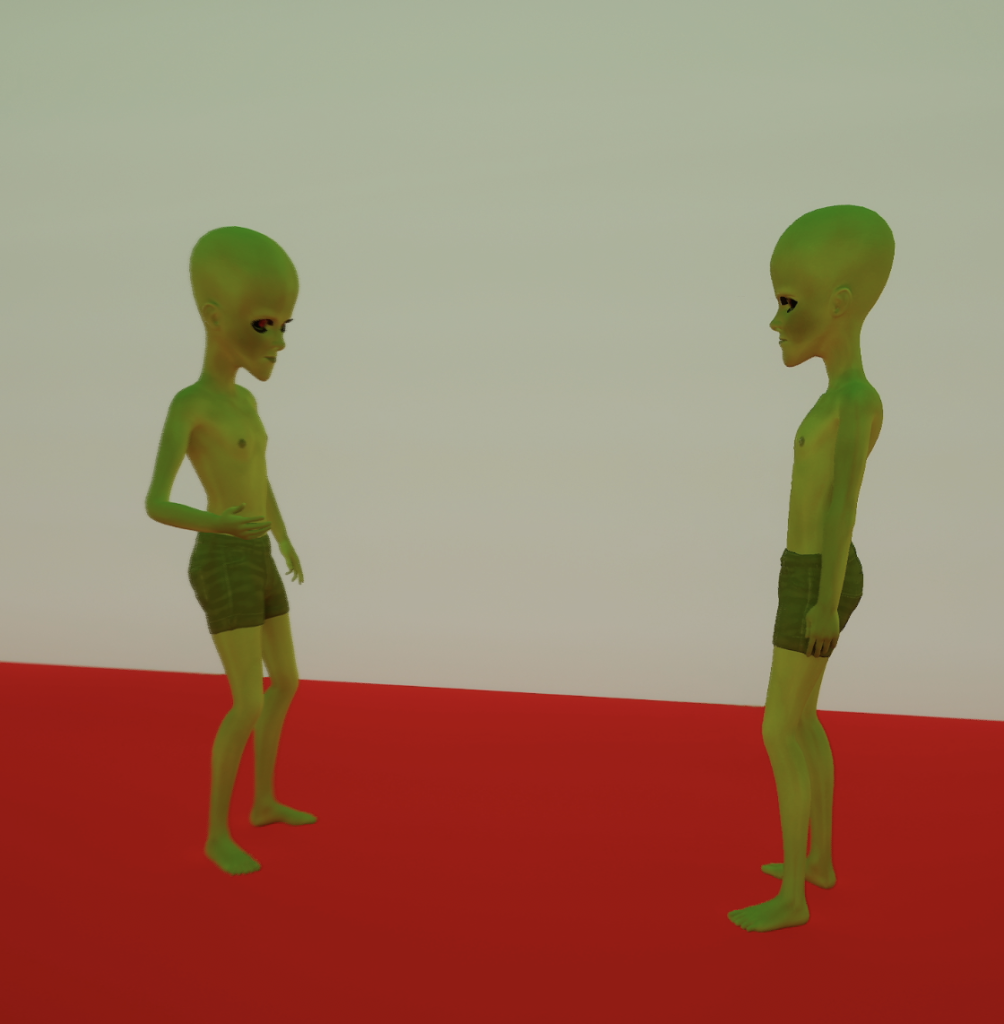
Afterwards, I will research for unique alien models to download and take inspiration from a titular movie alien character, E.T as I want to make a room for fictional aliens where two alien children will be seen dancing for fun to ensure they act like human children whilst two alien adults will be seen chatting to each other in a normal human way. I will ensure alien models I download will function in an unusual way to demonstrate how fictional aliens will act in future projects. Below is an example image of titular movie character ET to show how this character looks a unique alien to normal fictional aliens where I use this image as a model inspiration to look for any fictional alien model to download for my project.
Asset/Model Plans (3)
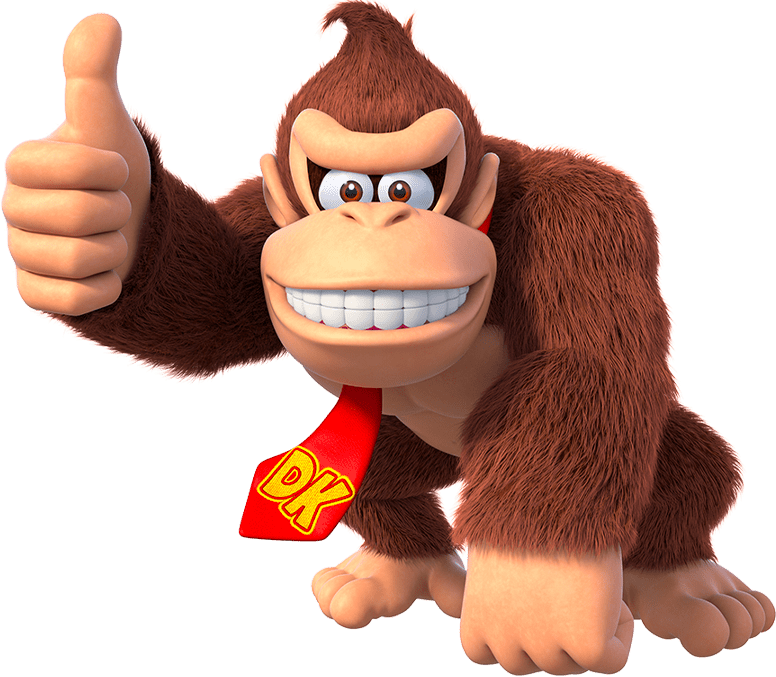
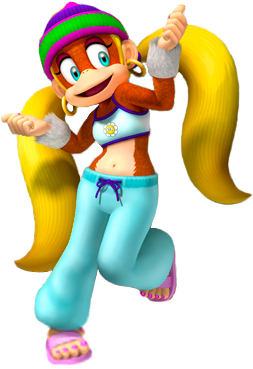
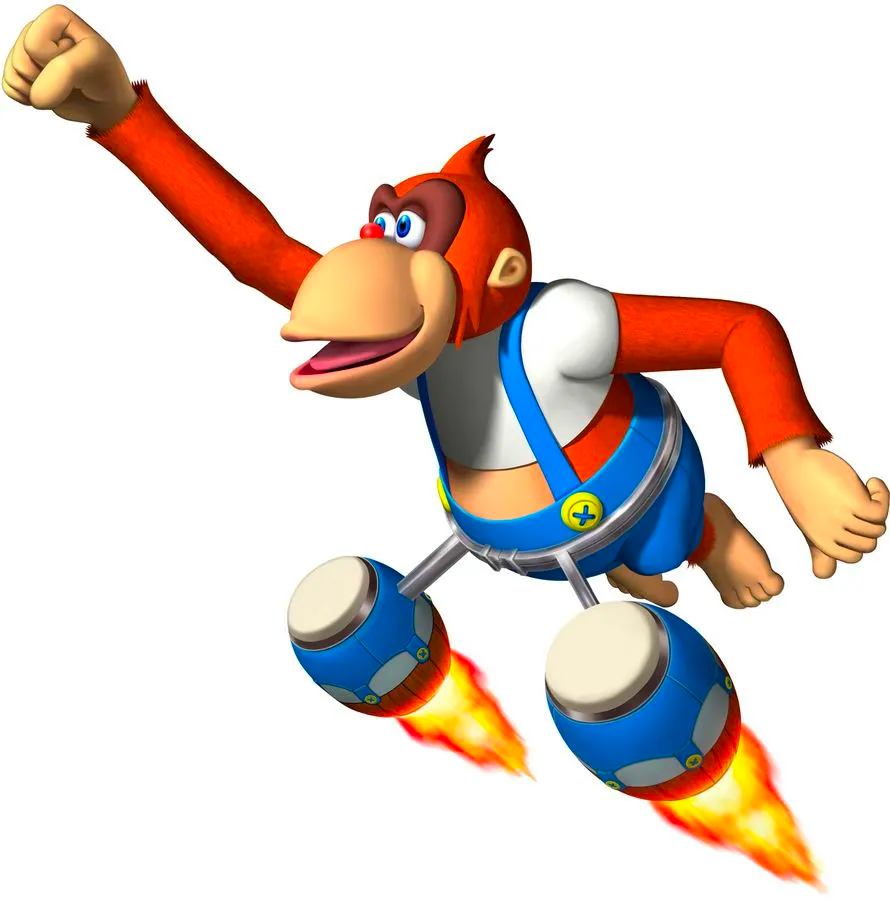
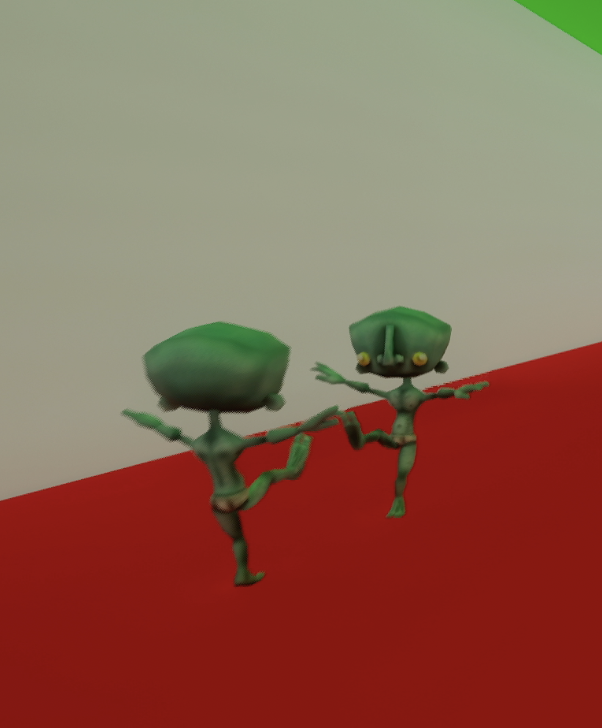
Later, I will download monkey and gorilla models that will take inspiration from Nintendo characters that are known as the DK crew in the Nintendo 64 platformer game, Donkey Kong 64 being Donkey Kong, Tiny Kong, Lanky Kong, Diddy Kong and Chunky Kong in order as of the Donkey Kong Rap music where I will make a room where three fictional monkeys will be dancing to a extremely epic music that will be played from a radio with a wave of music notes that indicates as if the radio is playing the uplifting music and another room where a fictional gorilla will be seen beating his chest for joy as if it is enjoying a drum beat music playing from another radio with another wave of music notes that indicates as if the radio plays the drum. This will demonstrate how fictional gorillas and monkeys in future projects for movies or games act in idiosyncratic ways to display their very own futuristic culture. Below are five example images that shows the five playable characters I have mentioned in this paragraph for the Nintendo 64 platformer game, Donkey Kong 64 where I use them as model inspirations to download any fictional gorilla and monkey model.


Asset/Model Plans (4)
Finally, I will download one other asset, a big golden fictional banana where it is seen floating on a table, giving a glowing effect to show it is used as special health for monkeys and gorillas to use. This is to show how golden fictional bananas would be created in gaming and/or movie projects and how they would affect fictional characters.
Timeline for Shots
The camera will fly throughout every room of the neon building until it reaches the final room where a golden banana is seen glowing. I will use a cinematic camera actor to add a straight line with curves to allow the camera’s freedom for looking at models and assets I have downloaded for my project for viewers to understand more about the truth of my promotional gaming advert project.
Here is my Shot Timeline:

Storyboard & Animatic
Storyboard
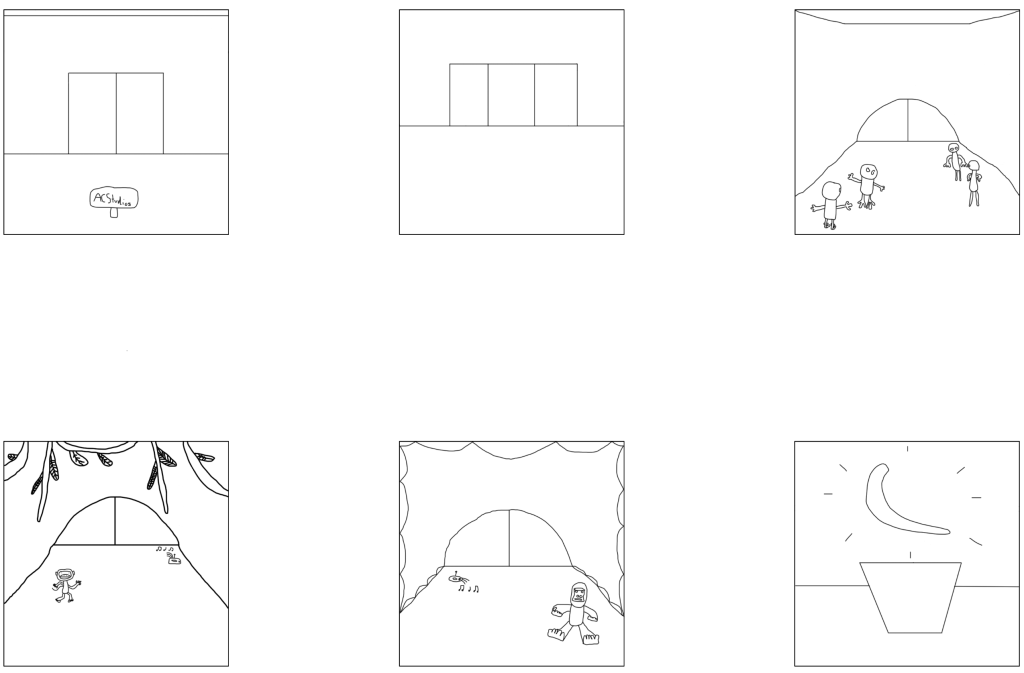
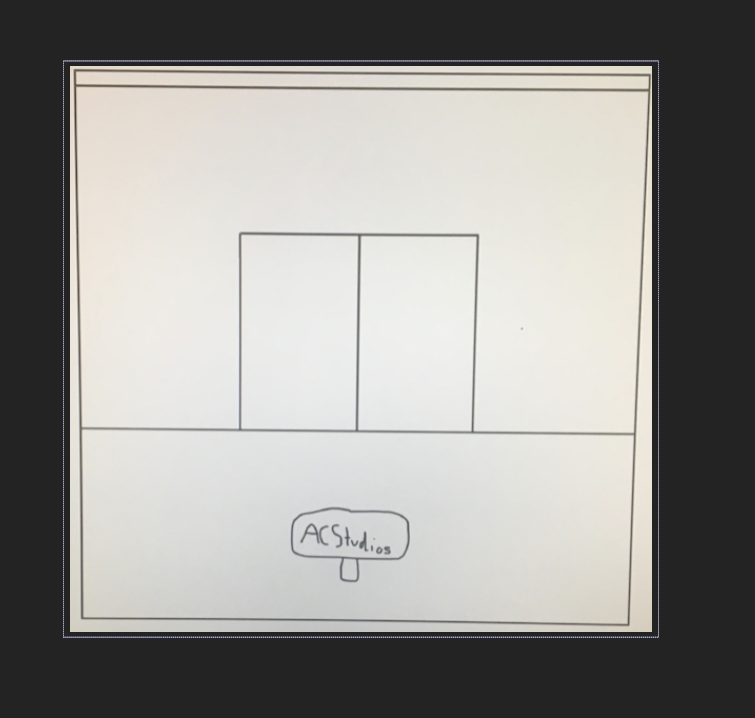
For my storyboard plan, I plan to use Photoshop using a landscape paper in order to use six image boxes to draw concepts of my project with assets and models used which will be ready to be used as an animatic for my project and is shown below via screenshot. This shows how I plan out my project for making an animatic of my project which will be used on After Effects before making my actual project on Unreal.
Animatic
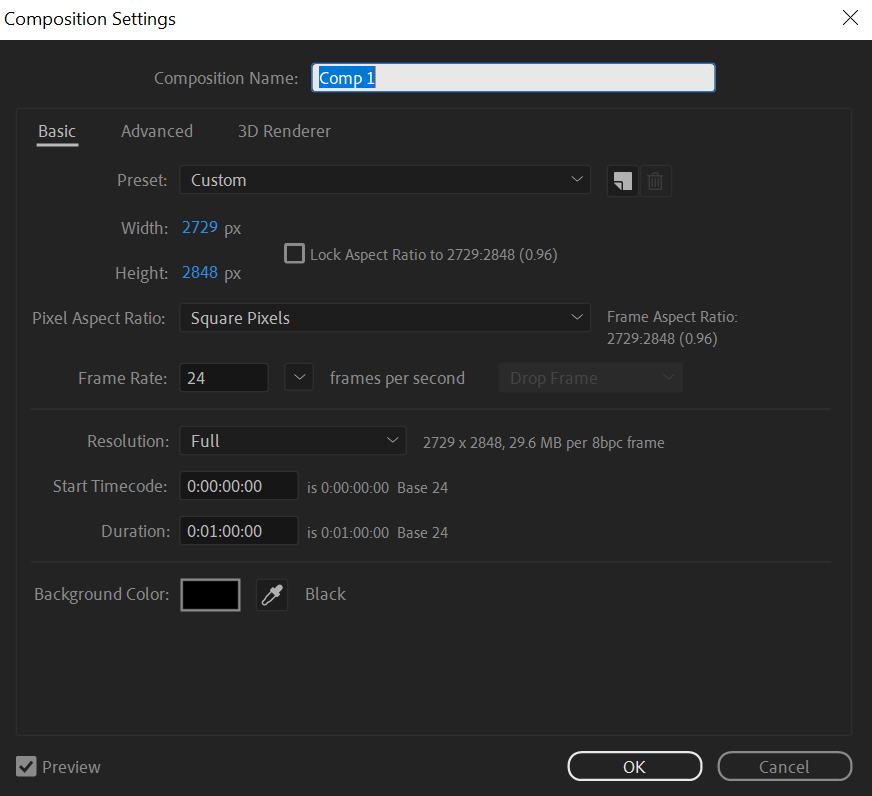
As I have made my storyboard turn into an animatic, below is the first screenshot of my animatic progression stage where I used After Effects where I made a new composition by using a custom preset with a width adjusted to 2729 px and a height adjusted to 2848 px. I then kept the pixel aspect ratio as square pixels and used a framerate of 24 frames per second. I then have set the resolution as full as I want my animatic to be seen clearly just before I have set the duration to 0:01:00:00 that indicates that the duration of my animatic is set to a minute.
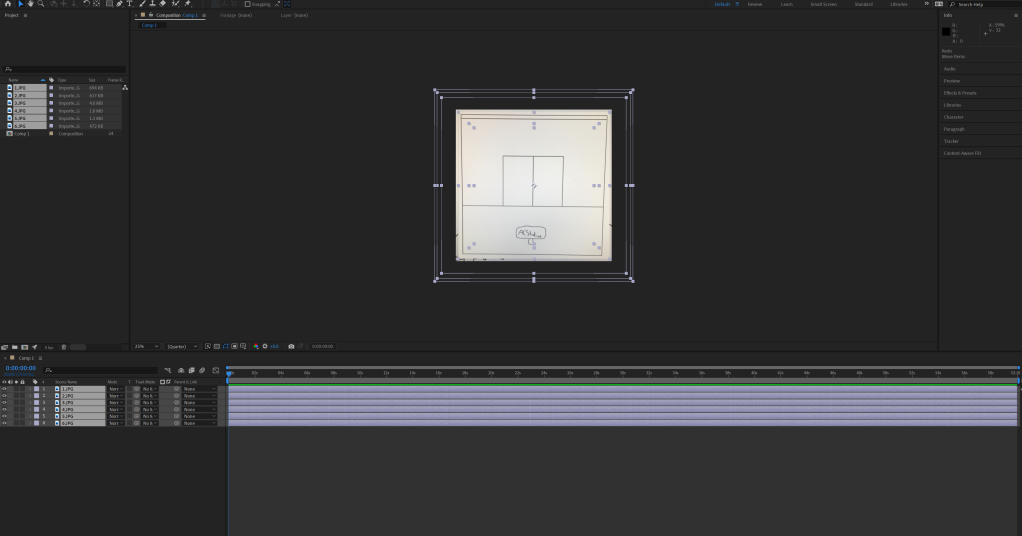
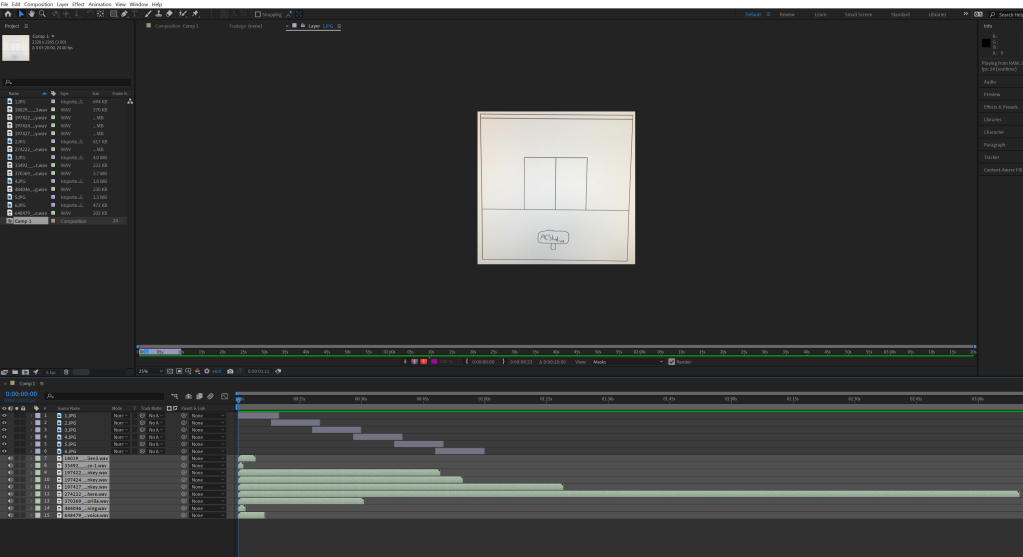
Below is another screenshot of my animatic progression stage where I have added all storyboard concepts I added as I took every image of every concept of my project, one at a time via my phone before putting them onto my composition on After Effects and then dragging them onto the timeline.
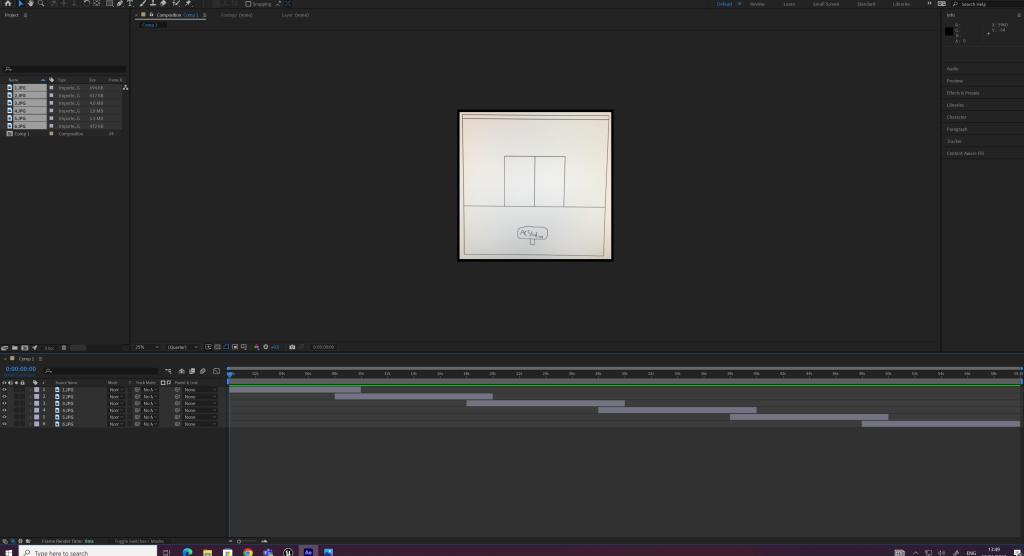
Below is yet another screenshot of my animatic progression stage where I have adjusted every duration of all my six project concepts on the timeline to ensure the first image of my first project concept starts right at the beginning whilst the rest start two seconds before one another stops ends its duration and ensure they stop at a destination time mark, e.g (The image of my first project concept via storyboard stops at the 10 second time mark).
Below is yet another screenshot of my animatic progression stage where I have adjusted every image of my project concepts by grabbing any corner and holding shift whilst holding left click on any of them to either drag them back to make my images bigger or drag them down as I ensure there are no black background on my images, ready to be used by keyframes.
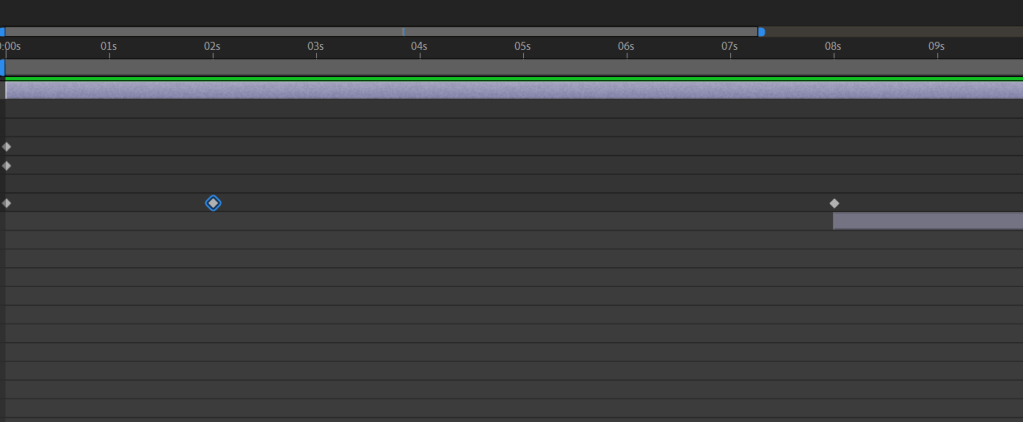
Below is yet another screenshot of my animatic progression stage where I have added keyframes by clicking on drop downs of my images following a transformation drop down to click to give keyframes for anchor points, position, scale, rotation and opacity. I added key frames for opacity, scale and position of every image, right clicking on scale and position to add keyframes at the start and end of every image and added an opacity keyframe at the beginning by pressing T. I faded out the first image of my project concept for the next image by selecting it and putting an opacity keyframe with the percentage of 100 for visibility 2 seconds before the duration of the first image stops and the mark where the second image’s duration starts and putting another opacity keyframe at he mark the first image stops where I set the percentage to 0 to make the first image invisible and the second image show up. I also added keyframes at the beginning for the scale and position of my first image where I keep it as it it and added more at the end of my first image duration where I have adjusted the position and scale of my first image to ensure they are adjusted to where the image will be zoomed in on the sign with my fictional gaming studio company name. I repeated the process for others, positioning and scaling other images via the position and scale keyframes at the end of each image’s durations to ensure viewers quickly look at my assets and models as the images are zoomed in on futuristic doors and fade out for one image another until the part where I decided the last image of my last project concept doesn’t fade out as I have positioned and scaled it via the position and scale keyframes at the end where I ensured the image is zoomed in on a golden banana glowing.

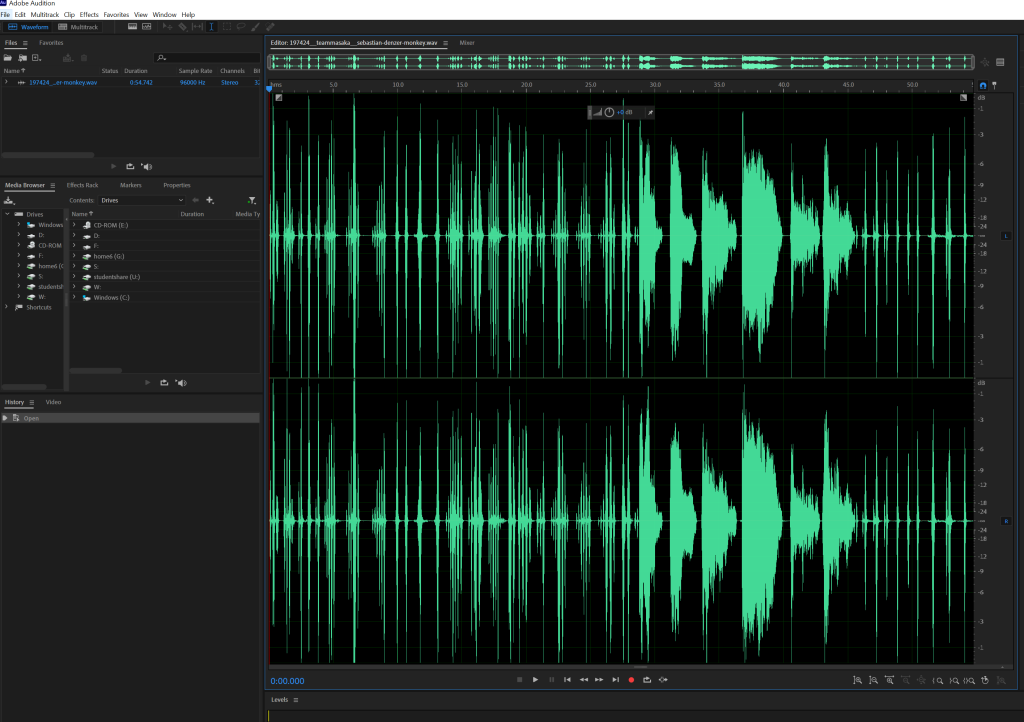
Below is yet another screenshot of my animatic progression stage where I have changed some audio files format to a .wav by File and Save as to change the format to a .wav on Audition as they were downloaded from Freesound and appeared to not be in a .wav format.
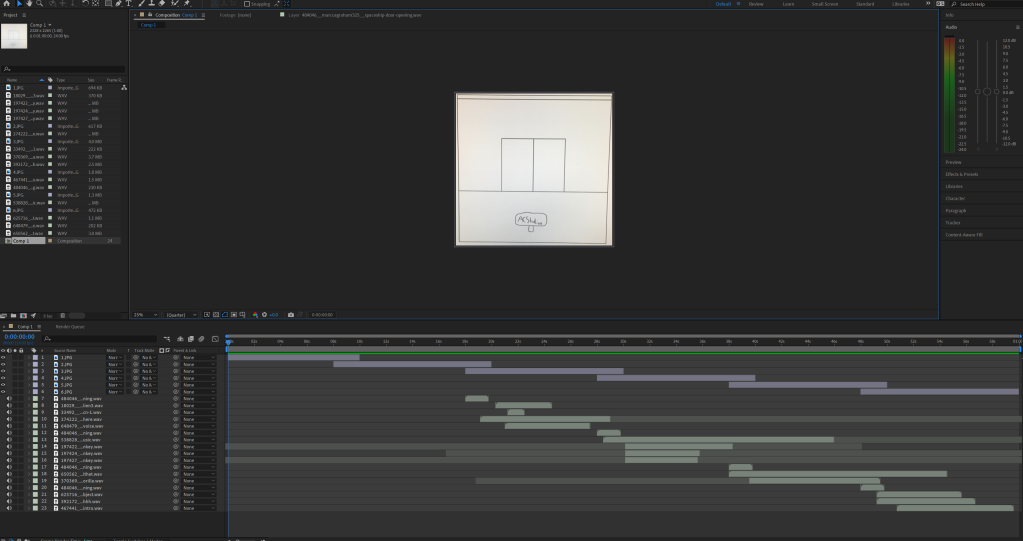
Below is yet another screenshot of my animatic progression stage where back into After Effects, I added all my audio files that are in .wav formats into my composition and put them into the timeline and when I realise some audio files are too long, I went to the composition settings via composition and changed the duration to something like 0:03:20:00 so I can edit times of audio sounds to get the sounds I want.
Below is yet another screenshot of my animatic progression stage where I have double-clicked on audio files for a shortcut of how to edit timeframes for audio sounds to get the sound I want.

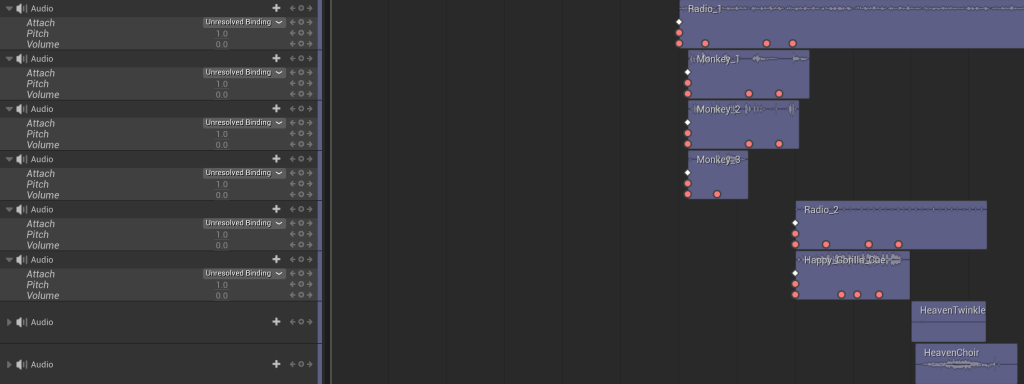
Yet another screenshot of my animatic progression stage where I have put all sound files into the right place where I put all space and alien sounds where an image showing aliens are, all monkey sounds and an uplifting music sound where an image showing a monkey and a radio are and the gorilla sound along with a drum beat music where an image showing a gorilla and a radio are, just before I added audio keyframes via drop down following an audio drop down following a waveform drop down to adjust the decibels of audio keyframes where keyframes at beginning and end of most audio sound timeframes are put at -60 decibels and adjusted the decibels of keyframes between the keyframes at beginning and end of most audio sound timeframes to 0 decibels where it sounds as if the camera would fly past the audio sounds.

Another screenshot of my animatic progression stage where I downloaded a twinkling sound along with heaven voices where some of the new audio files are not in a .wav format so I repeated the process on Audition before adding them all in .wav formats onto the composition in After Effects before I added them to the timeline and repeated the process.
Below is a screenshot where I have forgot to add opacity keyframes at the beginning of my first image timeframe where I have put the percentage of the opacity keyframe to 0 for invisibility and the percentage of the opacity keyframe 2 seconds ahead of the opacity keyframe right at the beginning to 100 for visibility to ensure the first image fades in.
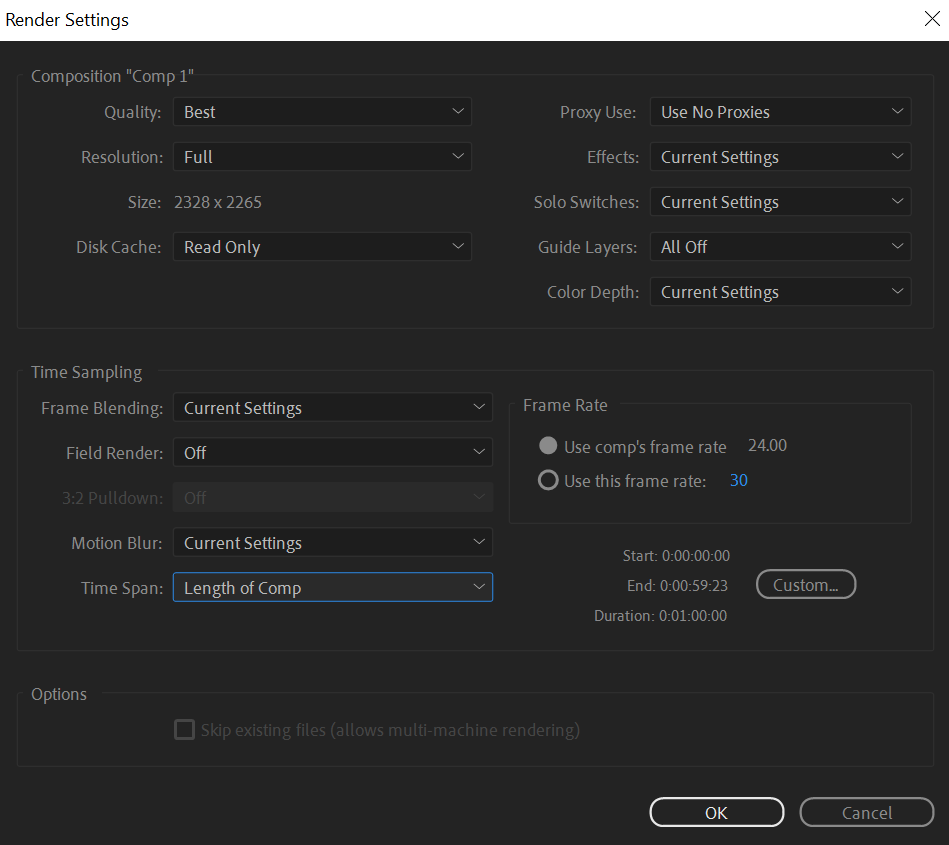
Below is another screenshot where I have rendered my animatic in so many ways, but I selected Current Settings on both Frame Blending and Motion Blur as I want to ensure my animatic looks clear to see.
Here is a final draft of my animatic video for my promotional gaming advert:
Overall, it was a good experience to make an animatic thanks to two tutorials I have watched on YouTube that are referenced in the reference section.
Production
Project Setup
I have set up my project by having a building with 5 rooms. I also used a CineCameraActor for a Level Sequencer so that I can render my sequence once everything has finished.
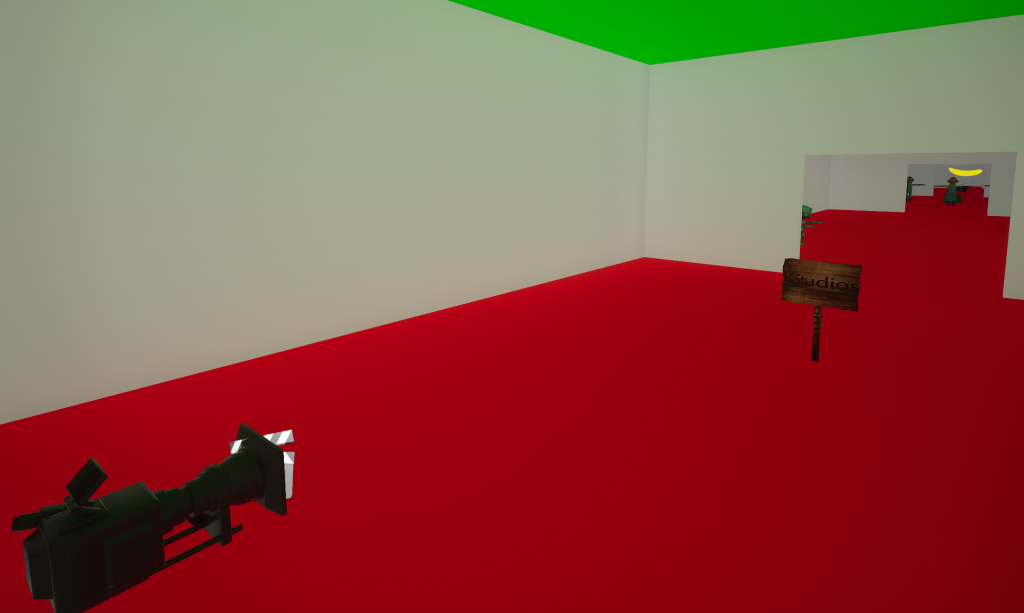
Room 1
For Room 1, I added a sign with my game studio name where I downloaded a wooden sign, then used its texture to change in Photoshop and then converted the texture image to a TGA to add to my project for my wooden sign.
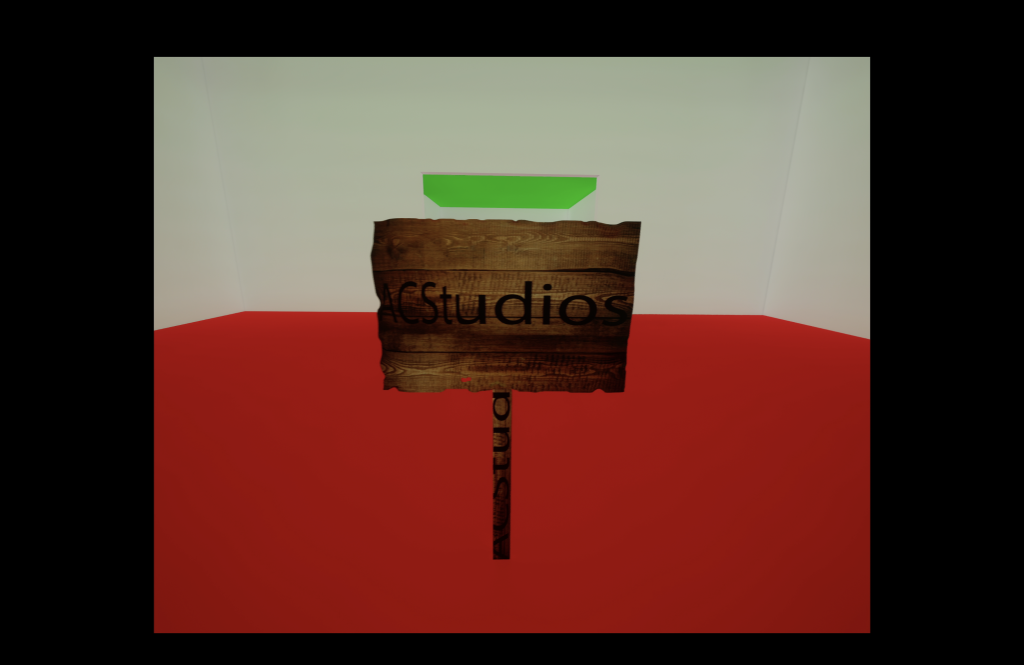
I’m going to be honest, this sign looks mostly good, but be sure to always focus on my game studio name on top of my wooden sign, not the sign stick. Also, I remember downloading it from sketchfab, but cannot remember where I found that wooden sign model from, so the original wooden sign I downloaded will not be referenced as it may have been deleted.
Room 2
For Room 2, I added a space atmosphere that would play when entering Room 2. I also added 2 alien children I downloaded from sketchfab that are seen jazz dancing and 2 adult aliens also downloaded from sketchfab where you would see one talking and stating “You are not alone” to the other that would be seen agreeing whilst listening to the talking alien to show that they are having a chat.
These aliens look very unique for my project, to be honest.
Room 3
For Room 3, I added a radio that would play an epic music with 3 monkeys doing some silly dances to it as if they are having fun.
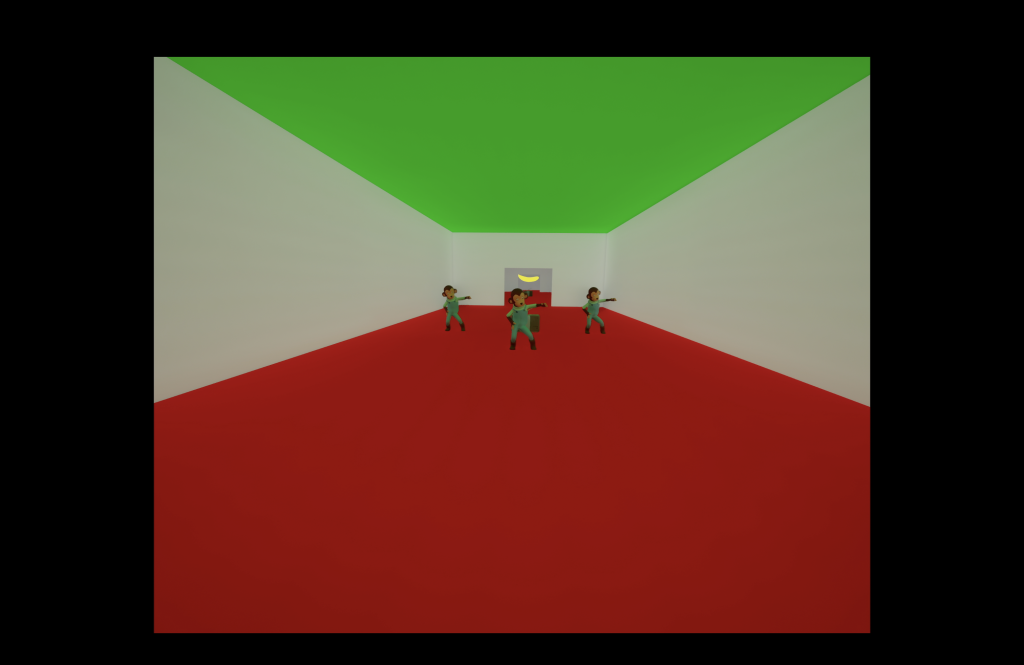
As you can see, one monkey is in front of the radio that is in between two other monkeys.
Room 4
For Room 4, I added another radio that would play a drum beat music with a gorilla dancing to it as if it is having fun.

I drew around the radio and gorilla to help you focus fully on them when it comes to Room 4 for my project.
Room 5
For the final room, I added a shiny neon golden banana where if the camera enters the room, sounds of a twinkle and choir would play as heaven sounds to show how shiny the banana looks.
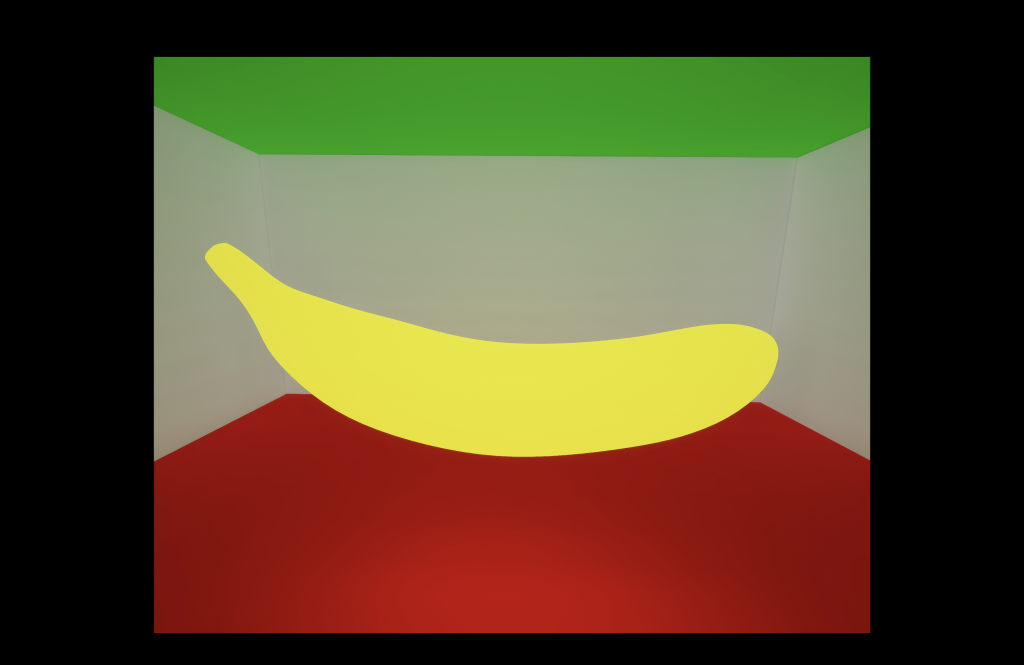
Look how shiny and neon-like the golden banana looks!
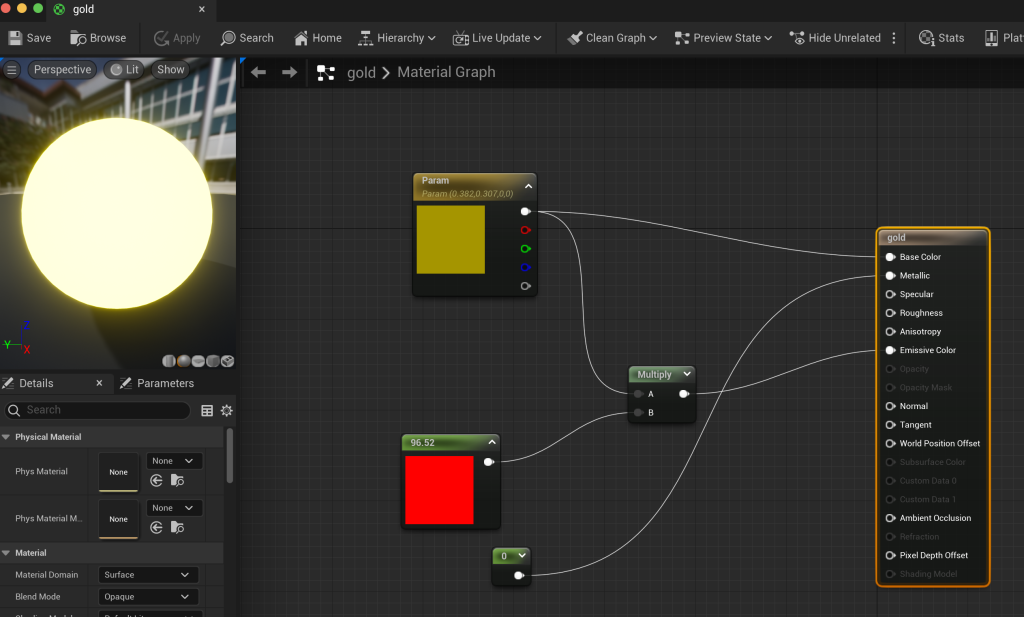
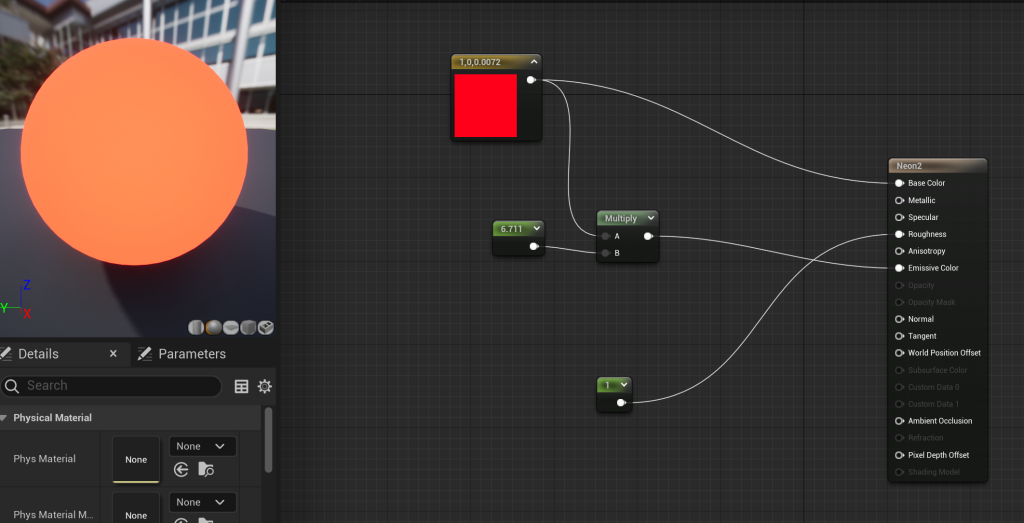
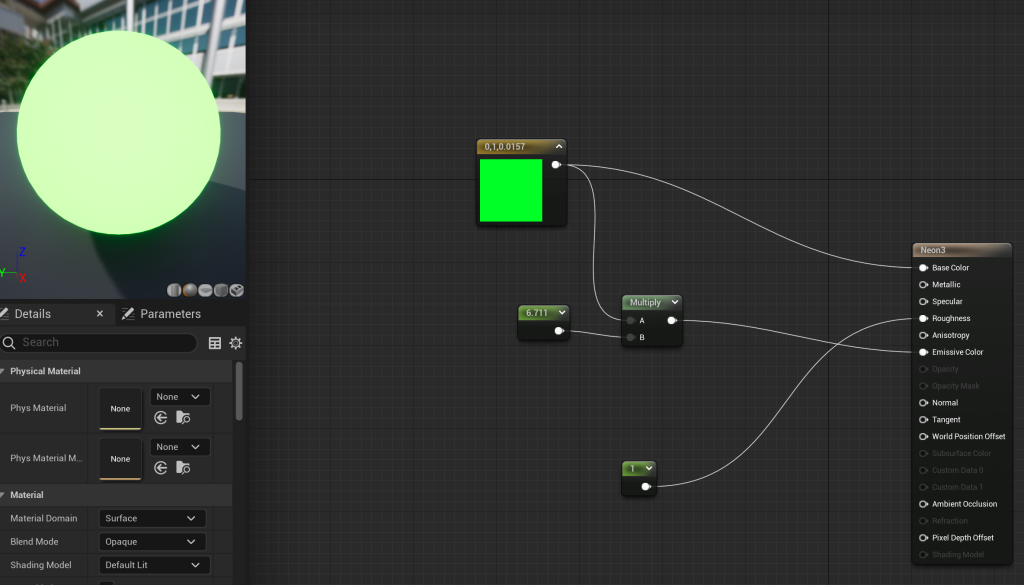
Materials (for walls, floor, ceiling and banana)
I have used Neon Greyish White for the walls, Neon Red for the floor, Neon Green for the ceiling and Neon Yellowish Gold for the Banana, adding 2 constant1 nodes and a multiply node for each material used for the following.

Sequencer
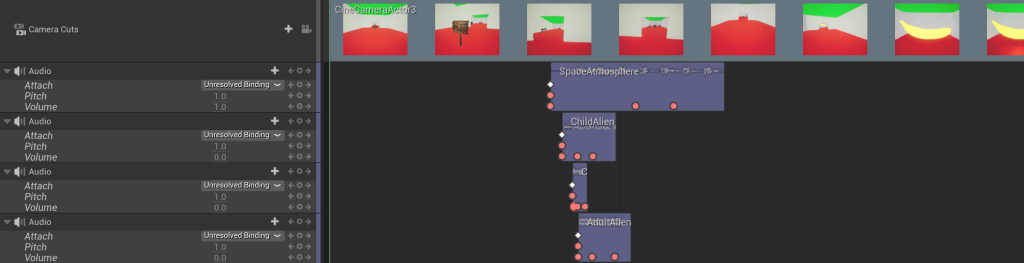
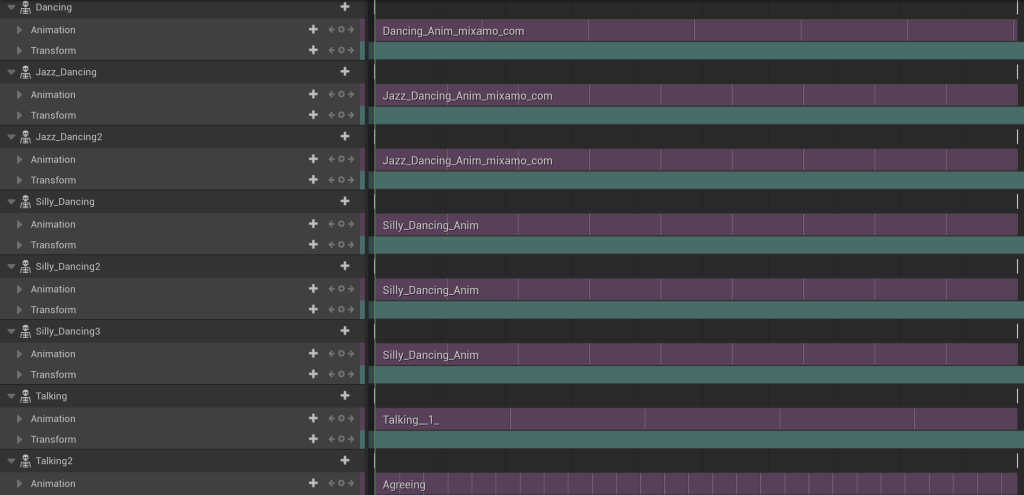
For the sequencer, I set the fps to 30 and use a CineCameraActor where I add keys for its location and rotation where I end the sequence with the camera looking at the shiny neon golden banana. I also added model animations I downloaded from Mixamo and set the animations from the beginning of the frame to the frame after the camera surpass the dancing gorilla in room 4. I also added audio where I put specific audio sounds I downloaded from freesound into frames where they match rooms, models and their animations, and added keys mainly for audio volume.

Level Blueprint
This is the level blueprint for my project. I added an event begin play before adding a reference for the sequencer I use for my project. I then added a sequence player for both the sequence referencer and event begin play to connect to before compiling it and testing the video project out.

First Final Draft
Here is the first final draft of my promotional gaming advert video:
Review on my sequence
I looked back on the video and I didn’t add any visual effects as I have forgot to add the ones I should’ve added. Also I watched a feedback video to figure out how I would improve my project
A way to improve my project
To improve my project, I watch some VFX tutorials that help me come up with new visual effects I could make on Unreal, such as musical notes. I have also decided to make updates to the rooms and alternate some sounds to ensure my sequence would make more sense. I also decided that aliens are no longer in use, so I am sticking with the 3 monkeys and a gorilla I used for my first and awful final draft that I will improve. I will also ensure the banana I added for my first VFX video will look a normal banana that is used to increase gorilla and monkey characters’ health.
Back on production
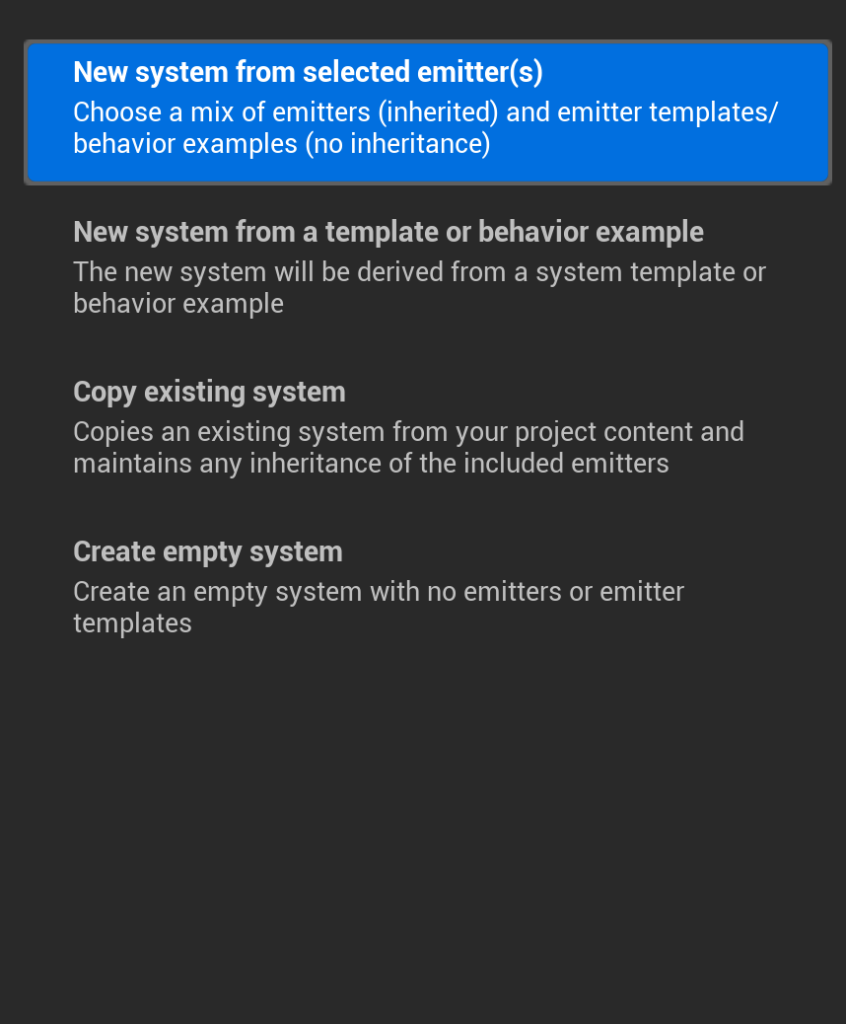


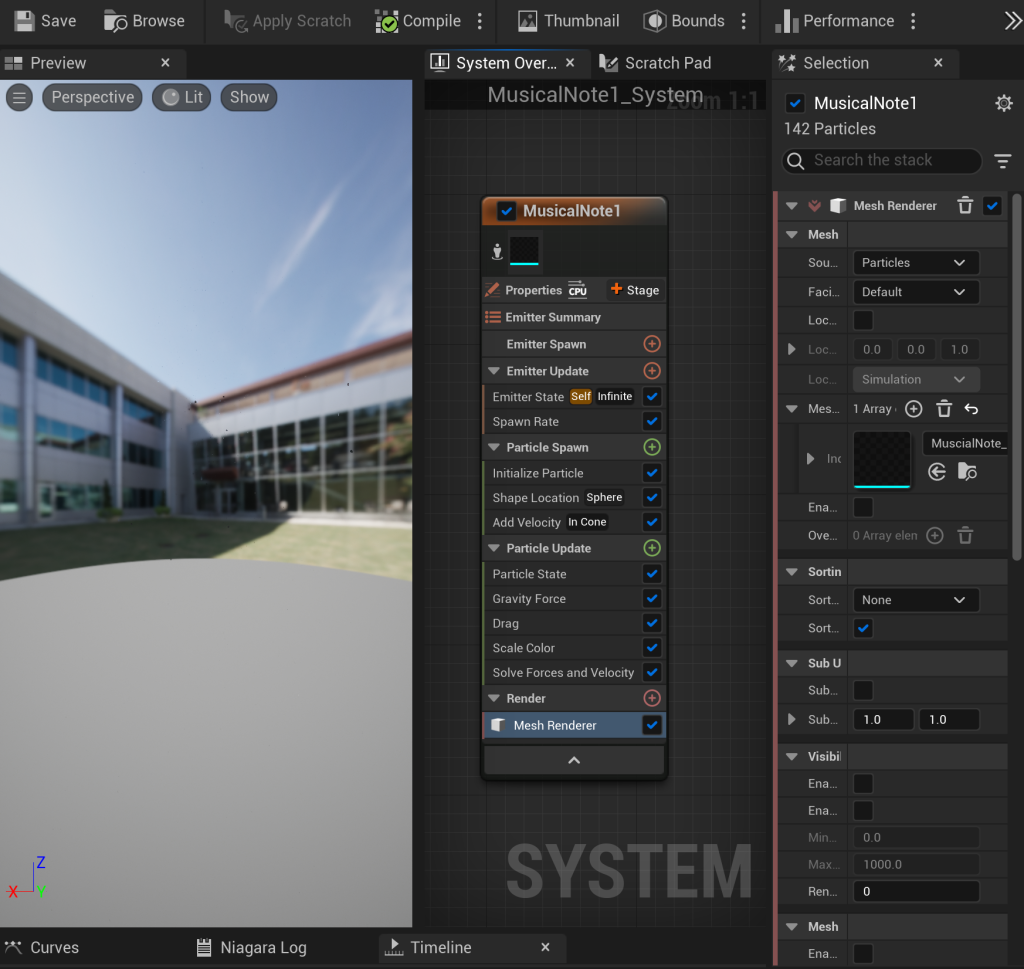
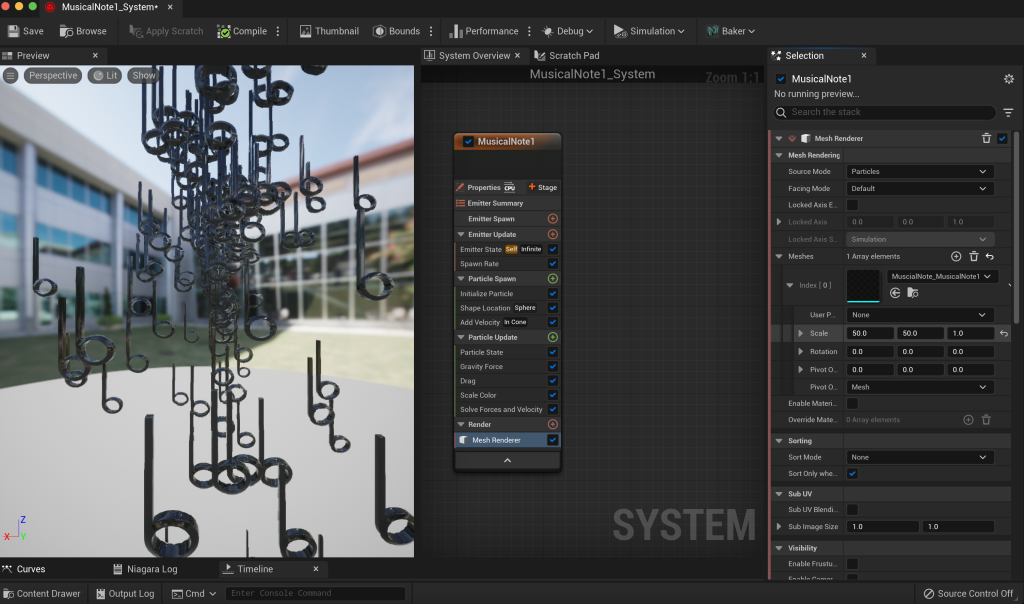
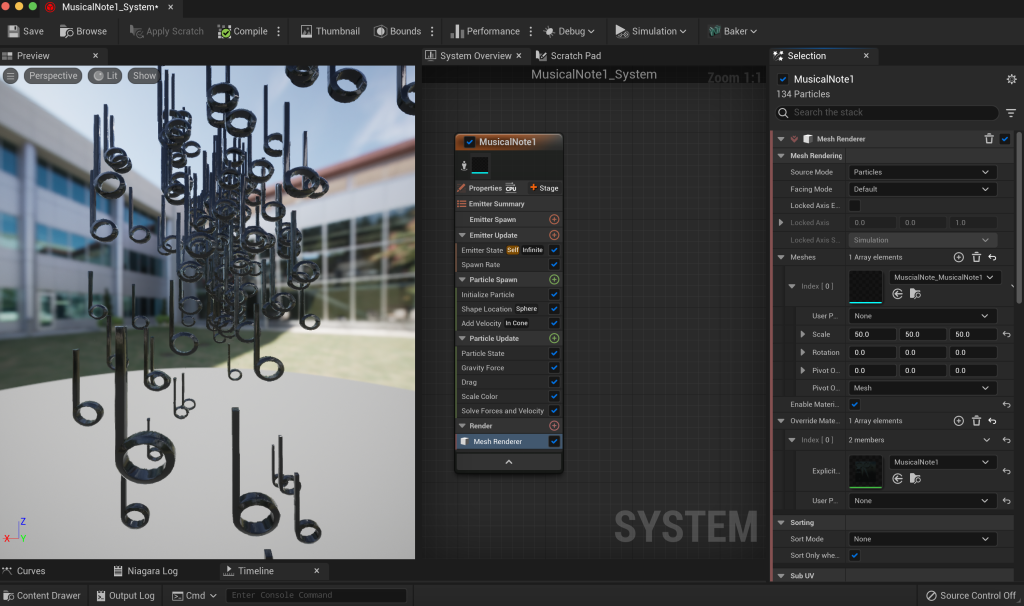
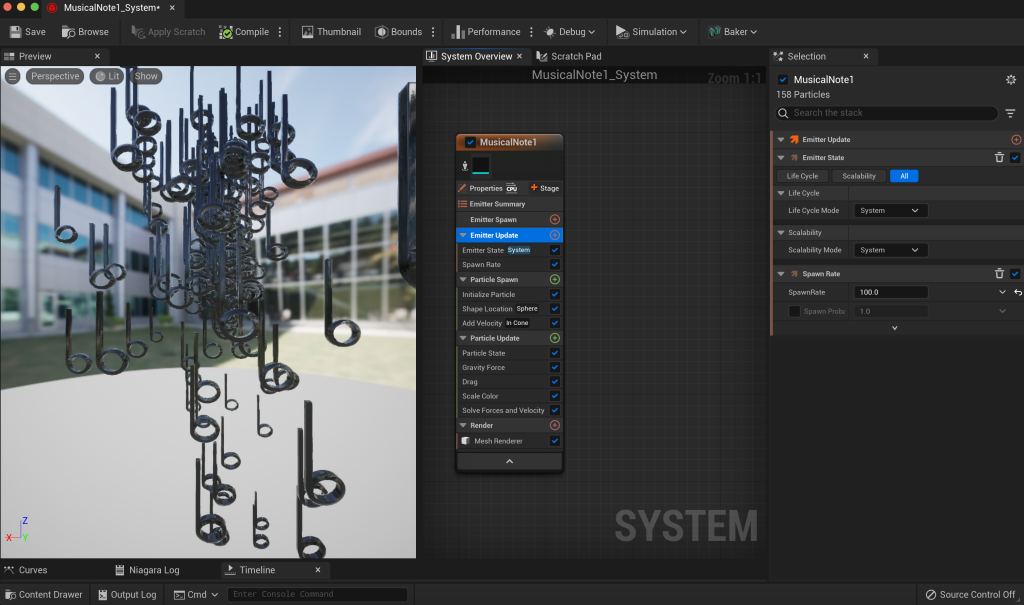
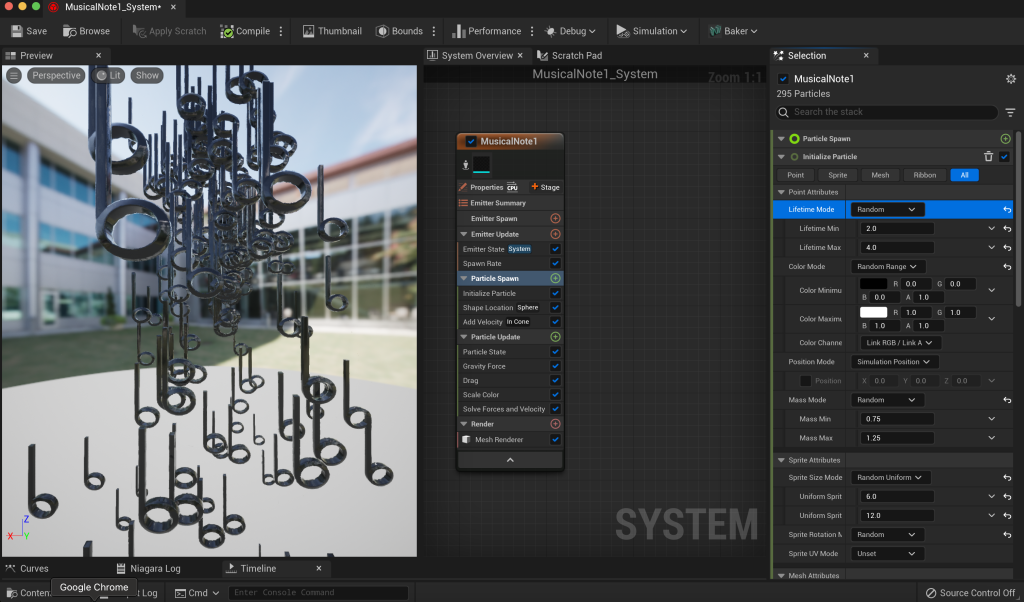
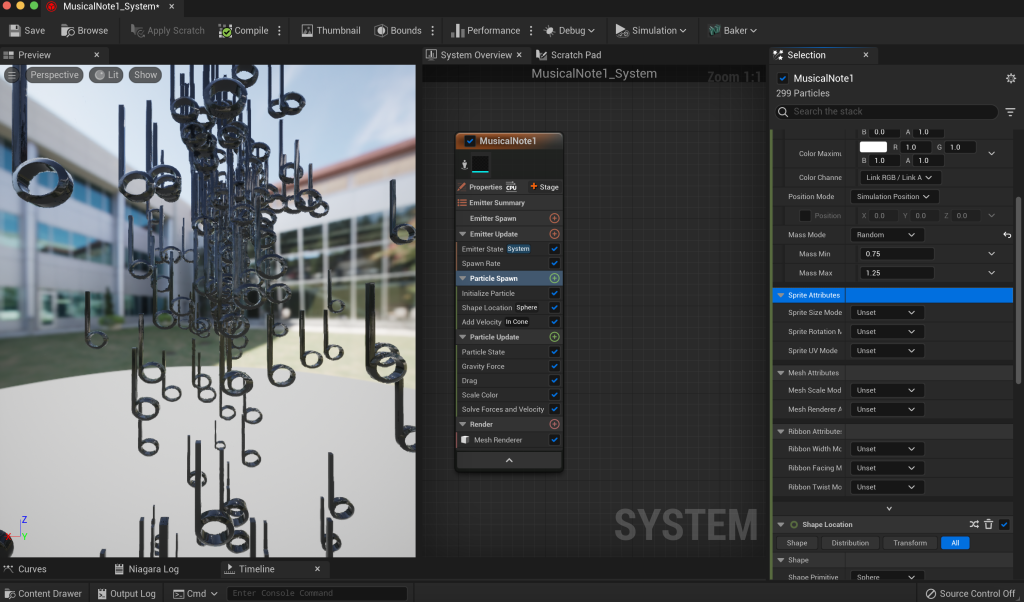

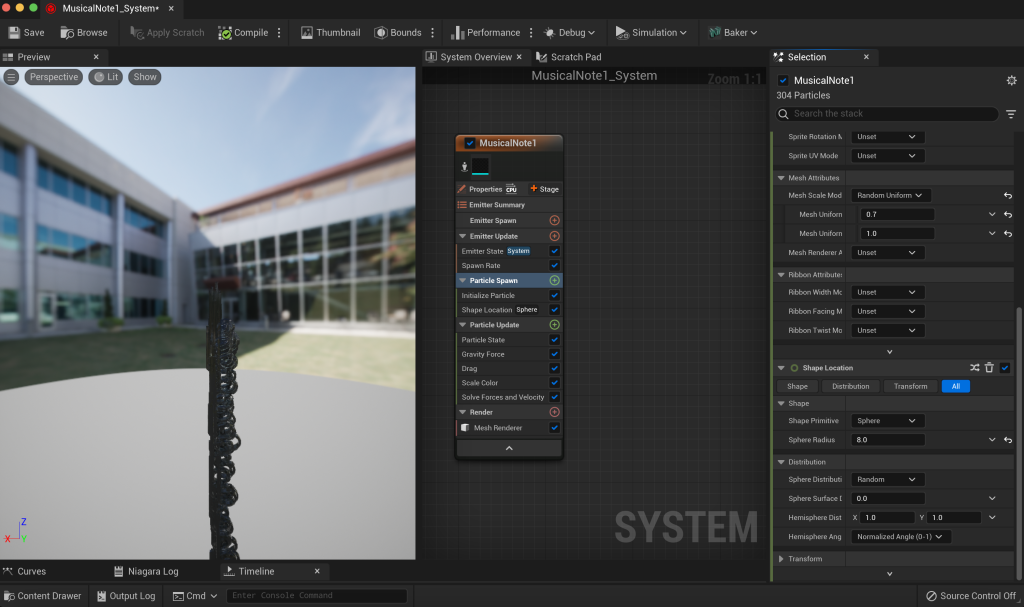
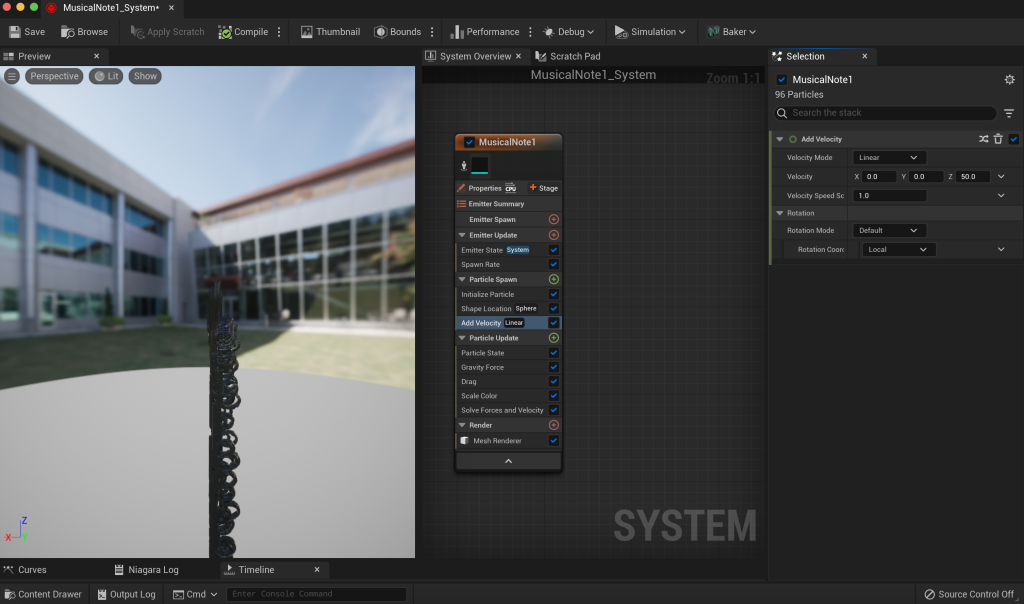
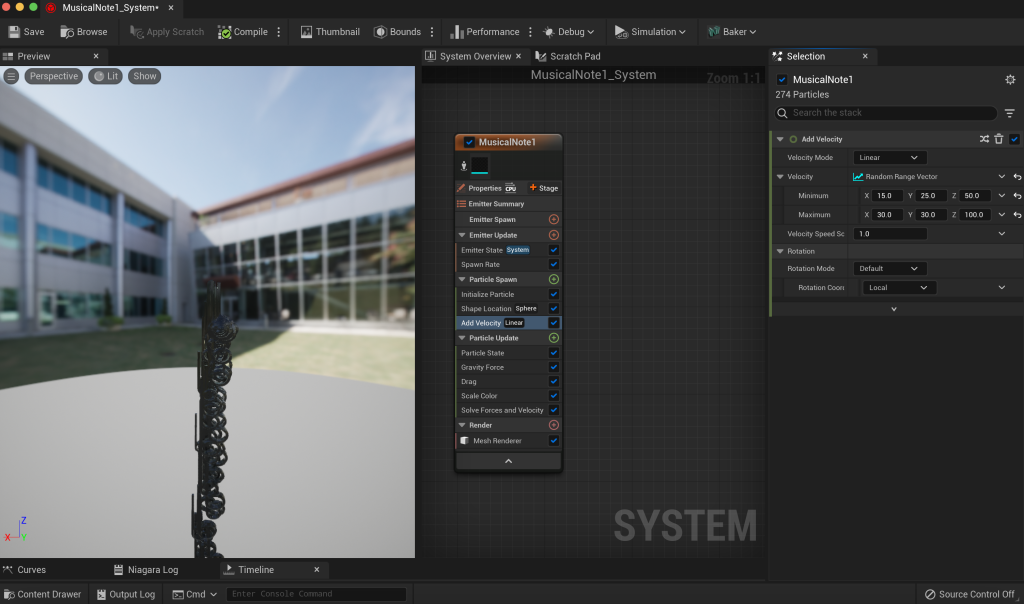
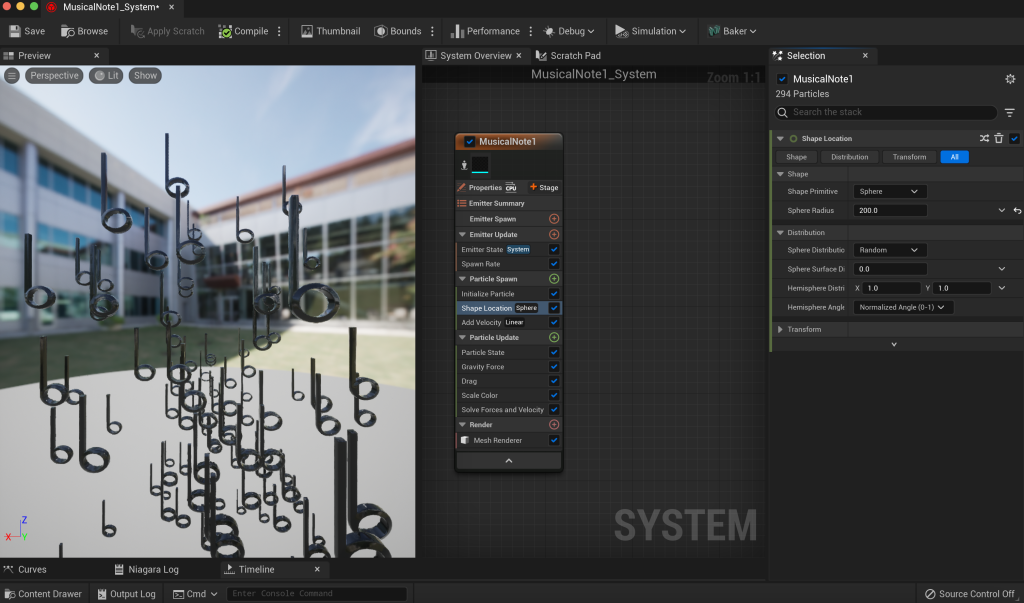


I went through a tutorial website by EpicGames on how to make a musical note niagara VFX system using the balloon effect. After making the musical note niagara, I duplicated another one and only replaced the mesh and material of one musical note type with another type via the Mesh Renderer selection.
My second final draft has arrived, but there is no audio but glitch…
References:
Models Used:
eggtoast (2017) Naked Dude [3D Model]. Available online: https://sketchfab.com/3d-models/naked-dude-ed2afedb9adf4674bec983e23c7ef453 [Accessed 31/7/2023].
Mohammed.Adnan (2019) Alien [3D Model]. Available online: https://sketchfab.com/3d-models/alien-44a97581578244e6b476d5030ca08ce7 [Accessed 31/7/2023].
Kylie Stockberger (2019) Radio/ CD Player [3D Model]. Available online: https://sketchfab.com/3d-models/radio-cd-player-7e12ac07201647debdada98877db130a [Accessed 31/7/2023].
Danyy59 (2020) Awkward Look Monkey [3D Model]. Available online: https://sketchfab.com/3d-models/awkward-look-monkey-f26639ba7b3e477aa7974d0160a38010 [Accessed 31/7/2023].
Kapi777 (2021) Gorilla+motions [3D Model]. Available online: https://sketchfab.com/3d-models/gorillamotions-b50cab2736c04d128f417f05008605fd [Accessed 31/7/2023].
lovelypineapple (2020) Gold banana [3D Model]. Available online: https://www.cgtrader.com/free-3d-models/architectural/decoration/gold-banana [Accessed 31/7/2023].
plaggy (2022) CC0 – Musical Note [3D Model]. Available online: https://sketchfab.com/3d-models/cc0-muscial-note-0b4a266e38a54abc9677149d87cd359f [Accessed 31/2/2024].
Images Used:
E.T (This is not a proper image reference)
Heroes Wiki (2023) E.T. Available Online: https://hero.fandom.com/wiki/E.T. [Accessed 31/7/2023].
Other Images (referenced properly)
Blhte (2023) MPS Donkey Kong Artwork [Photograph]. Available online: https://www.mariowiki.com/File:MPS_Donkey_Kong_Artwork.png [Accessed 31/7/2023].
YoshiDaisyfan1 (2013) Tiny Kong MSS art [Photograph]. Available online: https://www.mariowiki.com/File:Tiny_Kong_MSS_art.png [Accessed 31/7/2023].
L151 (2016) Lankyblast [Photograph]. Available online: https://www.mariowiki.com/File:Lankyblast.jpg [Accessed 31/7/2023].
Trig Jegman (2019) DiddyKong2 [Photograph]. Available online: https://www.mariowiki.com/File:DiddyKong2.png [Accessed 31/7/2023].
Metalex123 (2020) SSBU Chunky Kong Spirit [Photograph]. Available online: https://www.mariowiki.com/File:SSBU_Chunky_Kong_Spirit.png [Accessed 31/7/2023].
Audio Used:
Animatics only:
MarcusGraham325 (2019) Spaceship Door Opening.wav [Sound Effect]. Available online: https://freesound.org/people/MarcusGraham325/sounds/484046/ [Accessed 22/7/2023].
Rest:
PearceWilsonKing (2015) Space Atmosphere [Sound Effect]. Available online: https://freesound.org/people/PearceWilsonKing/sounds/274222/ [Accessed 31/7/2023].
zippi1 (2006) sound-alien3.wav [Sound Effect]. Available online: https://freesound.org/people/zippi1/sounds/18029/ [Accessed 31/7/2023].
CosmicD (2007) alien_screecn_1.wav [Sound Effect]. Available online: https://freesound.org/people/CosmicD/sounds/33492/ [Accessed 31/7/2023].
ryanconway (2015) Alien – You are not alone [Sound Effect]. Available online: https://freesound.org/people/ryanconway/sounds/265359/ [Accessed 31/7/2023].
PureDesignGirl (2020) Dramatic Music [Sound Effect]. Available online: https://freesound.org/people/PureDesignGirl/sounds/538828/ [Accessed 31/7/2023].
TeamMasaka (2013) Iwan Gabovitch – Monkey [Sound Effect]. Available online: https://freesound.org/people/TeamMasaka/sounds/197422/ [Accessed 31/7/2023].
TeamMasaka (2013) Sebastian Denzer – Monkey [Sound Effect]. Available online: https://freesound.org/people/TeamMasaka/sounds/197424/ [Accessed 31/7/2023].
TeamMasaka (2013) Robin – Monkey [Sound Effect]. Available online: https://freesound.org/people/TeamMasaka/sounds/197427/ [Accessed 31/7/2023].
Cheesycat312 (2022) Basic hithat [Sound Effect]. Available online: https://freesound.org/people/Cheesycat312/sounds/650562/ [Accessed 31/7/2023].
zatar (2016) CaveGorilla.wav [Sound Effect]. Available online: https://freesound.org/people/zatar/sounds/370369/ [Accessed 31/7/2023].
sonically_sound (2022) Shiny Object [Sound Effect]. Available online: https://freesound.org/people/sonically_sound/sounds/625716/ [Accessed 31/7/2023].
Robinhood76 (2019) 07579 heaven voices intro.wav [Sound Effect]. Available online: https://freesound.org/people/Robinhood76/sounds/467441/ [Accessed 31/7/2023].
Tutorials Watched or Visited to learn:
ublik-om (2017) Animatics in After Effects [Tutorial] [Video]. Available online: https://www.youtube.com/watch?v=e9zGQ8XKMuM [Accessed 4/1/2023].
School of Motion (2022) How to Render in (or Export from) After Effects CC 2023 – 3 Easy Ways [Video]. Available online: https://www.youtube.com/watch?v=qDIJwhOU4Rc [Accessed 4/1/2023].
(2024) Mesh Balloons Epic Games. Available online: https://dev.epicgames.com/documentation/en-us/unreal-engine/how-to-use-a-solid-mesh-to-create-a-balloon-effect-in-niagara-for-unreal-engine [Accessed 28/7/2024].
Gorka Games (2022) How to Create an Opening Cinematic in Unreal Engine 5 [Video]. Available online: https://www.youtube.com/watch?v=-b9FO8iQYSY [Accessed 20/7/2023].
Aziel Arts (2022) Simple Exporting With the Movie Render Queue – Unreal Engine 5 [Video]. Available online: https://www.youtube.com/watch?v=9wKHGXZFA78 [Accessed 29/7/2024].
Cristi Cotovan (2020) Import image sequence into Adobe Premiere as a clip | Premiere Pro Tutorial [Video]. Available online: https://www.youtube.com/watch?v=zp7NI72ZdBQ [Accessed 29/7/2024].